Microsoft released Windows 11, a brand new operating system, to the public on June 24, 2021. It brings brand new UI design, features, and improvements. Soon afterward, the first version of the Windows 11 preview build came. Nowadays, multiple build versions are available for Windows Insider users to install.
Advantages – Install Windows 11 on SSD
With the release of Windows 11, you may want to experience this new OS. But compared to installing Windows on a traditional hard drive, it is a good option to install Windows 11 on a new SSD. The main reasons for this include:
- An SSD has a faster speed. It can greatly improve the system boot speed, shortening the time to seconds from a few minutes.
- Also, an SSD can let the whole system faster by speeding up the system when it is running.
Well then, do you have an idea of how to install Windows 11 on a new SSD? It is time-consuming and laborious but if you follow these two methods below, things will become easy.
Preparation: Get a New SSD Ready for Windows 11
Since Windows 11 has strict system requirements, to make sure that the PC has a great performance, it is necessary to choose a proper SSD as the system drive. Just get a new SSD ready for Windows 11 by following the tips here.
Get an Appropriate SSD
There are multiple SSD types, including SATA SSD, PCIe SSD, M.2 SSD, NVME SSD, etc. To know more, refer to this post – Different Types of SSD: Which One Is More Suitable for You.
Related articles:
- Here Are Some Guides for You to Buy Right Solid State Drives
- How to Pick an SSD of the Right Form Factor for Your Device
To install Windows 11 on a new SSD for better performance, you should first buy a proper one. For a fast and endurable computer, an M.2 SSD is ideal for Windows 11. Of course, you can install an SSD in other form factors based on your computer.
Besides, make sure the SSD has a big storage space to store the new system and some files.
Set up SSD
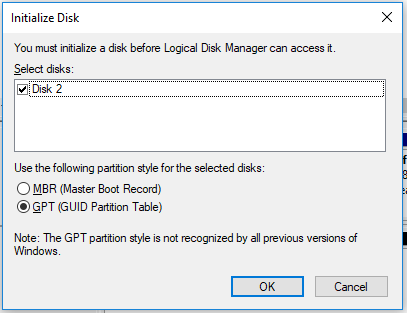
As for Windows 11 system requirements, the new system requires the Secure Boot mode that is only available on a GPT disk. Thus, to make sure of a successful installation of Windows 11 on an SSD, initialize the SSD to GPT.
Just connect your SSD to your computer, then launch Disk Management and right-click on the SSD to choose Initialize Disk. Then, set the partition style to GPT.
After finishing the preparatory work, now it’s time to start Windows 11 installation on an SSD.
How to Install Windows 11 on M.2 SSD or Other SSD?
Method 1: Migrate Windows 11 to SSD
If you haven’t already installed Windows 11, you can upgrade to this new operating system from Windows 10. Currently, Windows 11 is in the test phase.
You can go to Windows Updates and check for updates. Then, download and install Windows 11 on your PC.
After installing Windows 11, now you can transfer the new operating system to your SSD. To achieve this aim, you need the help of professional cloning software. Here, MiniTool ShadowMaker can be your good assistant.
Use MiniTool ShadowMaker to Clone Windows 11 to SSD
At the first sight, you find MiniTool ShadowMaker is a computer backup software since it can back up files, folders, disks, partitions, and systems. It can be a file sync software since it supports file & folder sync. Besides, it can be a powerful disk cloning software. With its Clone Disk feature, you can easily clone a disk to another hard drive.
To install Windows 11 on SSD, you can use it to clone the entire system disk to your SSD and then boot the PC from the target disk. During the cloning process, everything including Windows 11 system files, settings, registries, your files, documents, and other data is transferred to the SSD.
Importantly, this software is free to you. Now, get it to have a try by clicking the following download button. Then, install it on your Windows 11 PC.
MiniTool ShadowMaker TrialClick to Download100%Clean & Safe
Step 1: Run MiniTool ShadowMaker in Windows 11.
Step 2: Under the Tools tab, choose Clone Disk to continue.
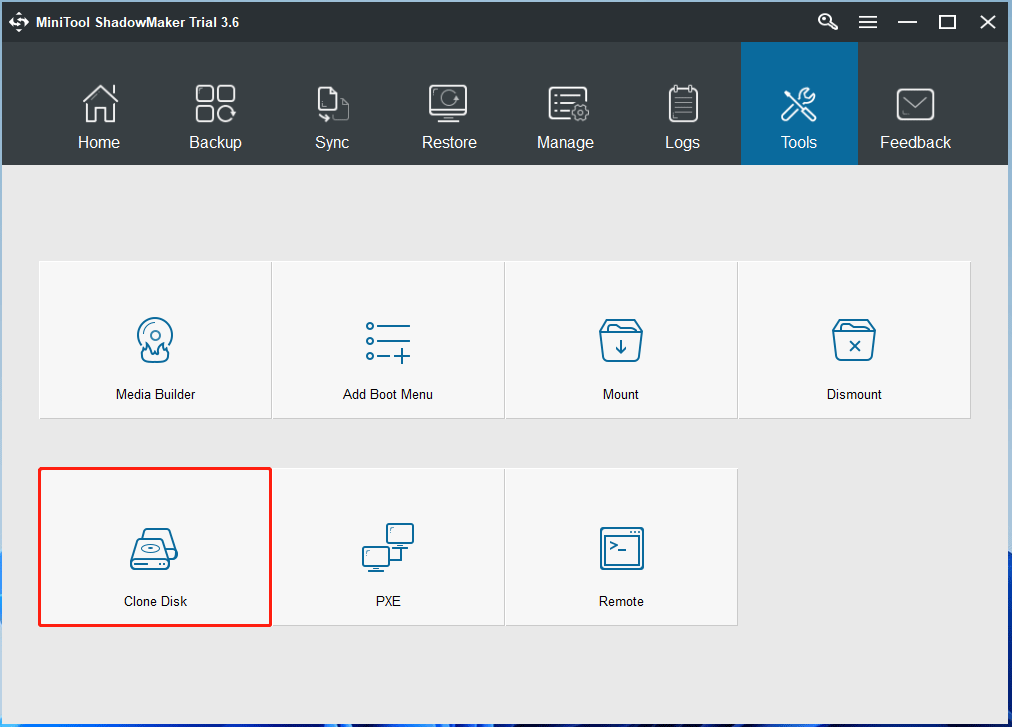
Step 3: Click the Source section and select the system disk as the source disk from the combo box in the pop-up window. Also, click Destination and choose the SSD as the target disk.
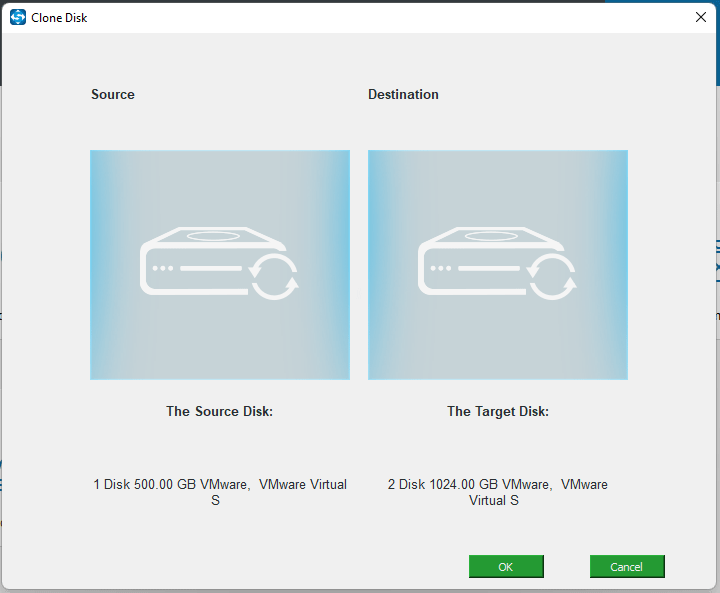
Step 4: Click OK and you will get a message that says the cloning process can destroy the content on the target disk. Click Yes to continue. Then, MiniTool ShadowMaker starts cloning Windows 11 disk to your SSD.
Step 5: After a few minutes, disk cloning finishes.
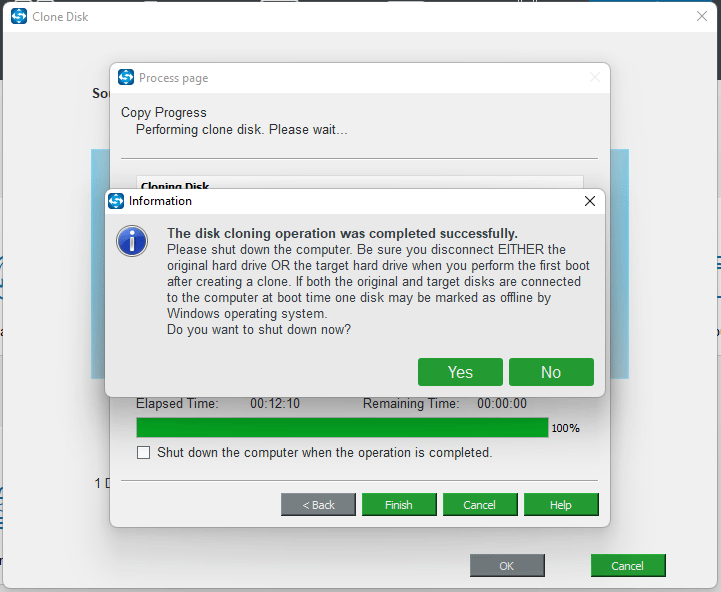
After finishing the disk cloning, it is better to convert the SSD to GPT with MiniTool Partition Wizard although you have initialized the disk to GPT. This is because GPT turns MBR after the cloning process.
Next, you can remove the original system disk from your computer and then put the SSD in the original place. Then, you can boot Windows 11 from an SSD at a fast speed.
Use MiniTool Partition Wizard to Clone Windows 11 to SSD
In addition to MiniTool ShadowMaker, you can use another PC cloning software to migrate Windows 11 to SSD. It is MiniTool Partition Wizard. This software offers two options to you
- Migrate OS to SSD/HD: Only transfer Windows 11 to an SSD or clone the entire system disk to an SSD.
- Copy Disk:Clone the entire disk to an SSD
These two features are helpful for you. If you only want to migrate Windows 11 to SSD, use the first feature and select the proper migration mode. To deal with the system disk, a paid edition of MiniTool Partition Wizard is required.
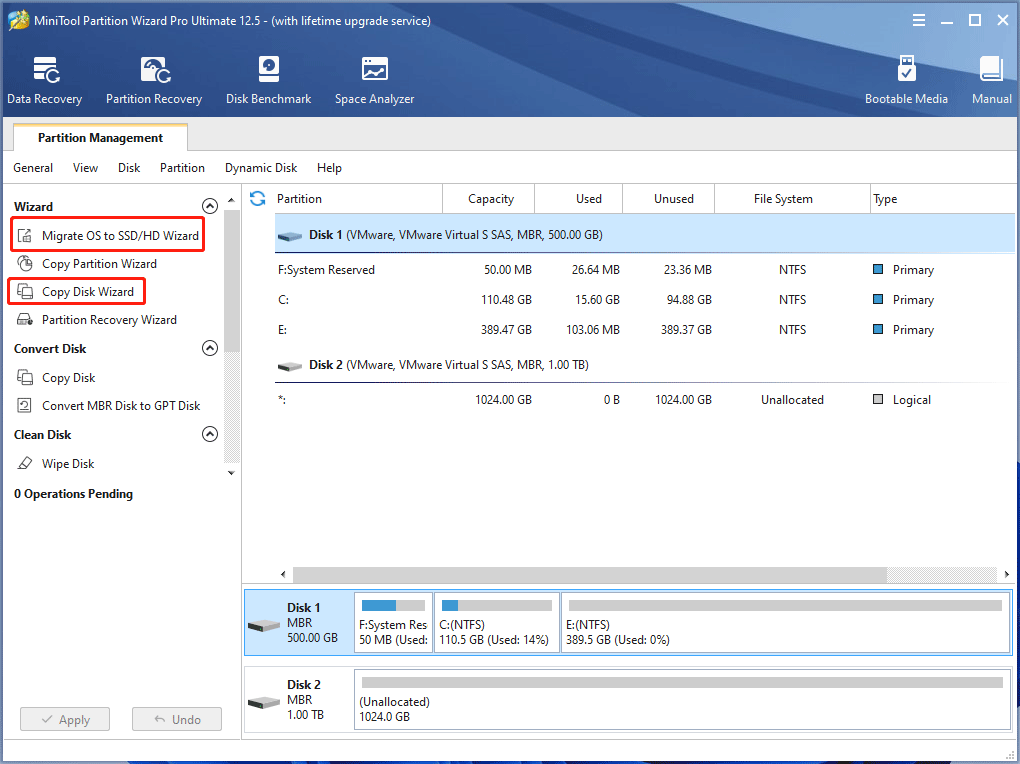
If you initialize the SSD to GPT in advance, after cloning, you won’t need to convert the disk to GPT again. You can also remove the original disk and put the SSD in the original place.
Related article: How to Install an M.2 SSD on Windows PC
If you want to keep both of these two disks on your computer, you need to take measures to make this SSD bootable.
How to Make NVMe/SATA/M.2 SSD Bootable after Windows 11 Installation
- First, restart your computer, press a specific key to load the PC to BIOS.
- Under the boot menu, set the SSD as the boot drive in BIOS.
- Save the change and reboot the PC again to Windows 11.
Method 2: Install Windows 11 on SSD from USB
This is the direct way to install Windows 11 on an SSD. There are two main situations:
- If you are running Windows on an HDD, you can directly install Windows 11 on a new SSD from a USB drive. After installation, boot the PC from the SSD and keep the original HDD as a data disk.
- Or you have an SSD on your PC and installed Windows on your PC’s SSD, and you want to reinstall Windows 11 due to some reason, this way is also available. Note that you had better back up your important files before the installation with the professional backup software – MiniTool ShadowMaker.
How to install Windows 11 on a new SSD from a USB drive? Follow these steps below.
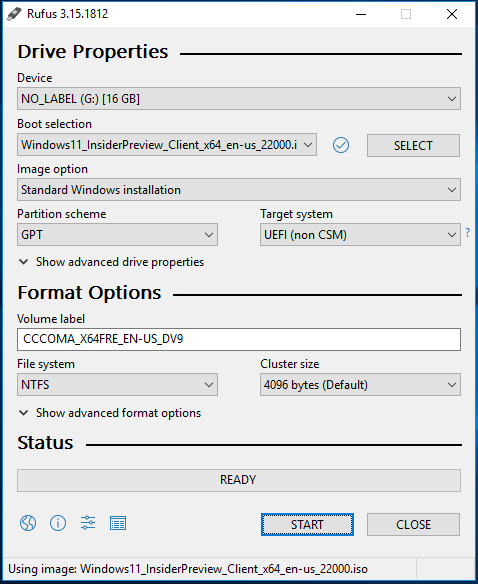
# 1. Create a Windows 11 Bootable USB Drive
Step 1: Prepare a USB flash drive that has up to 8GB or bigger space.
Step 2: Go to download an ISO file from the Microsoft page.
Step 3: Run Rufus to burn the Windows 11 ISO file to your USB flash drive.
#2. Install Windows 11 on SSD
Step 1: Restart your computer and press a specific key (Del, F2, F10, etc.) to enter BIOS.
Step 2: Change the boot sequence in BIOS – set the PC to boot from the USB drive.
Step 3: Configure your keyboard, language, time, and currency format.
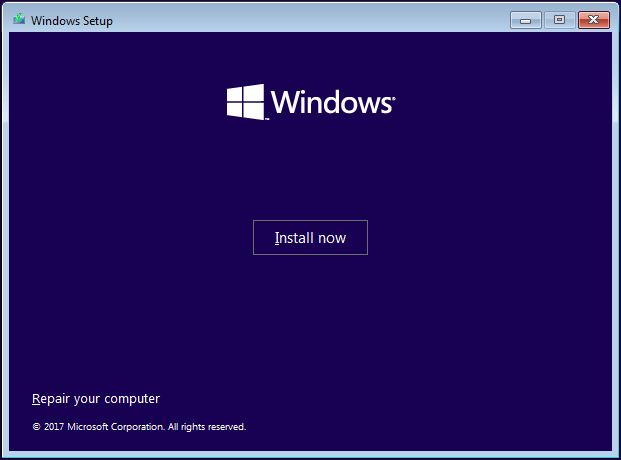
Step 4: Click the Install now button to continue.
Step 5: Windows setup will ask you to enter a license key. Just click I don’t have a product key.
Step 6 (Optional): You are asked to choose an edition of Windows 11 and then accept the license terms.
Step 7: Choose Custom: Install Windows only (advanced).
Step 8: Choose a location to install Windows 11 to.
Case 1: To install Windows 11 on a new SSD, you can see Drive 0 Unallocated Space. Click Next to start the installation.
Case 2: To reinstall Windows 11 on your original SSD, you can see Drive 0 Partition 1, Drive 0 Partition 2, etc. Choose the partition where the original system is saved and click Delete. Then, click Next to start the installation process.
This will take some time. After installing Windows 11 on your SSD, set up the new operating system based on your likes.
Bottom Line
On this page, we offer you a full guide to install Windows 11 on SSD – get an SSD ready and install Windows 11 on it. If you want to get a fast boot speed with Windows 11, try one method mentioned above.
Cloning is strongly recommended since everything including all your data, system files, settings, etc. is moved to the SSD, without reinstalling Windows operating system.
If you run into any questions when using MiniTool Software, or have any suggestions on how to install Windows 11 on external hard drive or SSD, leave your idea in the comment below or contact our support team via [email protected].
