If you receive an error message saying “operation did not complete successfully” but you do not know how to deal with this error, you can read this post on the MiniTool website. It will show you how to fix operation did not complete successfully with multiple useful solutions.
Error Message: Operation Did Not Complete Successfully
Sometimes you may receive an error message saying “Operation did not complete successfully because the file contains a virus”. Why is this happening?
There are many antivirus tools available to you online, but none can completely stop the virus for you. There will always be malicious tools that go unnoticed and even the most expensive & popular antivirus tools can’t detect these malicious tools.
Every coin has two sides. Even if your files are 100% legal, your antivirus tools may keep coming up with false positives. However, if you want to judge whether a file is genuine or not, the process can be delicate. You need to pay close attention if you try to deal with these files.
Before you confirm the file is a false positive, you need to scan the file with several different antivirus scanners. The error code that sometimes occurs underneath the message shown up in the title is actually triggered by Windows.
If you want to learn how to deal with this error, just follow the methods presented below.
Method 1: Fix the Issue by Disabling Windows Defender Temporarily
If the settings of Windows Defender are set to full protection, Windows Defender can produce some false positives, so it’s normal for you to encounter a simple mistake like this.
When the problem involves Windows and Windows Defender, there is no effective way to actually run the reported file, and the only way is to disable Windows Defender completely.
Step 1: Type windows defender in the search bar and click Windows Defender Security Center to open it.
Step 2: Click Virus & threat protection to open it and click Virus & threat protection settings.
Step 3: Under the Real-time protection section and the Cloud-delivered protection part, switch the toggle to Off.
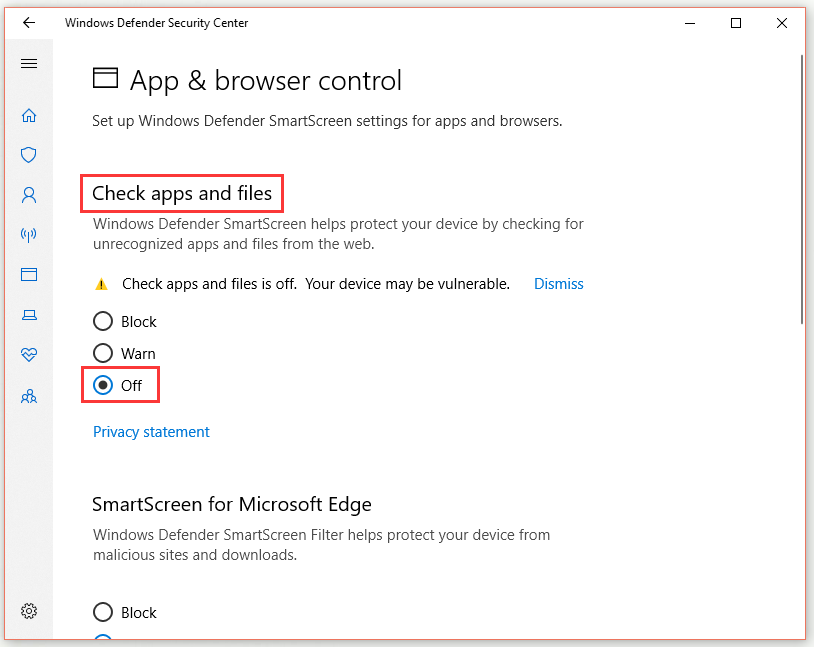
Step 4: Click App & browser control from the left panel, check Off under the Check apps and files part. You can also turn off SmartScreen if you think it will disturb your actions during which you wish to proceed.
Check if the “operation did not complete successfully” error still persists.
Method 2: Fix the Issue by Adding an Exception for the Folder
If you are using several other antivirus tools besides Windows Defender, you need to know turning off one security tool causes the other to start acting. Fortunately, in order to fix this issue, you can simply try adding an exception for the file you want to run.
If the file is on a removable storage device, make sure the device is connected to the PC before opening your antivirus screen.
Follow the steps below to do this work.
Step 1: Double-click the icon of your antivirus on the Desktop to open its user interface. Alternatively, you can double-click the icon of your antivirus in the bottom right part of the taskbar.
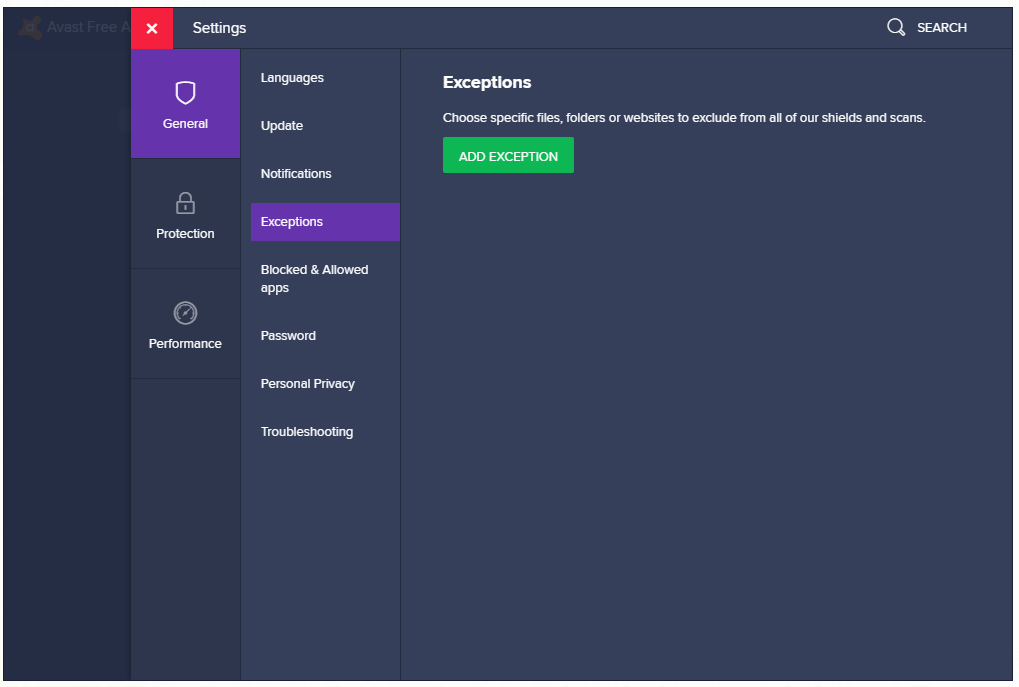
Step 2: Find the Exception setting and add an Exception for the folder where the file is located.
The Exception setting is located in different locations depending on the antivirus tool. It’s usually easy to find, and here are some locations on the most popular antivirus tools:
Avast: Home > Settings > General > Exceptions.
AVG: Home > Settings > Components > Web Shield > Exceptions.
Kaspersky Internet Security: Home > Settings > Additional > Threats and Exclusions > Exclusions > Specify Trusted Applications > Add.
In each case, be sure to select the correct folder location. Meanwhile, you can’t click on the file directly because you actually need to select the folder rather than the file which you want to add to the exceptions.
Method 3: Use Command Prompt to Fix the Problem with Windows Explorer
This may sound strange, but sometimes even the Windows explorer process is flagged as potential malware, which will prevent you from using your computer properly. Meanwhile, you will receive the “Operation did not complete successfully because the file contains a virus” error message.
Explorer.exe is a genuine Windows process, so you are not able to fix the issue by turning off antivirus or by adding explorer.exe to exceptions. There’s an easier way for you to fix the problem associated with Windows Explorer.
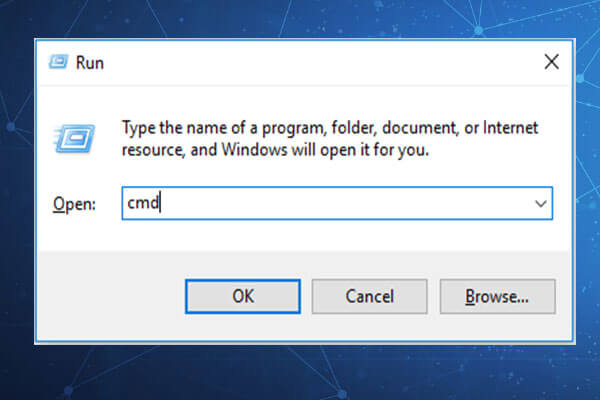
Step 1: Type cmd in the search bar, right-click it and select Run as administrator to open Command Prompt with administrator privileges.
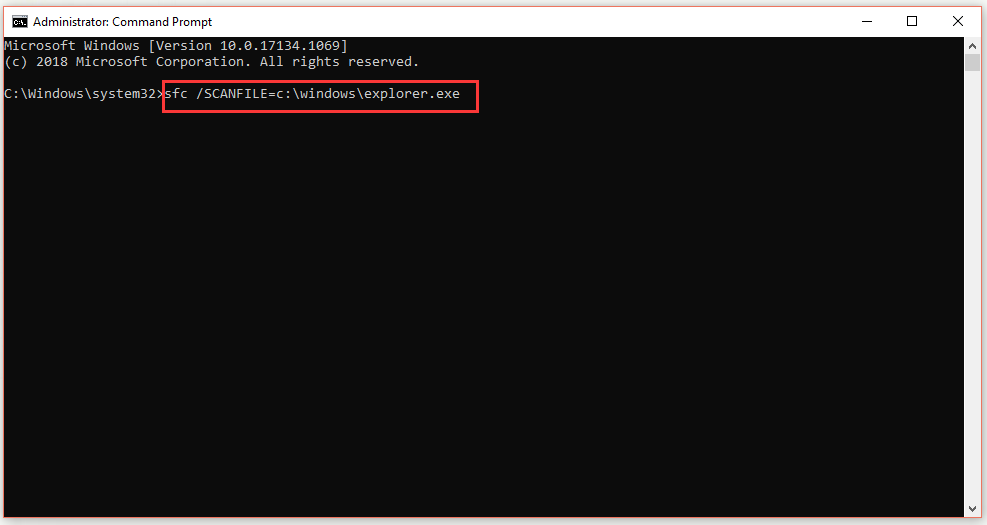
Step 2: Input the command: sfc /SCANFILE=c:\windows\explorer.exe and then press Enter to perform this command.
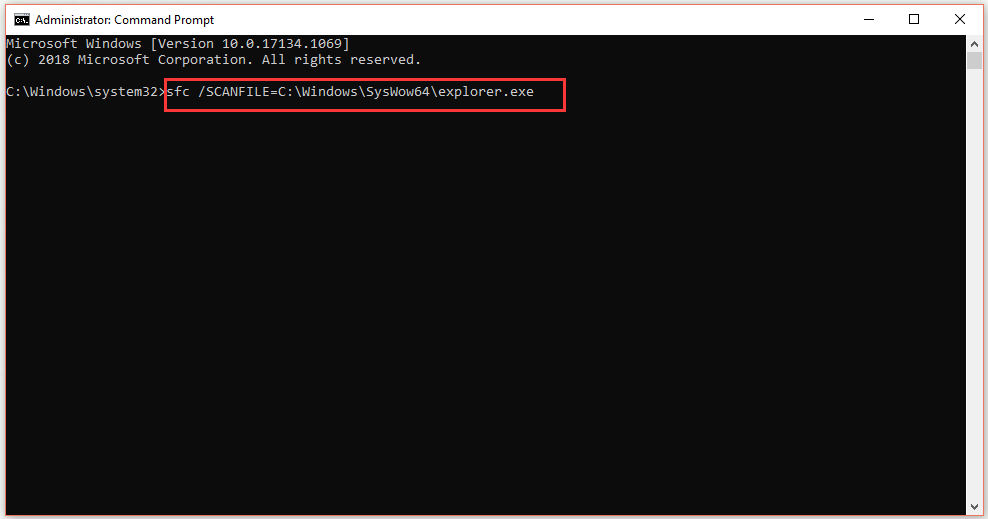
Step 3: Input the command: sfc /SCANFILE=C:\Windows\SysWow64\explorer.exe and then press Enter to perform this command.
Step 4: If all goes well, you should receive a message like this: Windows Resource Protection found corrupt files and successfully repaired them.
Step 5: Even if this message does not show up, your issue may still be fixed. Thus, you need to reboot your computer later and check if the “operation did not complete successfully” problem still exists.
Method 4: Use Control Panel to Fix the Problem with Windows Backup
This error can also occur when you are running Windows Backup. The “Operation did not complete successfully” error message will show up when Windows Backup encounters the problematic file.
If you have tried the methods above and scanned your computer multiple times, and you’re pretty sure your computer isn’t infected, the false positive could be caused by temporary Internet and cached files.
Before you try to run Windows Backup again, you need to delete these files on all browsers you have used. Right now, you can follow the steps below to clear browsing data for both Internet Explorer and Edge.
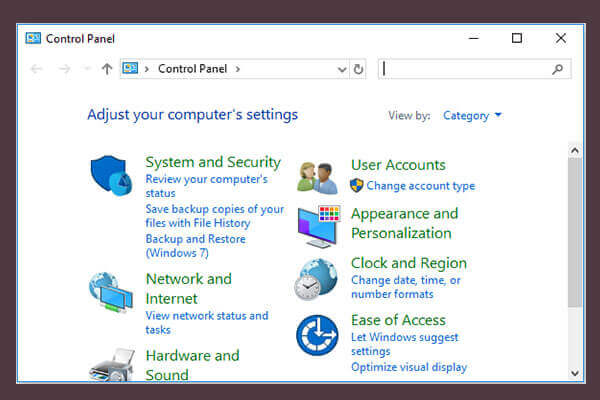
Step 1: Type control panel in the search bar and click Control Panel to open it.
Step 2: Choose View by: Large icons and then click Internet Options. The Internet Properties window will pop up.
Step 3: Under the General section and then find the Browsing history part. Click the Delete… button and check the browsing history you want to delete.
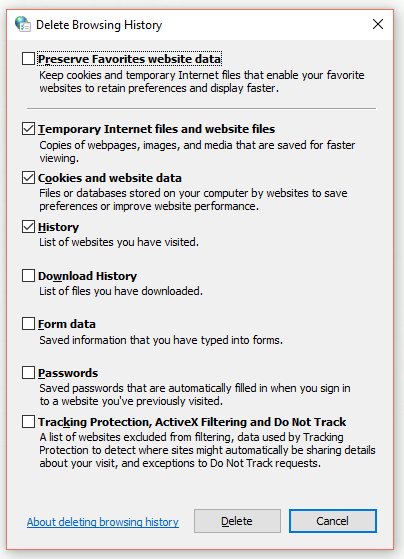
Step 4: Click Delete and then exit Control Panel.
Step 5: Restart your computer and check if the “Operation did not complete successfully” error message still appears.
Step 6: Click your Edge browser icon at the taskbar or search for it in the Start menu to open it
Step 7: Click the three horizontal dots at the top right part of the browser and then click Settings.
Step 8: Under the Clear browsing data section, click the Choose what to clear button.
Step 9: Keep the first four options checked and then click the Clear button to clear data.
After you finish all the steps above, the “Operation did not complete successfully because the file contains a virus” error message will not pop up again.
Protect Your Computer by Making a Backup with MiniTool ShadowMaker
If your computer is really attacked by a virus, you will lose your data and your computer may crash. What can you do ahead of time to avoid these things?
The best choice for you is to make a backup of your data to keep your data safe. Although there are many backup programs available online, MiniTool ShadowMaker is the most recommended. It is a piece of free backup software.
By using its Backup function, you can back up files, folders, partitions, operating systems, disks to protect your computer and then you can restore your computer with the Restore function if your computer is in trouble.
Its Sync feature is as useful as the Backup function. With it, you can sync files and folders ahead of time to protect your data.
You can also try its Clone Disk function which is significant for hard drive upgrade. With it, you are allowed to clone a whole disk to protect your computer. If you clone a disk, you can directly use it after you finish the operation, which is quite simple and easy.
Right now, you can click the following button to free get the MiniTool ShadowMaker Trial Edition to make a backup of your computer.
MiniTool ShadowMaker TrialClick to Download100%Clean & Safe
If you want to know how to make a backup with the Backup function of MiniTool ShadowMaker, keep reading to get the instructions.
Step 1: Choose the Backup Source
1.After installation, open MiniTool ShadowMaker.
2.Click Connect in the Local section to get its main interface. You are also allowed to click Connect in the Remote section, but you need to type the IP of another computer in the same LAN.
3.Click the Backup option to enter its interface.
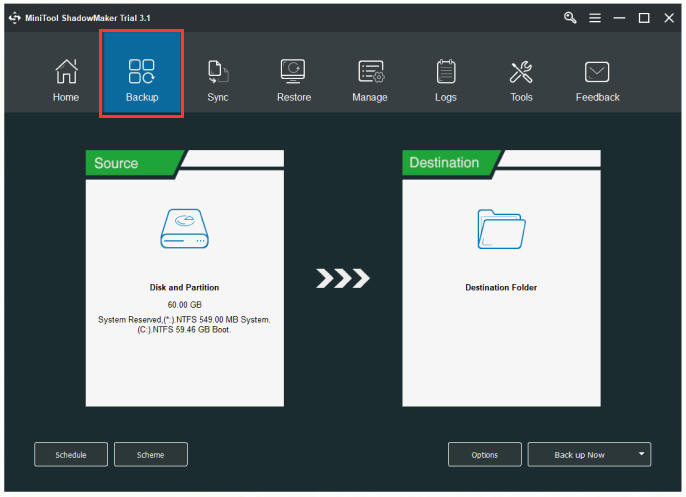
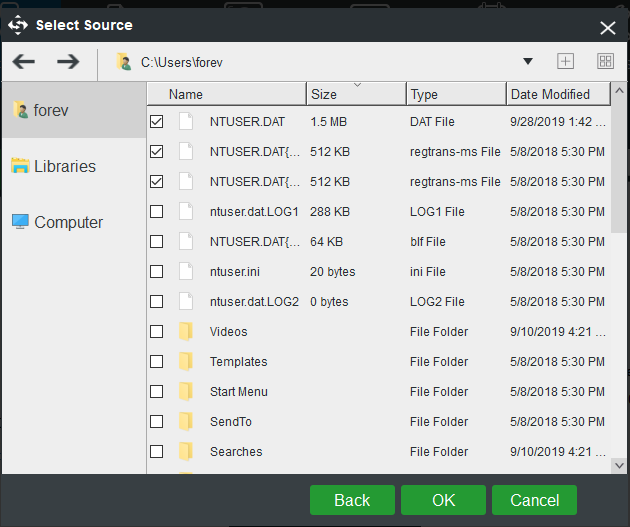
4.Click the Source tab, click Folder and Files from the pop-up window and then choose the files you want to back up. You can also choose another source type: Disk and Partitions if you want to back up your disks or partitions.
Step 2: Select a Destination to Save Your Backup Files
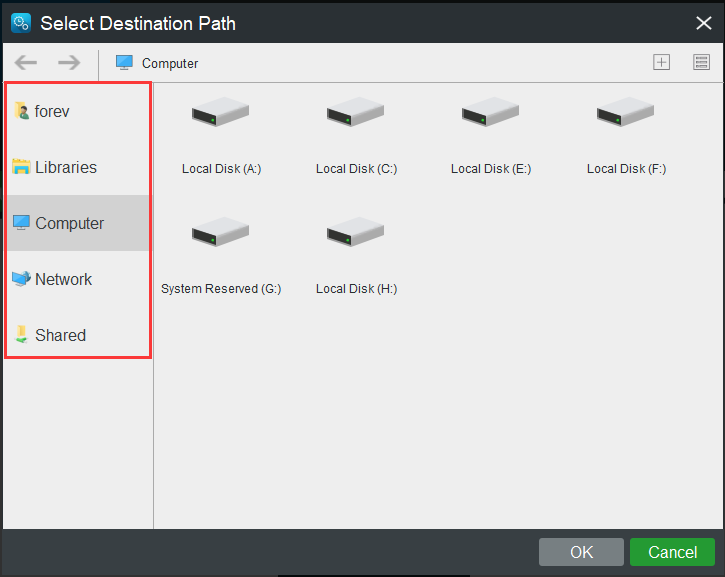
1.When you return to the Backup page, click the Destination tab.
2.Choose a destination available to save your backup files. Click OK to back to the main interface. There are 5 available destination paths for you. They are Administrator, Libraries, Computer, Network, and Shared. You need to choose a suitable destination.
Step 3: Apply the Backup Operation
1.Click Back up Now in the main interface to start backing up your data. You can also choose the Back up Later option. Then you need to click Back up Now on the Manage page to perform the pending operation.
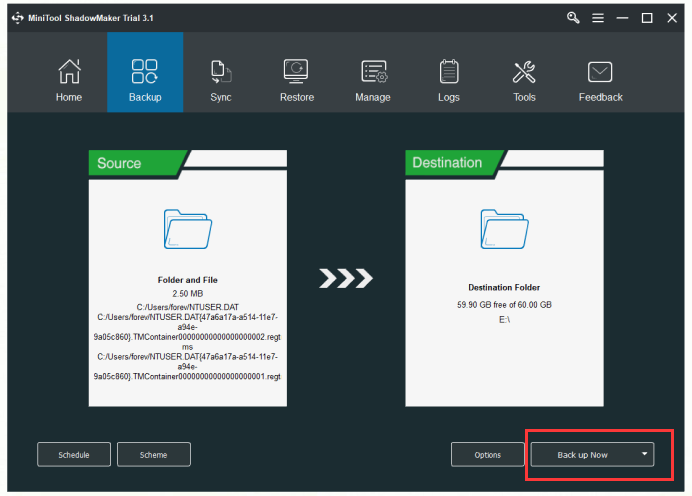
2.You will receive a confirmation message. If you are sure to do the backup operation now and click Yes. Meanwhile, you can also choose whether to check the option: Shut down the computer when all the running backup tasks are finished or not.
When you finish all the steps above, you can successfully make a backup of your data.
Conclusion
To sum up, this post has shown you several methods to fix the “operation did not complete successfully” issue. In addition, it also recommends a piece of free backup software – MiniTool ShadowMaker. If you want to back up your data ahead of time in case you lose data because of a virus attack, it is recommended that you use it to do this job.
MiniTool ShadowMaker TrialClick to Download100%Clean & Safe
If you encounter problems when you are using our program, please contact us via the email [email protected].
![[Solution] How to Disable Windows Defender Antivirus on Win 10](https://mt-test.minitool.com/images/uploads/2019/04/disable-windows-defender-win10-thumbnail.jpg)
![[SOLVED] Windows Defender Not Turning on in Windows 11/10/8/7](https://mt-test.minitool.com/images/uploads/2018/12/windows-defender-not-turning-on-thumbnail.jpg)
