On the market, there are various disk imaging and cloning programs and you may have heard of Rescuezilla and Clonezilla. To learn more information about Rescuezilla vs Clonezilla, read through the comprehensive guide from MiniTool. Aside from that, you will discover a free alternative to these two software here.
In the computing age, you may pay much attention to two things including computer backup and disk cloning.
The former refers to backing up your files, folders, the operating system, or the entire hard drive to an external hard drive or another location to avoid losing vital data or restore the crashed system to an earlier state. The latter involves cloning a hard drive to another drive for more disk space or cloning an HDD to an SSD for optimal performance.
To back up your PC and run disk cloning, many of you use Rescuezilla and Clonezilla. Today, we will walk you through much information on Rescuezilla vs Clonezilla in a pro guide, making it easy to know which one to use for disk imaging backup and disk cloning.
About Rescuezilla and How to Use
Rescuezilla is a free open-source disk imaging software, used for creating a backup for the hard drive on a computer and restoring your disk image in the event of PC not booting due to crashes, a hard drive failure, Windows update issues, and more. Within a few minutes, Windows settings, registry, and all the documents will be restored to the same normal state they were when the image was taken.
By making images and saving them to a network or a hard drive connected directly to the machine, your PC is protected well.
The program not only supports disk imaging backup but also disk cloning. Even you can run Rescuezilla to clone to a smaller disk. Importantly, Rescuezilla works well in Windows, macOS, and Linux as it requires you to boot it using a bootable USB drive.
How to use Rescuezilla to clone a disk or back up the computer?
Step 1: Download Rescuezilla ISO from its official website.
Step 2: Download & open Rufus, connect a USB flash drive to your PC, choose that ISO, and burn it to that drive to get a bootable USB drive.
Step 3: Restart the machine from that drive and enter the Rescuezilla interface.
Step 4: In the enhanced Graphic User Interface (GUI), you will discover multiple options, for example, Backup, Restore, Clone, etc. Just hit Backup for disk imaging backup while Clone for disk cloning.
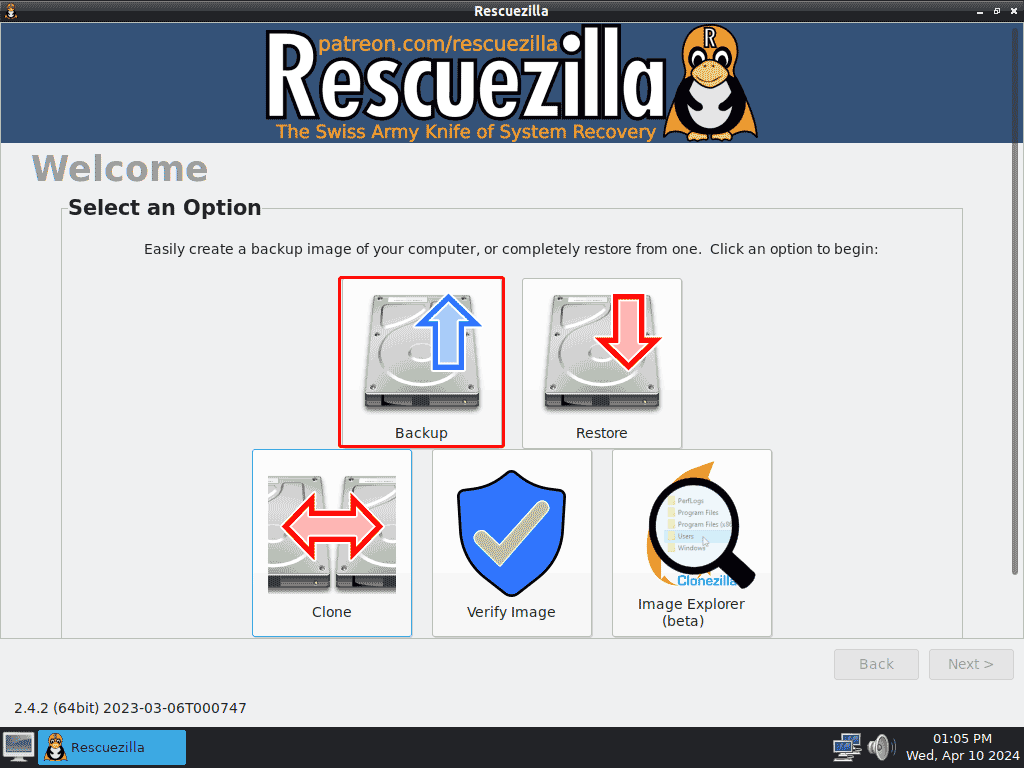
Step 5: Complete your backup or clone task according to the pop-up prompts.
About Clonezilla & How to Use
Like Rescuezilla, Clonezilla offers you disk imaging and disk cloning solutions. The open-source software is compatible with Windows, Linux, and macOS. With it, you can implement bare metal backup and recovery, system deployment, disk imaging backup creation, disk cloning, etc.
Clonezilla has three various versions: Clonezilla live is used for single machine backup, recovery, and cloning while Clonezilla lite server and Clonezilla SE (server edition) work best for massive deployment and cloning simultaneously.
To use Clonezilla on your PC, take these steps:
Step 1: Download Clonezilla ISO and burn it to your USB flash drive using Rufus.
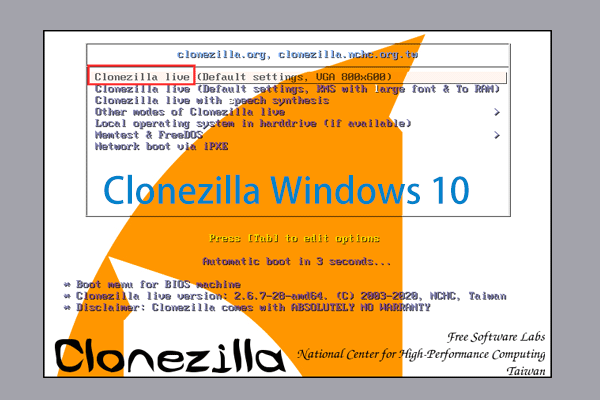
Step 2: Restart your machine from the created USB drive and choose Clonezilla live in the main interface of Clonezilla.
Step 3: Configure a language and keyboard, then start Clonezilla.
Step 4: Select a mode to continue. To make backups, choose device-image work with disks or partitions using images. To clone a hard drive to another, choose device-device work directly from a disk or partition to a disk or partition.
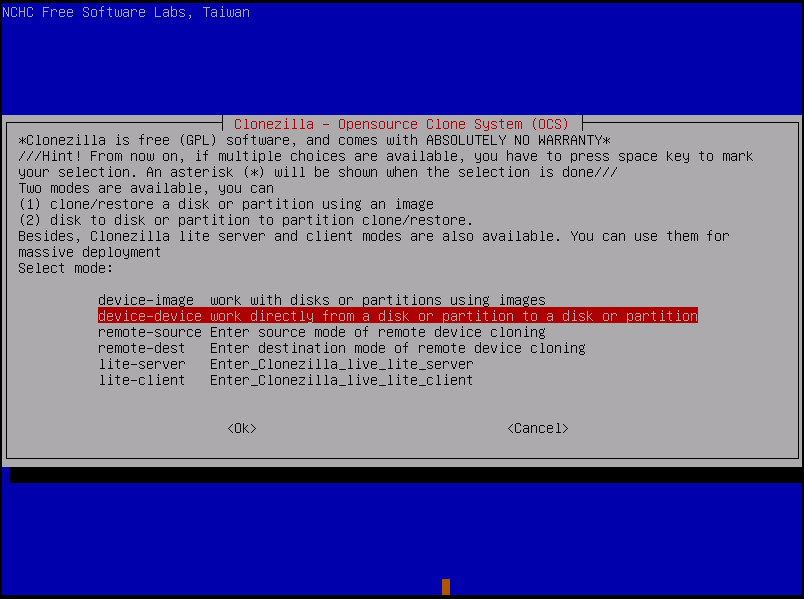
Step 5: Proceed with the reset operations depending on the instructions on the screen.
Rescuezilla VS Clonezilla
After having a general understanding of Rescuezilla and Clonezilla, let’s focus on the following part -Rescuezilla vs Clonezilla, quickly and easily knowing the detailed differences so that you can make a choice.
Clonezilla VS Rescuezilla: User Interface
Rescuezilla has a friendly user interface, making it easy to use even though you don’t have much IT skills. Officially, it is the Clonezilla GUI that you may be looking for but it is more than a Clonezilla GUI. While all steps in Clonezilla are done via commands. To some extent, it is a bit complex.
Clonezilla VS Rescuezilla: Features
In short, Clonezilla comes with more advanced features in cloning and backup compared to Rescuezilla. In the next moment, focus on some highlights of each one, assisting you in making a judgment.
Rescuezilla
- Has an easy GUI, enabling you to boot from USB in seconds.
- Runs from a USB stick, without installing the software.
- Offers backup, restore, and clone solutions in Linux, Mac, and Windows machines.
- Is fully compatible with Clonezilla.
- Accesses your files even though you cannot log in.
- Accesses Internet with a full-featured browser.
- Supports images created by many tools, including VMware, QEMU, Hyper-V, VirtualBox, and all known open-source imaging frontends such as Clonezilla.
- Recovers deleted documents, pictures, and other data.
- Mounts any supported images and copies out your files (beta).
- Saves image files to a network or a hard drive connected directly to the computer.
Clonezilla
- No installation, boots from a USB drive.
- Supports various file systems for different OS platforms, for example, Microsoft Windows, macOS, Linux, FreeBSD, NetBSD, OpenBSD, Minix, ChromeOS, VMWare ESX, and Chromium OS.
- Supports sector-to-sector copy.
- MBR and GPT are supported.
- Supports unattended mode, restoring one image to multiple local devices, and encrypting images.
- Allows massive cloning and massive deployment.
- Saves image files to a local disk, samba server, NFS server, SSH server, or WebDAV server.
- Helps image or clone a partition or the whole disk.
- Supports unicast, broadcast, multicast, and BitTorrent in Clonezilla lite server.
- Allows reinstalling boot loader including grub version 1 and version 2, as well as syslinux.
Rescuezilla VS Clonezilla: Aimed Users
Rescuezilla mainly targets ordinary users who prefer to perform backup, recovery, and clone tasks in GUI. However, Clonezilla is more suitable for IT administrators and professionals due to its advanced features (as mentioned above) and command-line control. In system deployment and massive cloning, it plays an important role.
Clonezilla or Rescuezilla, Which One to Use
Both Clonezilla and Rescuezilla are free open-source software, making it easy to create imaging backups and clone a hard drive to another. Which one should you use on your machine? This depends on your needs. You can run Rescuezilla to implement less complicated tasks. On the other side, if you pursue more advanced features and command control, use Clonezilla.
Clonezilla/Rescuezilla Alternative – MiniTool ShadowMaker
When using these two programs, you may notice some obvious shortcomings:
- In PC backup, they cannot enable you to back up the individual files and folders for data protection, only support disk backup and partition backup.
- Backup strategies such as automatic backups, incremental backups, and differential backups are not covered by those two programs.
- Although Rescuezilla has a user interface, it isn’t very friendly; let alone Clonezilla which doesn’t have a GUI.
Therefore, consider using an alternative if you regard computer backup as important. The free backup software, MiniTool ShadowMaker, as the substitute for Rescuezilla and Clonezilla, can satisfy your many needs.
Specially designed for Windows 11/10/8.1/8/7 and Windows Server 2022/2019/2016, MiniTool ShadowMaker devotes itself to backup, recovery, sync, and clone.
Specifically, it supports you in regularly/automatically backing up files and folders and only backing up newly added or modified data via incremental or differential backup mode. At the same time, you are allowed to set the number of old backup versions you want to keep so as to seamlessly manage disk space.
Moreover, this backup program covers various backup types, involving file backup, folder backup, partition backup, disk backup, and system backup.
What counts is that you can connect a USB flash drive or CD/DVD to the machine and run MiniTool ShadowMaker’s Media Builder to get a bootable drive so that you have a chance to perform a quick recovery in case Windows cannot start up as usual.
In cloning, it supports cloning HDD to SSD, cloning SSD to larger SSD, and moving Windows to another drive. Compared to Clonezilla, MiniTool ShadowMaker doesn’t require the target disk to be equal to or larger than the source drive but you should know the target drive should be enough to hold all the original data.
In case you don’t perform massive cloning or deployment, MiniTool ShadowMaker will be the top choice. Just click the download button and install it based on the instructions for a 30-day free trial.
MiniTool ShadowMaker TrialClick to Download100%Clean & Safe
How to Use MiniTool ShadowMaker
Here is a full guide on backup and cloning, telling you how to use MiniTool ShadowMaker. Do as the steps say.
Computer Backup
From the part of Rescuezilla vs Clonezilla, these two tools assist in making disk imaging backups. MiniTool ShadowMaker is such a tool for imaging backups and here we will introduce how to run it for computer backup.
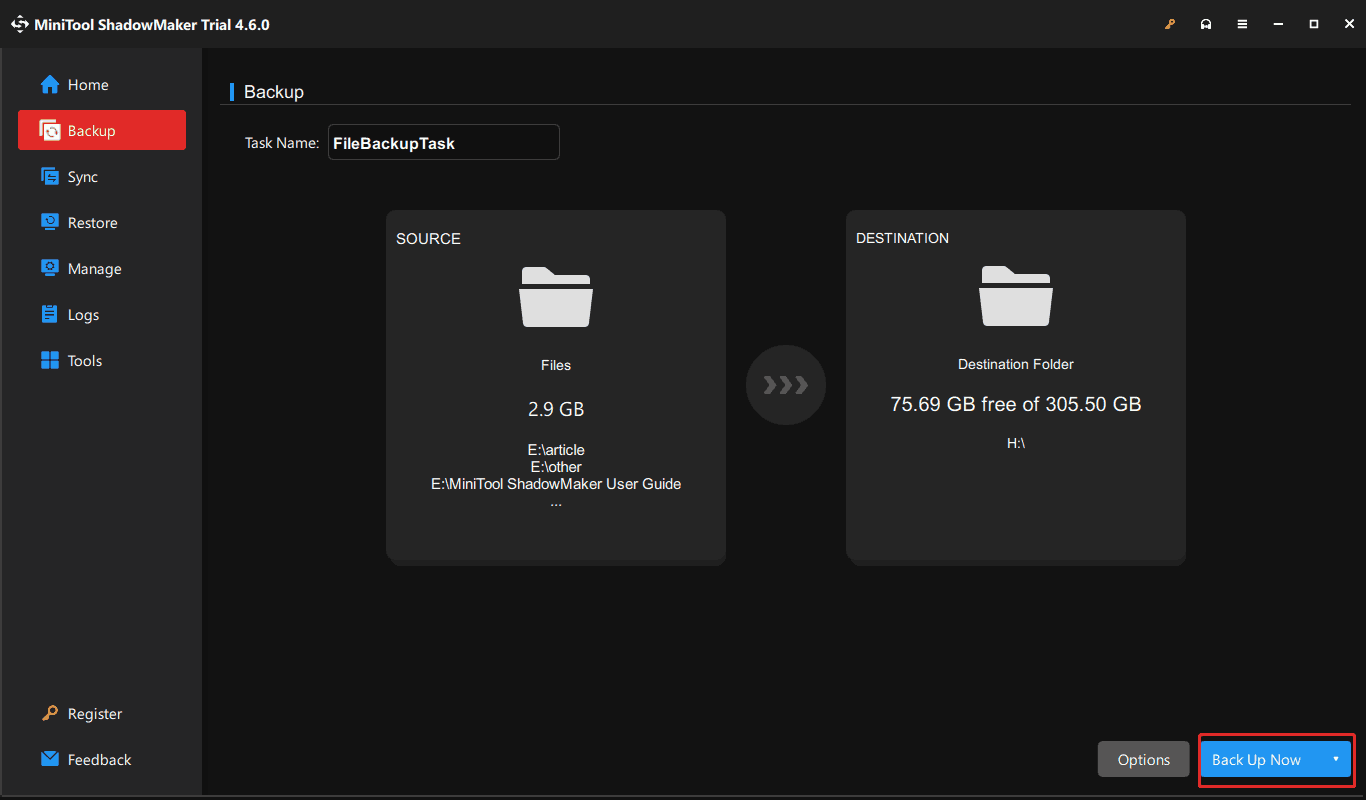
Step 1: Run MiniTool ShadowMaker and proceed by clicking Keep Trial.
Step 2: In the Backup interface, you will see this software creates a system image by default. To back up precious files/folders, head to SOURCE > Folders and Files > Computer, select what to backup, and click OK. Next, select a path such as your connected external drive, USB drive, network, etc. to save the image file.
Step 3: If needed, click Options and configure the scheduled plan or backup scheme as per your preferences. At last, begin backing up.
Disk Cloning
MiniTool ShadowMaker, the alternative to Clonezilla and Rescuezilla, can finish disk cloning with a few steps on the easy-to-use interface.
Step 1: Connect another hard drive to the PC and launch this disk cloning software.
Step 2: Choose Tools from the left side and hit Clone Disk to continue.
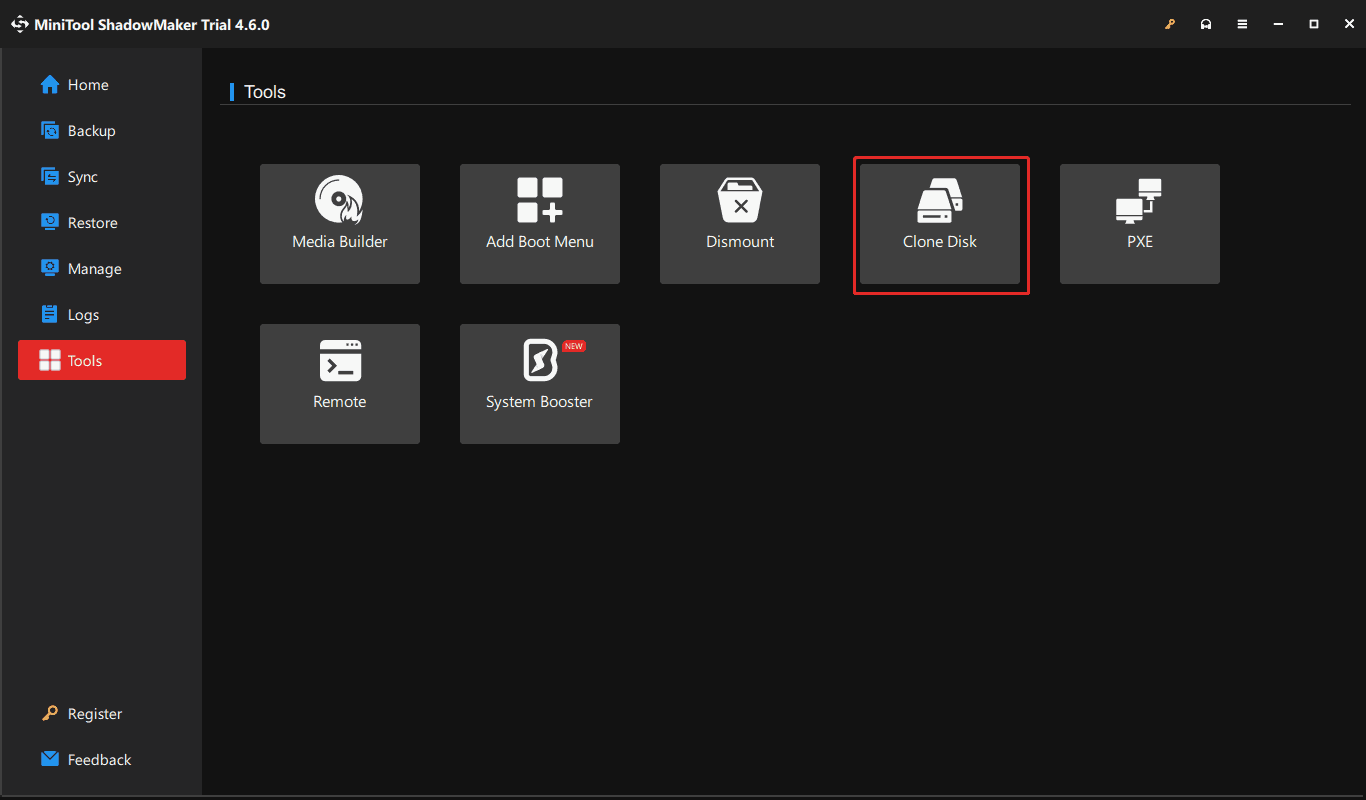
Step 3: Specify the source disk and target disk based on your situation. Then, start the cloning process.
2. You are allowed to perform sector by sector cloning. Just go to Options > Disk clone mode > Sector by sector clone. By default, the Used sector clone mode is chosen.
Wrapping Things up
How to use Rescuezilla and Clonezilla? Rescuezilla vs Clonezilla: which one to use? From this post, you can find much information. To simply back up your PC data and the system, as well as clone a hard drive/SD card/USB drive/SSD, etc. to another one, we recommend running the alternative, MiniTool ShadowMaker. The tool provides you with more advanced features in disk imaging and cloning.
MiniTool ShadowMaker TrialClick to Download100%Clean & Safe
When having issues while using our product, contact [email protected] to seek help. An in-time reply will be returned to you.
