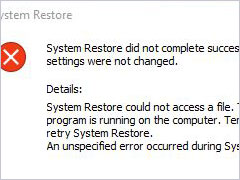
Scanning and Repairing Drive Stuck
Scanning and repairing drive might become stuck for some Windows 10 users when they try to boot their computer; sometimes, it would even be stuck for several minutes or hours. If you have the same issue, this is the right place for you.
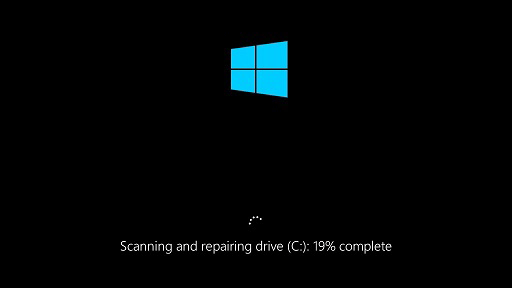
And here is a real example from the Tomshardware:
Scanning and repairing drive (C) has been running over 24 hours. It has been stuck on 39% complete over 14 hours. Should I let it continue or do something else?from the Tomshardware
It is unfortunately painful to encounter such a problem. Meanwhile, do you know the reasons for the issue Windows scanning and repairing drive stuck and how to fix them?
As a matter of fact, various reasons could have caused the issue Windows 10 scanning and repairing drive stuck. For example:
- You didn’t shut down the computer with a correct way such as a forced shutdown or a power outage.
- There are bad sectors on the hard drive.
- The computer is attacked by a virus.
- The drivers are configured incorrectly.
- Other reasons can also lead to the issue computer scanning and repairing drive stuck.
However, how long does scanning and repairing drive take and how to fix this issue? Keep on your reading and this post will show you 5 solutions to the problem scanning and repairing drive stuck Windows 10.
5 Ways to Fix Scanning and Repair Drive Stuck
In this section, we will show you how to fix the issue scanning and repairing drive C stuck at 10 percent. But before going ahead, you back up all your important files so as to avoid data loss during the fixing process.
Quick Video Guide:
Back up File Before Fixing the Issue
In order to back up files, you will need a piece of third-party software since you cannot enter Windows 10 to use any of its functionalities like Backup and Restore (Windows 7). Indeed Windows will be unavailable when it is stuck in the loop of scanning and repairing drive.
Thus, the best file backup software – MiniTool ShadowMaker would be a good choice. It is a piece of professional backup software which can be used to back up files, folder, partition, disk, and the operating system with its powerful feature.
Besides the backup feature, MiniTool ShadowMaker is also able to perform recovery solutions when accidents happen.
With so many powerful features, you can download it from the following button or purchase an advanced one to have a try. And we will show you how to back up files step by step.
MiniTool ShadowMaker TrialClick to Download100%Clean & Safe
Step 1: The first thing you need to do is to create a bootable media so you can enter Windows when it is stuck at scanning and repairing. Thus, you need to download MiniTool ShadowMaker and install it on a normal computer.
Step 2: After entering its main interface, please go to the Tools tab and click Media Builder feature to create the bootable media which can be used to boot the unbootable computer.

Step 3: Connect the bootable media to the unbootable computer and boot from it. Click here to know how to boot from burned MiniTool bootable CD/DVD discs or USB flash drive.
Step 4: Then you will enter the MiniTool Recovery Environment. Go to Backup page, click Source module and click Folder and Files to choose which files you want to back up.

Step 5: Next, click Destination module to decide where you want to save the backup image. We suggest you to choose an external hard drive.
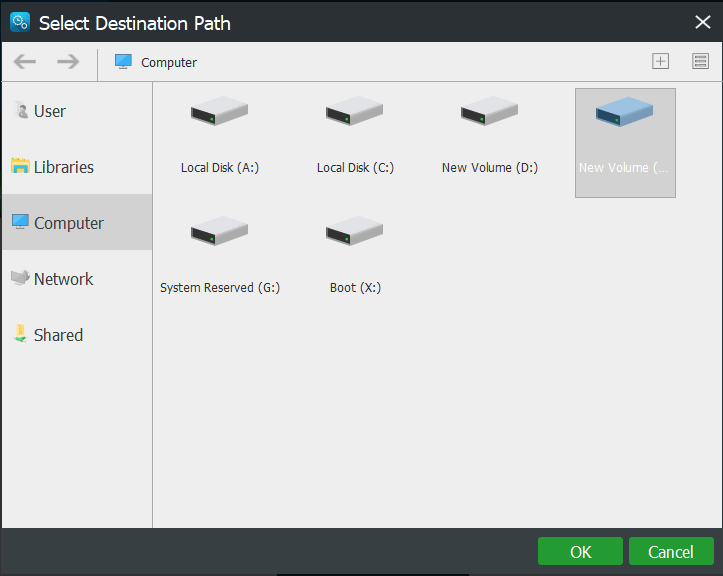
Step 6: After successfully choosing the backup source and destination, you can click the Back up Now button to perform this action immediately.
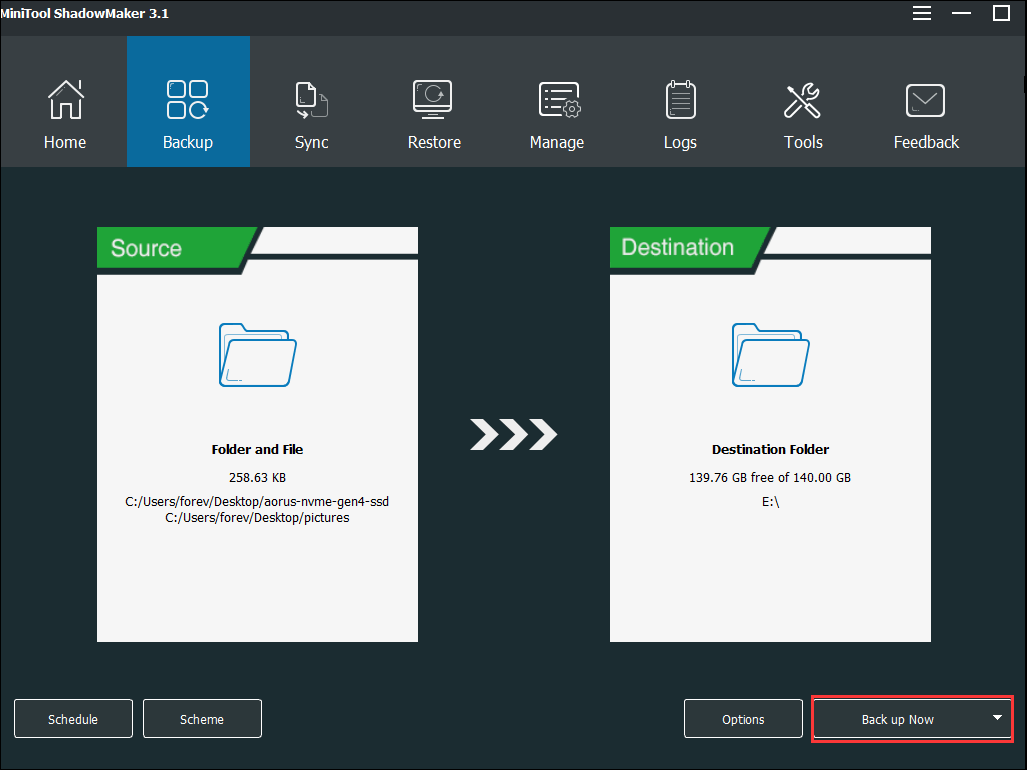
Now, all files are successfully backed up and it is time to fix the issue Windows 10 scanning and repairing drive stuck.
In the following paragraphs, we will show you how to fix the issue in detail.
Solution 1. Check and Repair the Disk in Safe Mode
As we all know, the issue Windows 10 scanning and repairing drive stuck at 0 may be caused by the bad sector of the hard drive. Thus, you can try checking and repairing the disk to fix this problem. Here we will show you the detailed instructions.
However, you need to complete the operations in Safe Mode because you can’t boot up Windows normally under this situation.
Step 1: Press and hold the Power button to force the computer to turn on and off 3 times, then you will enter the Windows Recovery Environment. If this is not working, you can use the installation media to boot your computer.
Step 2: Next, click Troubleshoot > Advanced options > Startup Settings > Restart to continue.
Step 3: Then you will go to the following page and press F4 to enter Safe Mode or press F5 to enter Safe Mode with Networking.
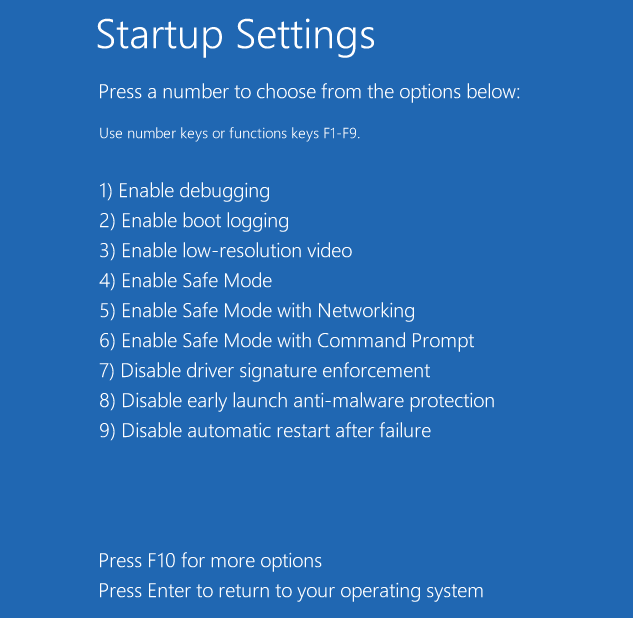
Step 4: Then type Command Prompt in the search bar on Windows 10 and right-click it to choose Run as administrator.
Step 5: Next, type the following command chkdsk c:/f in the command line window and hit Enter to check and repair the disk.
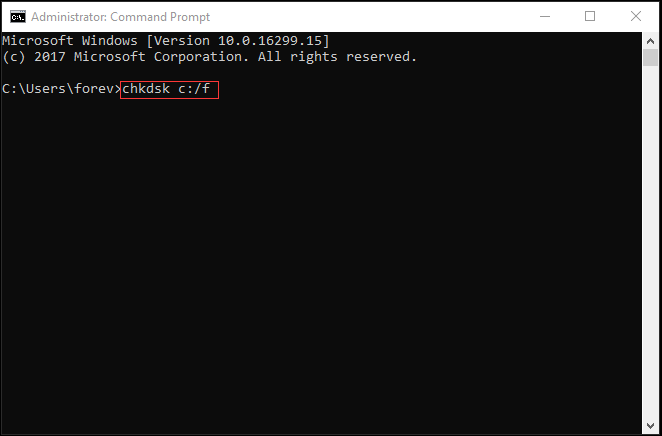
Step 6: Then you will receive a message which tells you that the process of schedule this volume to be checked will be performed when the operating system starts the next time. Thus, you are required to type Y to continue.
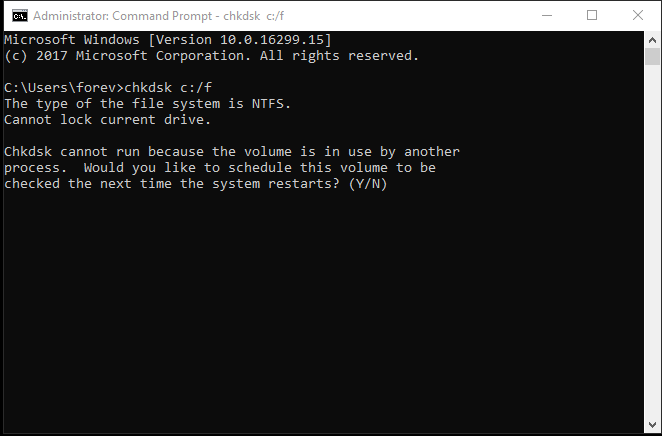
When the scanning and repairing process is finished, you can restart your computer to check whether the issue scanning and repairing drive stuck is solved.
To get more methods to repair hard drive error, you can read this post: How Do I Repair Hard Drive Error with Windows 10 CHKDSK Utility?
Solution 2. Check File System
To fix the issue scanning and repairing drive stuck Windows 10, you can try running System File Checker to check whether there is a corrupted file system and repair it. You can follow these instructions.
Step 1: Repeat the first three steps of above method to enter the Safe Mode.
Step 2: Type cmd in the search box and right-click it to choose Run as administrator to continue.
Step 3: In the popup command window, type the command sfc /scannow and hit Enter to continue.
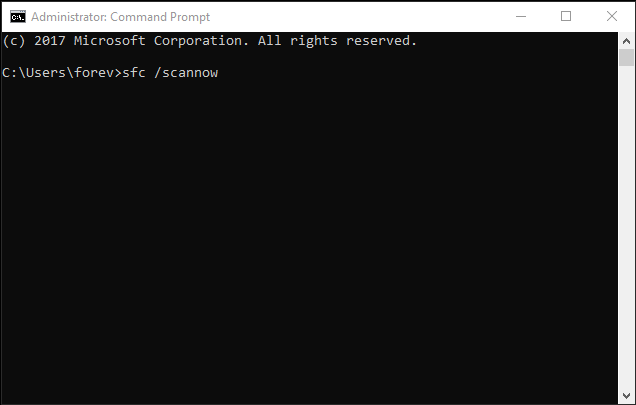
Step 4: Then the scanning process will take several minutes. Please don’t close the command line window until you see the message verification 100% complete.
When you completed the above steps, you can check whether the issue Windows 10 scanning and repairing the drive loop is solved.
Quickly Fix – SFC Scannow Not Working (Focus on 2 Cases)
Solution 3. Disable Check Disk on Booting
If there is nothing wrong with the hard disk and Windows 10 is still stuck at scanning and repairing, you can try modifying the registry and disabling CHKDSK on booting.
Thus, follow these instructions step by step.
Step 1: Boot your computer in Safe Mode with the same methods listed above.
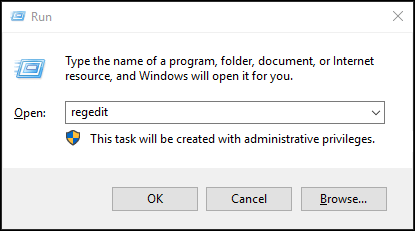
Step 2: Press Windows key and R key together to launch Run dialog and type regedit and hit Enter or click OK to continue.
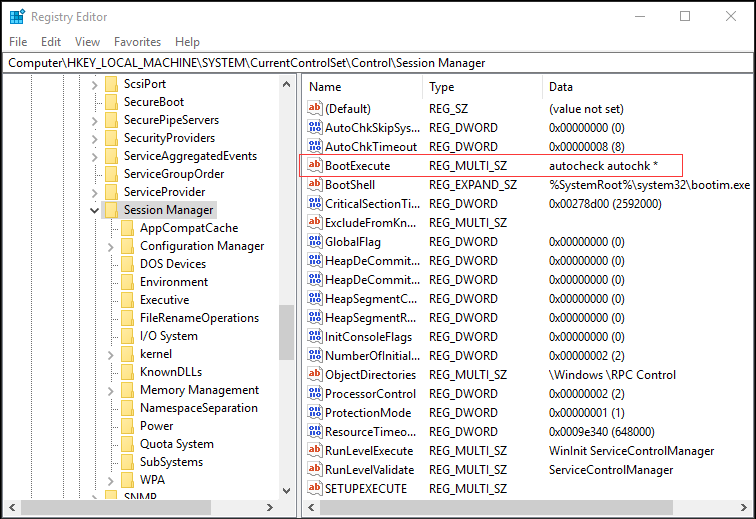
Step 3: Navigate to the Session Manager based on the following path and choose BootExecute on the right column to continue.
HKEY_LOCAL_MACHINE\SYSTEM\CurrentControlSet\Control\Session Manager
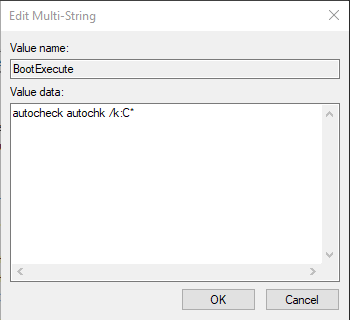
Step 4: Then in the pop-up window, change the Value data to autocheck autochk /k:C * and click OK to confirm this change.
After that, you can exit the Safe Mode and restart your computer to check whether the issue scanning and repairing drive C stuck Windows 10 is solved.
Solution 4. Run Automatic Repair
If the methods above are not working, you can try to run automatic repair to fix the issue computer scanning and repairing drive stuck. You can proceed based on following instructions.
Step 1: To perform the automatic repair, the Windows 10 installation disc is required. If you have one, please insert it to your computer and boot the computer from it.
However, if you don’t have it, you can click here to download the Microsoft Media Creation Tool and launch it to create a Windows 10 installation disc.
Step 2: Then you will enter the welcome interface, set the language and other elements, click Next to continue.
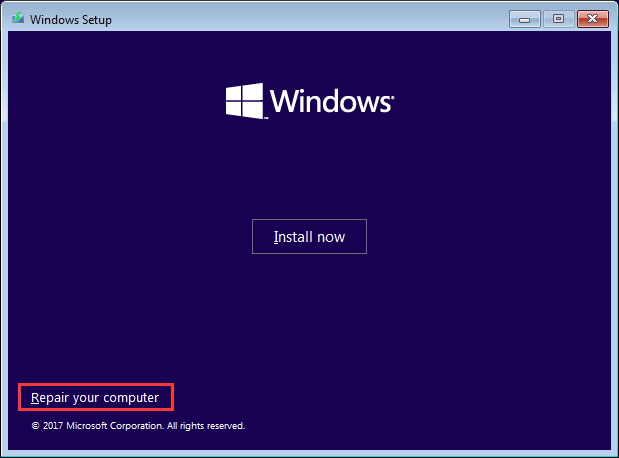
Step 3: In the popup window, click Repair your computer at the bottom-left corner to continue.
Step 4: Click Troubleshoot > Advanced options to go on.
Step 5: In the next popup window, you can choose Startup Repair to go on.
When the automatic repair process is finished, you can reboot your computer to check whether the issue Windows 10 scanning and repairing drive loop is solved.
Solution 5. Run System Restore
There is an optional method for you to solve the issue Windows scanning and repairing drive stuck at 0. If you have created a system restore point in advance, you can try performing a system restore to restore your computer to an earlier date to when this problem didn’t exist. Thus, we will show you the detailed procedure.
Step 1: Press and hold the Power button to force the computer to shut down 3 times and you will enter Windows Recovery Environment.
Step 2: Next, click Troubleshoot > Advanced options > System Restore to continue.
Step 3: In the popup window, click Next to continue.
Step 4: Then you are required to choose one system restore point and click Next to continue.
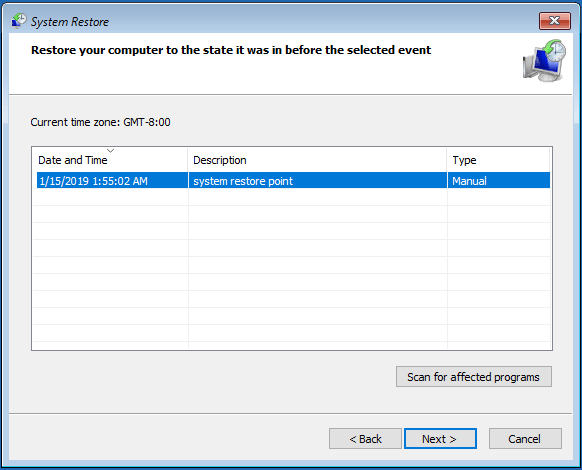
Step 5: You need to confirm your restore point and click Finish to continue.
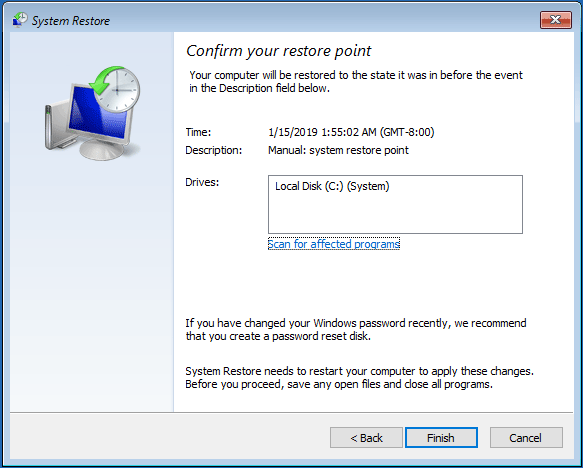
When the system restore process is finished, you can reboot your computer to check if the issue computer being stuck at scanning and repairing drive is solved.
Bottom Line
In conclusion, we have introduced five methods to fix the issue when scanning and repairing drive is stuck. If you have the same trouble, try those methods.
In addition, if you have any better solution to scanning and repairing drive C stuck, you can share it on the comment section.
If you have any problem with the best file backup software – MiniTool ShadowMaker, please don’t hesitate to contact us via the email [email protected].
Scanning and Repairing Drive Stuck FAQ
- Check and repair the disk in safe mode.
- Check file system.
- Check disk on booting.
- Run automatic repair.
- Run System Restore.
- Run test in BIOS menu.
- Run chkdsk command.
- Check hard drive.
You can also read the post [SOLVED] How to Disable SMART Hard Disk Error 301? Top 3 Fixes to learn more detailed instructions.
