When there is a noticeable hardware change on your Windows machine, you might receive some activation errors like error code 0xC004f211. How to activate Windows after a hardware change? Luckily, this error is not as hard as expected. If you are still at a loss at the moment, this post from MiniTool Solution might help you out.
Windows Activation Error 0xC004f211
To verify how genuine the copy of the Windows is, an activation is required. Sometimes, even when you are logged into your Windows account, you might run into the following message:
Windows reported that the hardware of your device has changed. Error code: 0xC004f211.
Windows activation error 0xC004f211 indicates that some hardware on your Windows 11/10 has changed. Although minor hardware changes might not greatly impact your operating system, any significant hardware change like replacing your motherboard might be a big problem. Now, we will share how to address Windows Activation error 0xC004f211 with you.
Also see: We Can’t Activate Windows on This Device
How to Fix Windows Activation Error 0xC004f211?
Fix 1: Run Windows Activate Troubleshooter
Some of you might encounter Windows activation errors after changing hardware on your device. If this is the case, you utilize Windows Activation Troubleshooter to activate your Windows again. To do so:
Step 1. Press Win + I to open Windows Settings.
Step 2. In the settings menu, scroll down to find Update & Security and hit it.
Step 3. In the Activation tab, click on Troubleshoot.
Step 4. Click on I changed hardware on this device recently and hit Next.
Step 5. Type your account information and select the operating system you are using.
Step 6. Click on Activate and the Windows will start to activate itself.
Step 7. After completion, restart your computer to inspect if Windows 10 activation error vanishes.
Fix 2: Check for Windows Update
Sometimes, the outdated operating system might also be blamed. If you don’t update your system for a long time, follow these prompts to check for any available updates.
Step 1. Press Win + I to open Windows Settings.
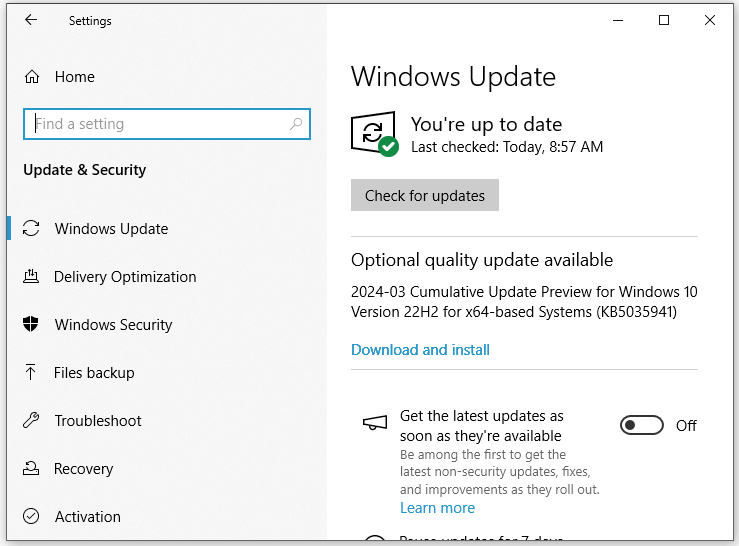
Step 2. Navigate to Update & Security > Windows Update > Check for updates. If there is any update available, click on Download and Install.

Fix 3: Enter a License Key
If you have a license key from the original Windows version, follow these steps:
Step 1. Open Windows Settings.
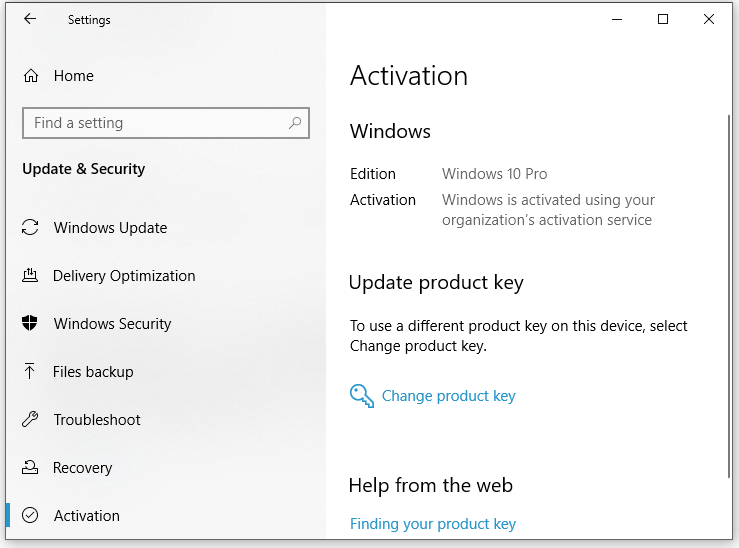
Step 2. Navigate to Update & Security > Activation > Change product key.

Step 3. Enter your product key of the original product key and hit Next.
Fix 4: via Command Prompt
Another way is to activate your Windows in Command Prompt. Here’s how to do it:
Step 1. Press Win + R to open the Run box.
Step 2. Type cmd and hit Ctrl + Shift + Enter to launch Command Prompt with administrative rights.
Step 3. Type slmgr /ipk License Key and hit Enter. Remember to replace License Key with your personal key.
Step 4. Run slmgr /ato and don’t forget to hit Enter.
If you don’t know what your license is and are using digital license, run the following command:
slmgr /xpr
If you have a product key from your original Windows, input the following command and hit Enter:
wmic path softwarelicensingservice get OA3xOriginalProductKey
Fix 5: Clean Install
If everything fails, the last resort is to perform a clean install of your computer. By doing so, all the files, settings, programs, and apps might be removed. Therefore, before applying this method, please make sure that you have a backup of crucial files.
To back up, it is strongly recommended to try MiniTool ShadowMaker. This is a piece of free Windows backup software that supports backing up various items on your computer including important files and folders, selected partitions, the Windows system, and even the whole disk. Get the free trial and have a try.
MiniTool ShadowMaker TrialClick to Download100%Clean & Safe
Final Words
Hopefully, you can activate your Windows again when encountering 0xC004f211 with one of these solutions above. Appreciate your time!


