Windows 10/11 comes with a type of account called Super Administrator that gives you additional privileges over the normal account. Do you know how to activate Super Administrator on your computer? If not, this post from MiniTool is perfect for you.
What Is a Super Administrator Account?
In the old versions of Windows system, there was only one administrator account available. Windows introduces another Super Administrator account called Super Administrator account in the later versions including Windows 7/8/8.1/10/11. Usually, this account is disabled by default.
It is a type of hidden account that grant you the same sort of privileges that you get with Root in Linux. That is, with a Super Administrator account by your side, you won’t be prompted by User Account Control when attempting to carry out some elevated tasks. This is very useful when you got locked out of the main account.
In the second section, we will walk you through on how to activate a Super Administrator account to unlock more administrative rights step by step. Without further ado, let’s dive into it!
How to Activate a Super Administrator Account on Windows 10/11?
Way 1: via Command Prompt
Command Prompt is a command line interpreter application that can be used to perform advanced administrative tasks including activating a Super Administrator account. To do so:
Step 1. Type cmd in the search bar to locate Command Prompt and select Run as administrator.
Step 2. In the command window, input the command below and hit Enter. Then, a super administrator account will be enabled.
Net user administrator /active:yes
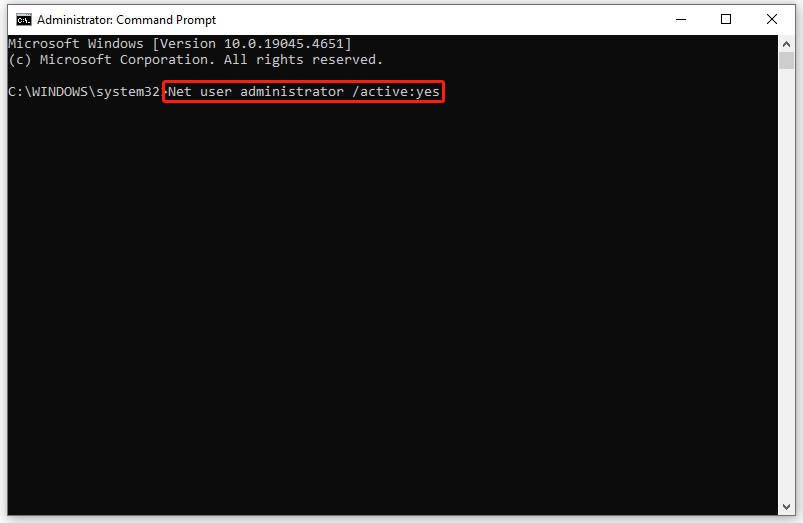
Next, you can click on the Start menu > hit the user profile icon to switch the account.
After finalizing the troubleshooting tasks with the super administrator account, run the following command in an elevated Command Prompt to disable it.
Net user administrator /active:no
Way 2: via Windows PowerShell
Similar to Command Prompt, Windows PowerShell can also automate and control your system and applications by executing the corresponding command lines. Therefore, it’s a good idea to set up a super administrator account via it. Follow these steps:
Step 1. Right-click on the Start menu and select Windows PowerShell (Admin).
Step 2. Type the following command and don’t forget to hit Enter to enable the inbuilt super administrator account:
Get-LocalUser -Name “Administrator” | Enable-LocalUser
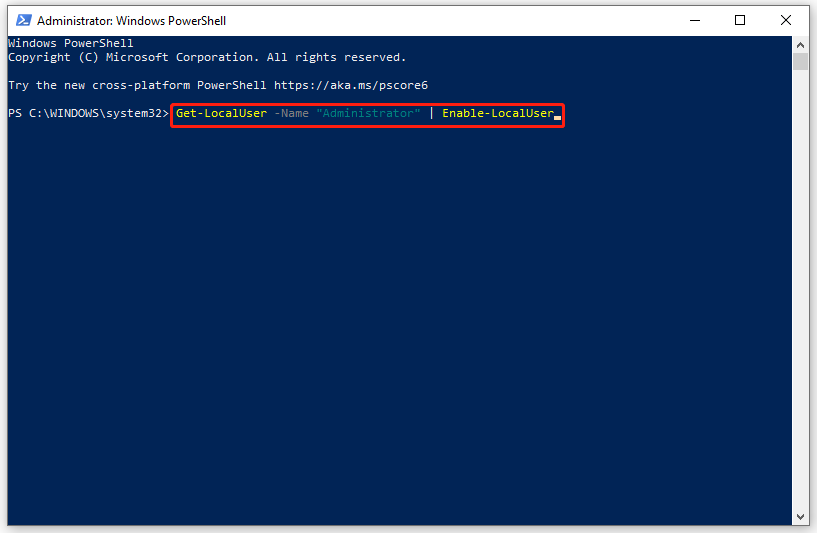
Step 3. Run the commands below one by one to set a password for your super administrative account:
- Net user administrator [yourPassword]
- Net user administrator activate:yes
To deactivate your super administrator account, carry out the following command:
Get-LocalUser -Name “Administrator” | Disable-LocalUser
Way 3: via Local Group Policy Editor
Another way to activate a Super Administrator account is to modify the Accounts: Administrator account status policy in Local Group Policy Editor. It’s noted that this tool is only available in Windows Professional and Enterprise editions. For Windows Home users, please move to the next method.
Step 1. Press Win + R to open the Run dialog.
Step 2. Type gpedit.msc and hit Enter to run Local Group Policy Editor.
Step 3. Navigate to: Computer Configuration > Windows Settings > Security Settings > Local Policies > Security Options.
Step 4. In the right pane, locate the Accounts: Administrator account status policy and double-click on it.
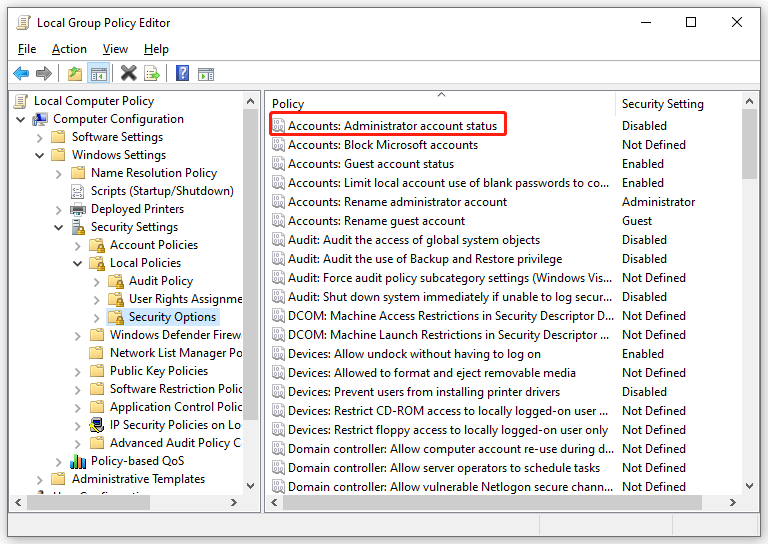
Step 5. In the Local Security Settings section, tick Enabled.
Step 6. Click on Apply & OK to make the change effective.
Way 4: via Local Users and Groups
Local Users and Groups is an inbuilt Windows feature that allows you to manage several users and memberships locally saved on your computer. With the help of this feature, you can also enable your Super Administrator account and set a password for it. To do so:
Step 1. Press Win + R to open the Run box.
Step 2. Type lusrmgr.msc and hit Enter to launch Local Users and Groups.
Step 3. In the left pane, click on Users.
Step 4. On the right side of the pane, locate Administrator and double-click on it to open its properties.
Step 5. In the General tab, uncheck Account is disabled.
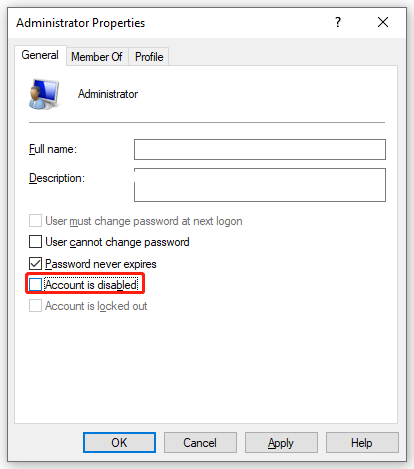
Step 6. Tap on Apply & OK to save all the changes you’ve made.
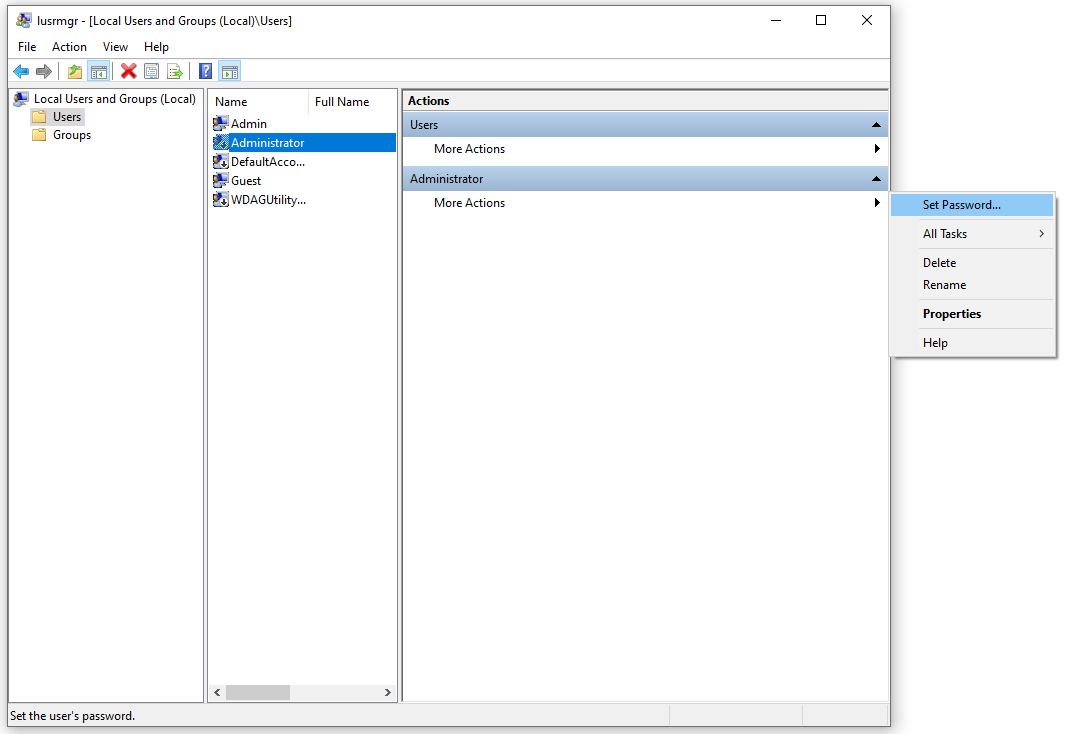
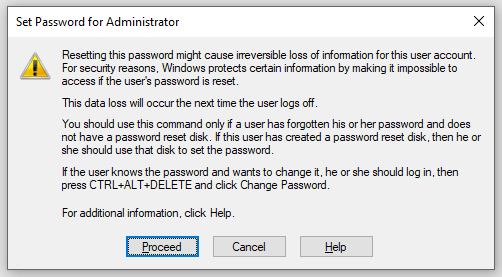
If you want to set a password for your Super Administrator account, click on More Actions under Administrator and then select Set Password.
MiniTool ShadowMaker TrialClick to Download100%Clean & Safe
Wrapping Things Up
After reading this post, you will have a basic understanding of Super Administrator account and how to set it up on your Windows. If you need to get full administrative rights and override UAC, select one method as per your preferences.
