If you don’t want to receive the new Windows update, you can choose to pause updates for a while. However, you may find that you can’t pause Windows updates for unknown reasons. If you are bothered by this issue, do you know how to fix it? In this post, MiniTool Software introduces two methods to solve the issue.
MiniTool Power Data Recovery is a professional and free data recovery software. If you lose or delete your files by mistake, you can use this software to get them back as long as they are not overwritten by new data.
MiniTool Power Data Recovery TrialClick to Download100%Clean & Safe
Can’t Pause Windows Updates on Windows 10/11
Usually, after a new Windows update is released, your computer can automatically detect it and download it on your computer. If you don’t want to update your system to the latest version, you can go to Start > Settings > Windows Update on Windows 11 or Start > Settings > Update & Security > Windows Update on Windows 10 to pause updates.
If the Pause updates feature is available, everything will be OK. But some users find that Pause updates greyed out (you can see a message saying This setting isn’t available due to your organization’s policy if you are using Windows 10/11 Enterprise). Due to this, they can’t pause Windows updates. The following is an example (on Windows 11):
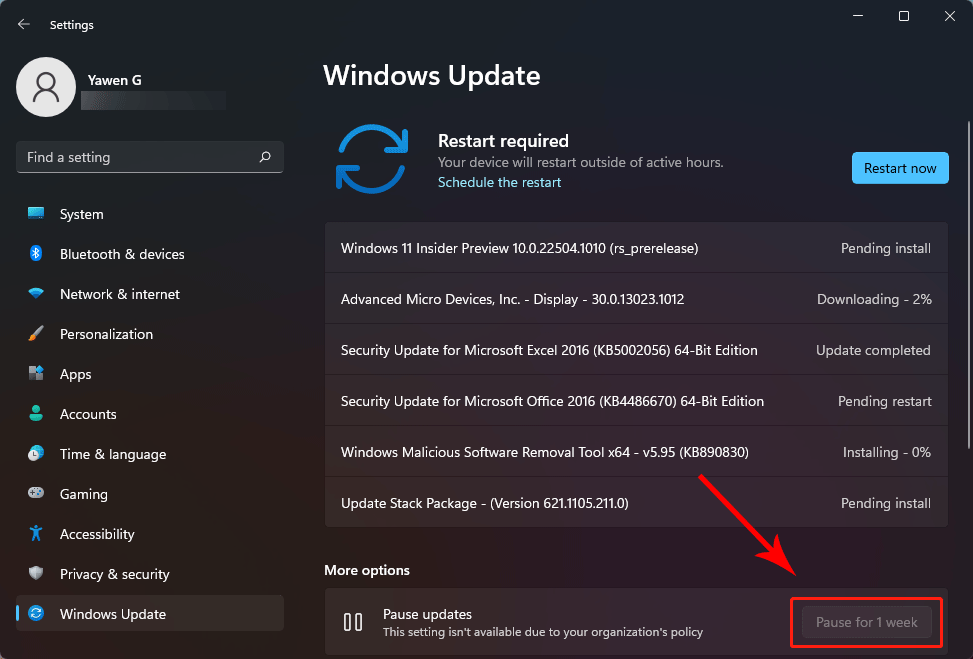
Fortunately, you can do something to make Pause updates available again. Here are two methods you can try.
Do you know how to get Windows 10 November 2021 Update on your computer? In this post, we will show you some easy and effective methods.
Fix 1: Enable Pause Updates Using Local Group Policy Editor
If you are using Windows 10/11 Pro or an advanced version, you can use Local Group Policy Editor to enable the Pause updates feature. We take Windows 11 as an example. If you are using Windows 10, the steps are the same.
1. Press Win+R to open Run.
2. Type gpedit.msc and press Enter to open Local Group Policy Editor.
3. Go to this path: Computer Configuration > Administrative Templates > Windows Components > Windows Update > Manage end user experience.
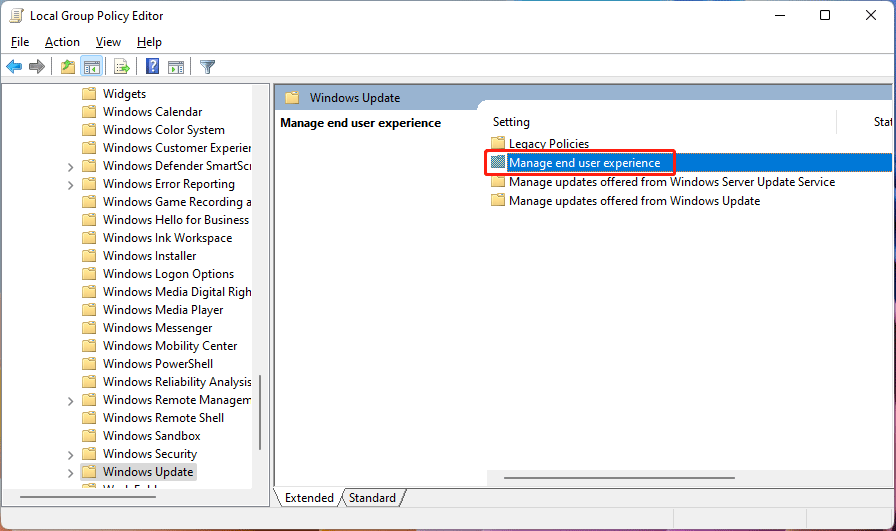
4. Double-click Remove access to “Pause updates” feature to open it.
5. Select Not Configured.
6. Click Apply.
7. Click OK.
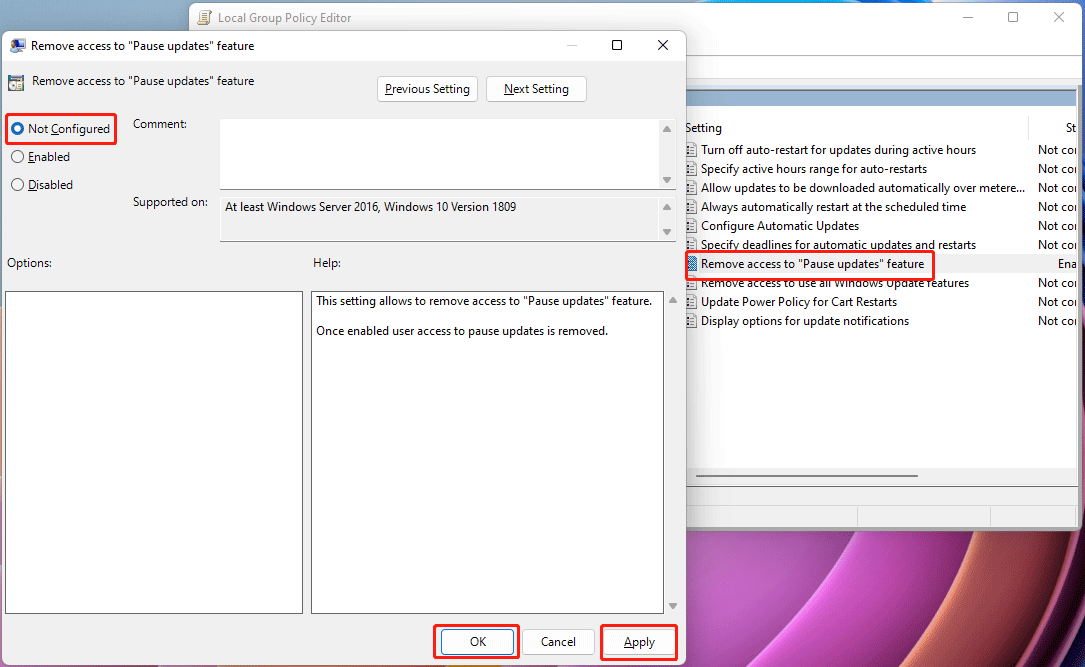
8. Restart your computer.
Well then, how to disable Pause updates if you don’t want to use this feature. You can just use the above steps, but in step 5 you need to select Enabled instead. After that, the Pause updates feature will no longer be available. And the Pause for 1 week button will be greyed out.
Fix 2: Enable Pause Updates Using Registry Editor
If you are using Windows 10/11 Home, or you can’t access Local Group Policy Editor on your computer, you can use Registry Editor to resume the Pause updates feature. Before doing this, you’d better back up the registry keys to prevent unexpected issues.
After that, you can enable Pause updates via Registry Editor using these steps:
1. Press Win+R to open Run.
2. Type regedit and press Enter to open Registry Editor.
3. Go to this path: HKEY_LOCAL_MACHINE\SOFTWARE\Policies\Microsoft\Windows\WindowsUpdate.
You can also directly copy and paste this path to the address bar in Registry Editor.
4. Right-click the WindowsUpdate folder and go to New > DWORD (32-bit) Value.
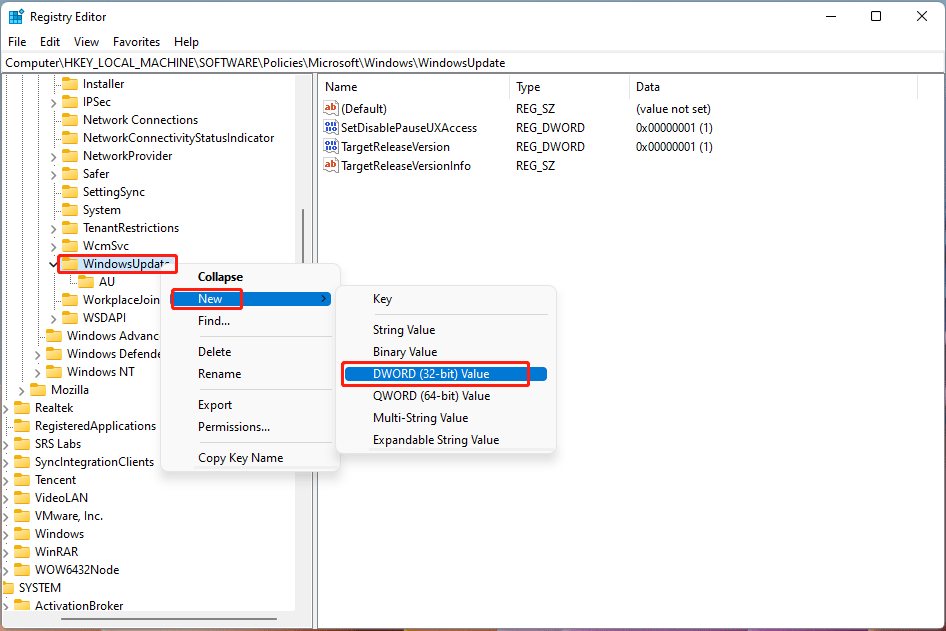
5. Name the newly-created key SetDisablePauseUXAccess and press Enter.
6. Double-click the newly created DWORD to open it and change the value from 0 to 1.
7. Click OK.
8. Restart your computer.
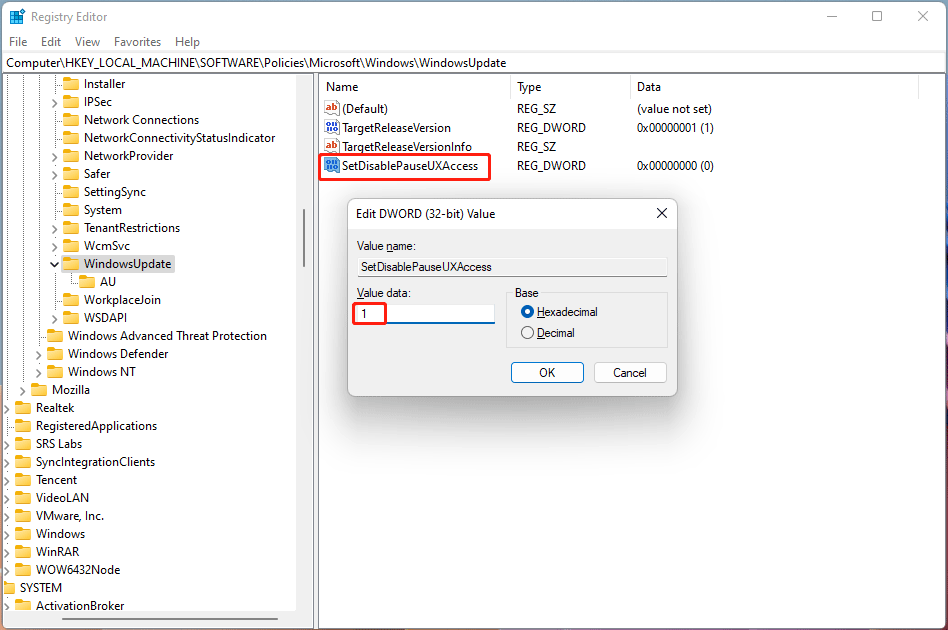
If you want to disable Pause updates using Registry Editor, you can just repeat the above steps, but in step 6, you need to change the value to 0. Then, you need to delete that key.
These are the two methods you can use when you can’t pause updates in the Settings app on Windows 10/11. There should be a suitable method for you. If you have other related issues, you can let us know in the comments.
