Default Printer Keeps Changing Windows 11/10
Setting a default printer on Windows saves you from manually selecting a printer each time, reducing your workload and speeding up the printing process. However, sometimes you may find that the default printer keeps changing in Windows 11/10.
“Default printer changes automatically” is usually caused by allowing Windows to change the default printer itself. Besides, outdated Windows versions and wrong registry values can cause this issue as well.
Now, you can follow the instructions below to prevent Windows from changing the default printer.
How to Stop Windows From Changing the Default Printer
Solution 1. Do Not Make Windows Manage the Default Printer
If you have allowed Windows to manage your default printer, Windows will set your default printer to be the one you used most recently at your current location. Here you can see how to prevent Windows from changing the default printer and how to set the default one manually.
For Windows 10 users:
Step 1. Press the Windows + I key combination to access Windows Settings.
Step 2. Select Devices and then move on to the Printers and scanners section.
Step 3. In the right panel, uncheck the option of Let Windows manage my default printer.
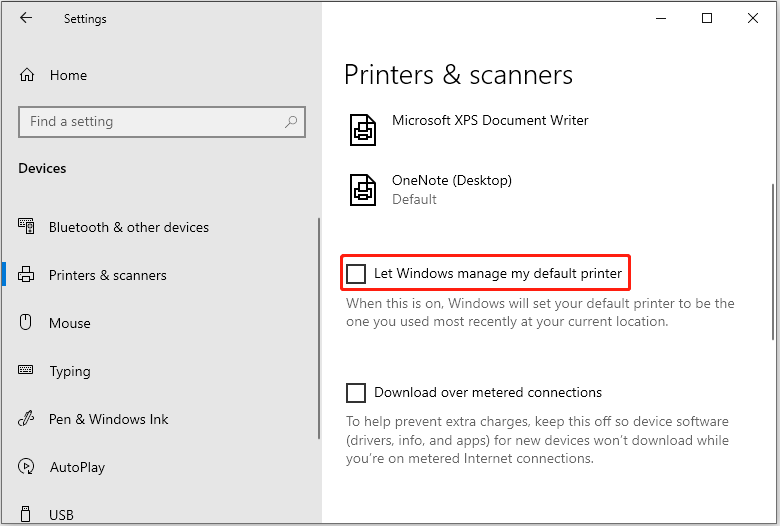
Step 4. On the same page, click the target printer under Printers & scanners, then click Manage > Set as default.
For Windows 11 users:
Step 1. Open Windows Setting by pressing Windows + I.
Step 2. Click Bluetooth & devices > Printers & scanners.
Step 3. Switch the button next to Let Windows manage my default printer to Off.
Step 4. Select the desired printer and click the Set as default button at the top.
Solution 2. Change Printer Settings via Registry Editor
If the problem “default printer keeps changing” persists after trying the above method, you need to make changes to the Windows registries.
MiniTool ShadowMaker TrialClick to Download100%Clean & Safe
Once you have backed up the registry or the system, follow the guide below to tweak the registry value.
Step 1. Press the Windows + R keyboard shortcut to open the Run command window.
Step 2. Type regedit in the pop-up window and click OK or press Enter.
Step 3. Select Yes when the User Account Control window pops up. If the Yes button is missing, fix it by referring to this article: How to Fix UAC Yes Button Missing or Grayed Out?
Step 4. Copy and paste the following location in the top address and press Enter. Or you can navigate to this path layer by layer.
Computer\HKEY_CURRENT_USER\SOFTWARE\Microsoft\Windows NT\CurrentVersion\Windows
Step 5. In the right panel, double-click the LegacyDefaultPrinterMode key to edit it. In the new window, set its value data to 1 and click OK.
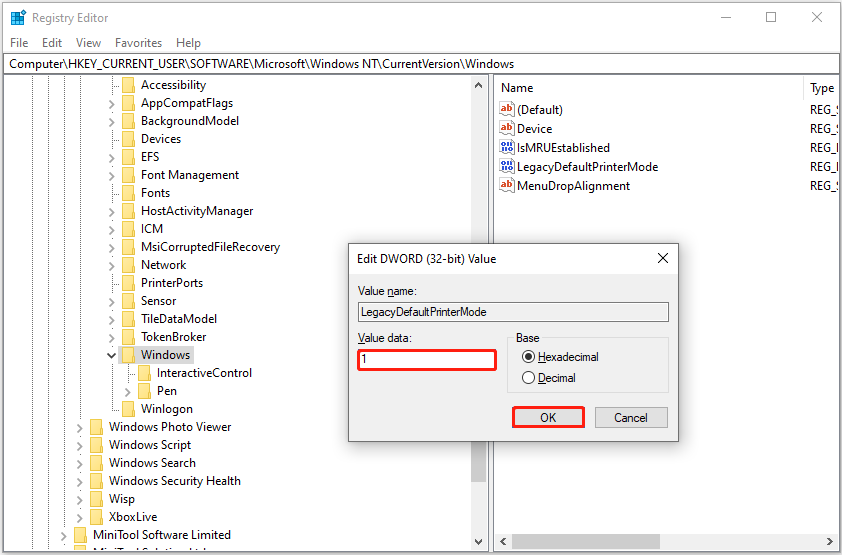
Step 6. Restart your PC and check if the issue has been resolved.
Solution 3. Update Windows
As mentioned earlier, an outdated Windows version can be responsible for the “default printer keeps changing” issue as well. So, you need to make sure your Windows is updated to the latest version. To do that, go to Windows Settings > Update & Security > Windows Update > Check for updates.
Top Recommendation
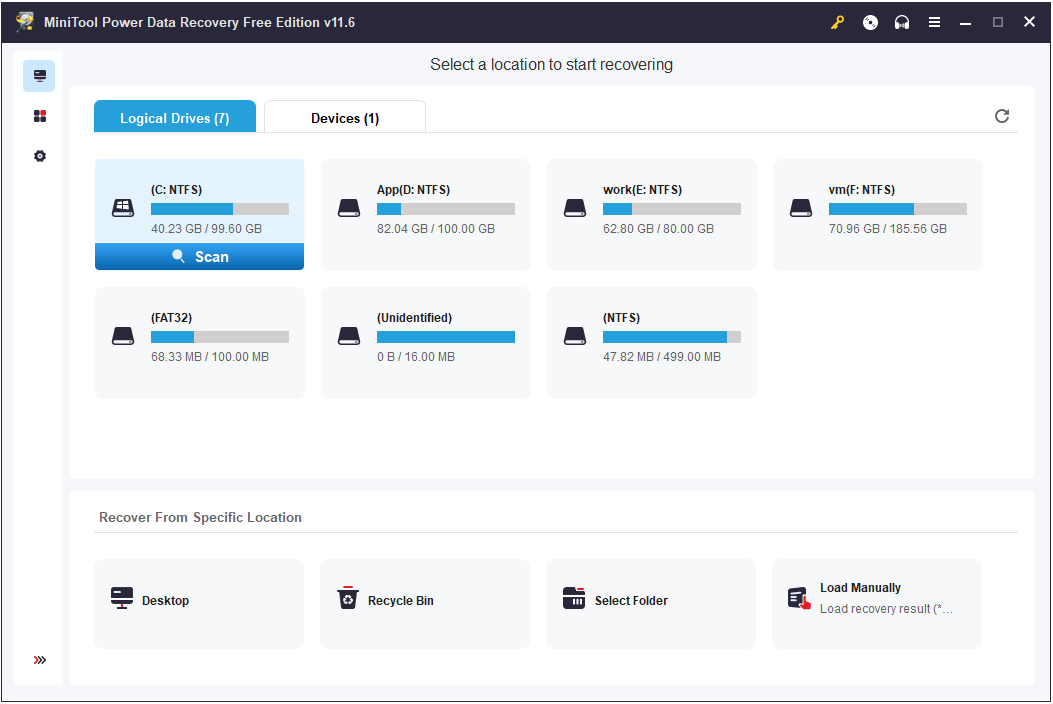
If your files get lost after updating Windows, you can use MiniTool Power Data Recovery to recover deleted or lost files. It serves as the best free data recovery software that not only helps to retrieve files from computer internal hard drives, but also helps to recover disappeared USB copied files, SD card files, external hard drive files, and so on.
Besides, MiniTool Power Data Recovery is fully compatible with Windows 11/10/8/7 and provides you with clear and concise interfaces that make data recovery easier. If necessary, download it and have a try.
MiniTool Power Data Recovery FreeClick to Download100%Clean & Safe
Bottom Line
If your default printer keeps changing, do not worry. Just follow this step-by-step guide to resolve the issue.
For more help with “default printer changes automatically” or MiniTool Power Data Recovery, please feel free to contact us via [email protected].
![[Fixed]: Computer Freezes When Trying to Print Windows 10/11](https://mt-test.minitool.com/images/uploads/2023/06/computer-freezes-when-trying-to-print-thumbnail.png)
