Does Shrink Volume Delete Data
Partition shrinking is the process of reducing partition space and creating unallocated space. It is an effective means to reasonably manage disk space, optimize disk performance, and reduce partition backup time. However, many users have this question before shrinking a partition: Will shrinking a disk partition delete the data in the partition?
No. Disk partition compression will only compress the available space and will not affect the space with existing data. Therefore, partition shrinking will not directly delete disk files. Nonetheless, for data security and integrity, we still recommend that you back up important data before shrinking the disk. MiniTool ShadowMaker (30-day free trial) is a professional and reliable file/partition/disk backup tool that is worth trying.
MiniTool ShadowMaker TrialClick to Download100%Clean & Safe
In the next part, we describe how to shrink a volume with diskpart.
Steps: Diskpart Shrink Partition Without Losing Data
Here are the major steps to shrink a partition with CMD in Windows.
If you need to shrink a partition on an external hard drive or removable USB drive, you should connect the drive to your computer via a USB cable.
Step 1. Type cmd in the Windows search box, right-click Command Prompt from the best match result, and then select Run as administrator.
Step 2. Select the Yes option when you see the User Account Control window.
Step 3. Type the following command lines, and press Enter after each command.
- diskpart
- list volume
- select volume # (replace # with the volume number, e.g., select volume 10)
- shrink desired = * (replace * with the amount of space you want to shrink, e.g., shrink desired = 1024)
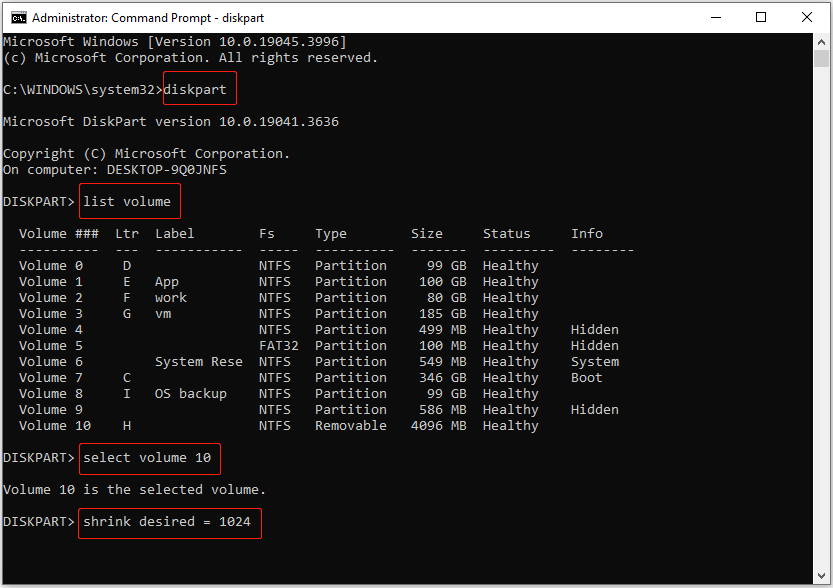
This is all about “diskpart shrink partition without losing data”. If you are not familiar with command lines, you can opt for a more intuitive way to shrink a disk partition, such as using Disk Management and professional partition magic, MiniTool Partition Wizard.
Alternative Ways to Shrink a Disk Partition
Way 1. Use Disk Management
To shrink a partition in Disk Management, you can implement the following steps.
Step 1. On the taskbar, right-click the Start button to select the Disk Management option.
Step 2. Right-click the target partition that you want to shrink, then choose the Shrink Volume option from the context menu.
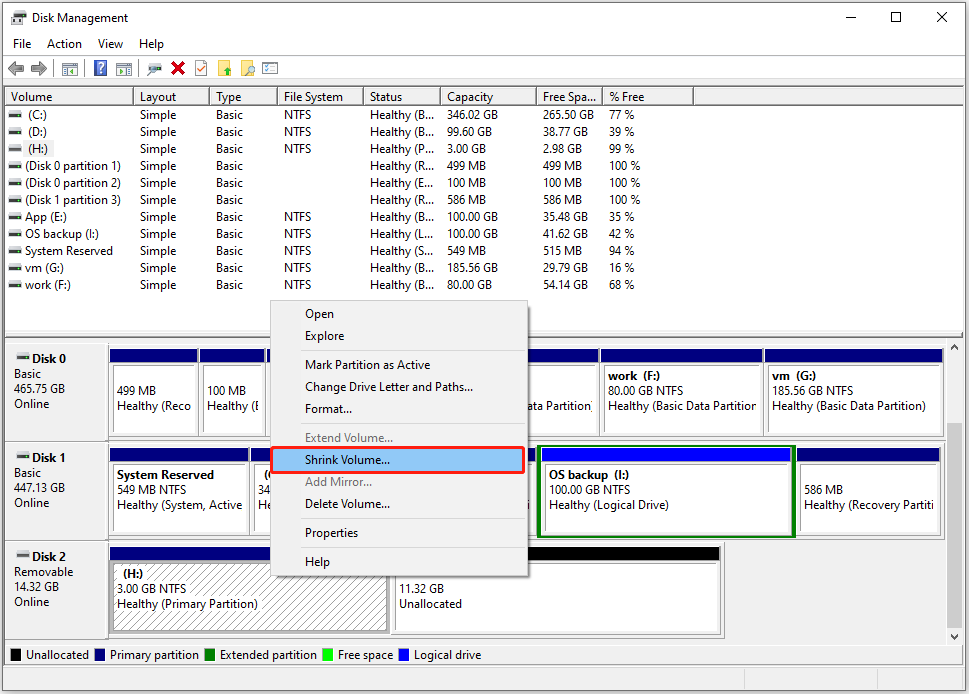
Step 3. In the new window, input the amount of volume space you want to shrink, then click the Shrink button.
Way 2. Use MiniTool Partition Wizard
If volume shrinking is taking forever or you want to shrink a FAT32 (and the NTFS) volume, you can use MiniTool Partition Wizard, a free and reliable disk management tool.
Step 1. Download, install, and launch MiniTool Partition Wizard Free on your PC.
MiniTool Partition Wizard FreeClick to Download100%Clean & Safe
Step 2. Select the partition you want to shrink, then click Move/Resize Partition from the left panel. In the pop-up window, drag the handle left and right to determine the required partition size and unallocated space. After that, click OK.
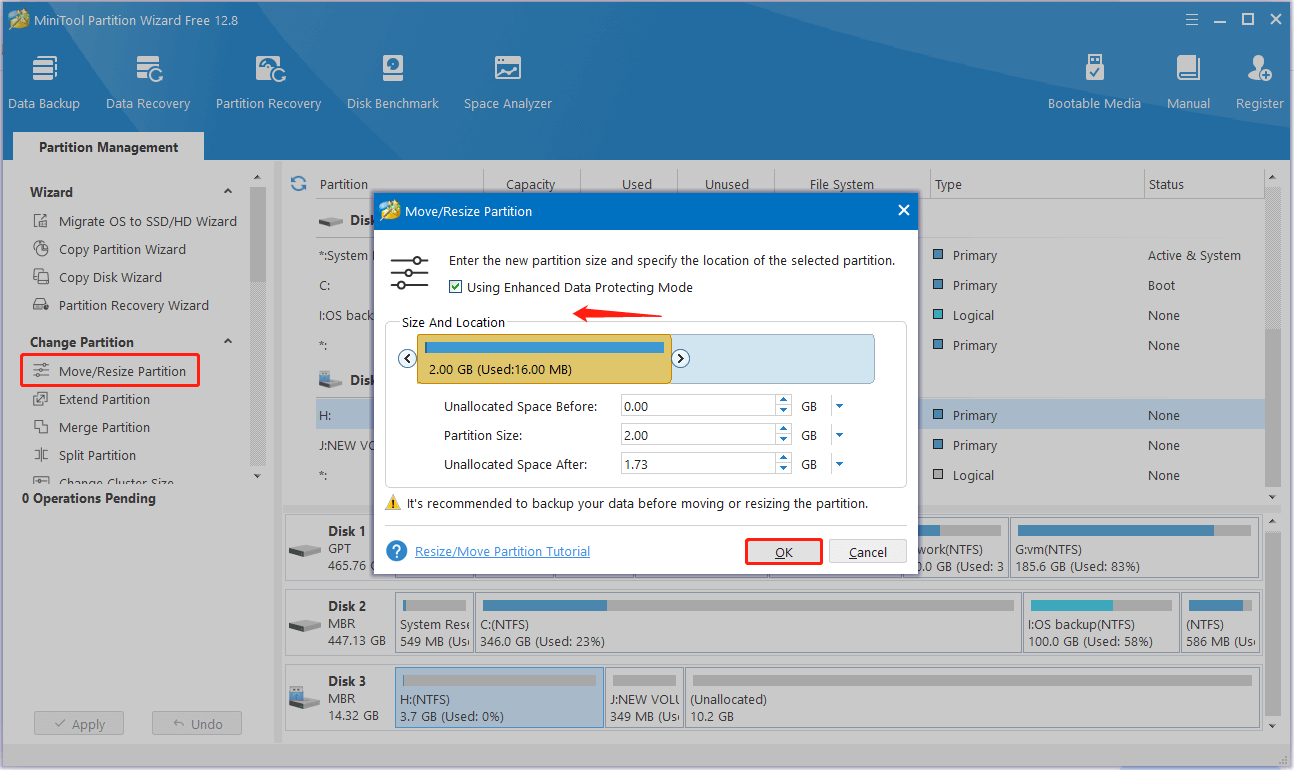
Step 3. Click the Apply button to complete the partition shrinking process.
MiniTool Power Data Recovery FreeClick to Download100%Clean & Safe
Conclusion
If you are searching for information about “diskpart shrink partition without losing data”, we believe you have a comprehensive understanding. Besides, you can choose to shrink a partition via other disk managers like Disk Management and MiniTool Partition Wizard.
Please feel free to send an email to [email protected] if you need any assistance from the MiniTool support team.
