SmartScreen can keep your computer safe and many users want to know how to enable/disable SmartScreen on Windows 11. If you are one of them, you can refer to this post from MiniTool. Here are 3 ways.
Microsoft Defender SmartScreen is a part of Windows Security. It helps you protect against common threats by warning against downloading or installing potentially malicious files from other computers. This feature is enabled by default in Windows. However, sometimes you may want to enable or disable SmartScreen on Windows 11 by yourself.
MiniTool ShadowMaker TrialClick to Download100%Clean & Safe
The following part introduces 3 ways for you to enable or disable SmartScreen on Windows 11.
Way 1: Via Settings
You can go to Windows Security settings to enable or disable SmartScreen on Windows 11. Here is how to do that:
1. Press the Windows + I keys together to open the Settings application.
2. Click Privacy & security > Windows Security > Open Windows Security.
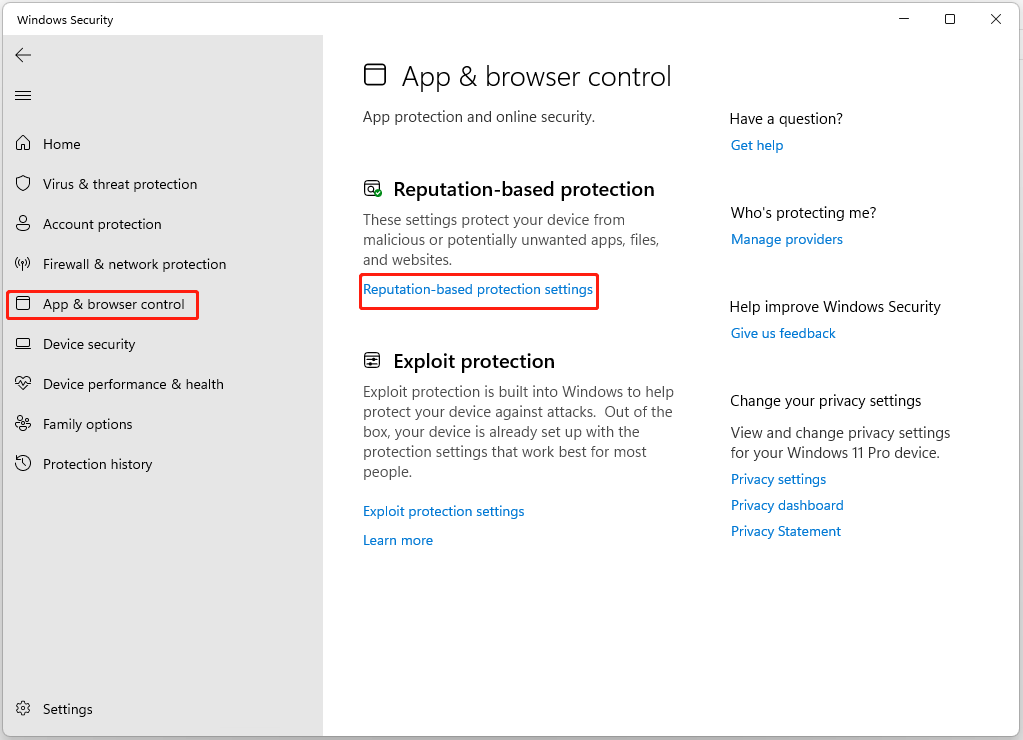
3. Go to the App & browser control part. Under Reputation-based protection, click Reputation-based protection settings.
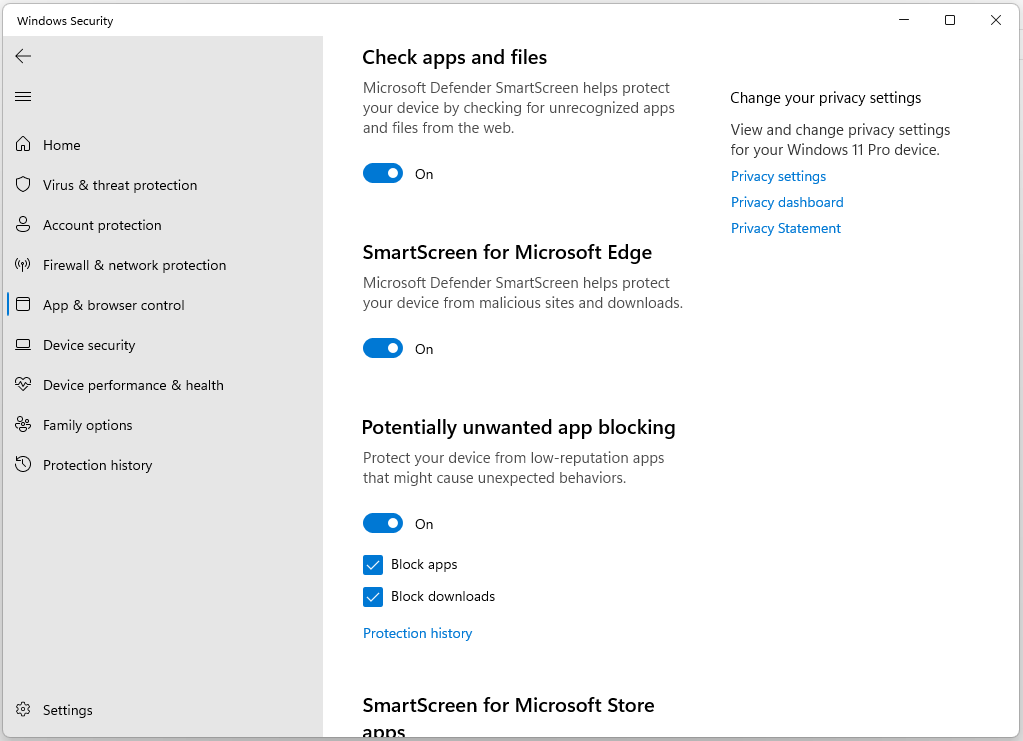
4. Then, you can enable or disable Check apps and files and Potentially unwanted app blocking. The other two filters are for Microsoft Edge and Microsoft Store apps.
Way 2: Via Local Group Policy Editor
You can turn on or off the Windows Defender SmartScreen using Local Group Policy Editor.
1. Press Windows + R to open Run. Type gpedit.msc and click OK to open Group Policy Editor.
2. Go to the following path:
Computer Configuration > Administrative Templates > Windows Components > File Explorer
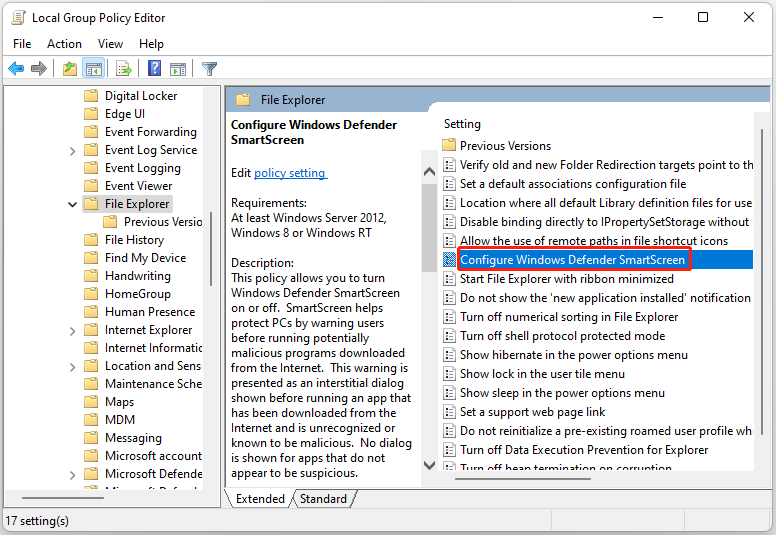
3. Find the Configure Windows Defender SmartScreen option in the right panel.
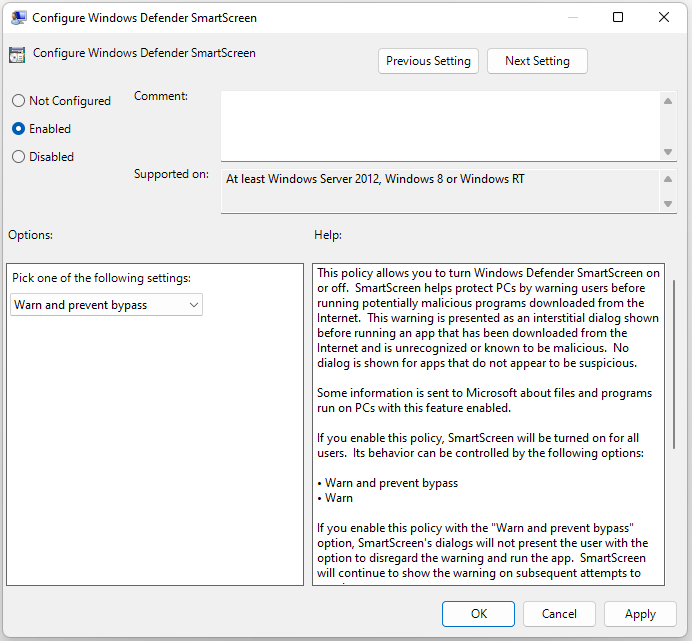
4. Double-click it. Then, you can click Enabled or Disabled and click Apply and OK to save the changes.

Way 3: Via Registry Editor
You can also turn on or off the Windows Defender SmartScreen using Registry Editor. Follow the guide below:
1. Press the Windows logo key and the R key at the same time to open the Run dialog.
2. Type regedit and then press Enter to open Registry Editor. You’ll be prompted for permission and please click Yes to open it.
3. Go to the following path:
HKEY_LOCAL_MACHINE\SOFTWARE\Policies\Microsoft\Windows\System
4. From the left-hand side, right-click the System Registry key and choose New > DWORD (32-bit) value, and name it as EnableSmartScreen.
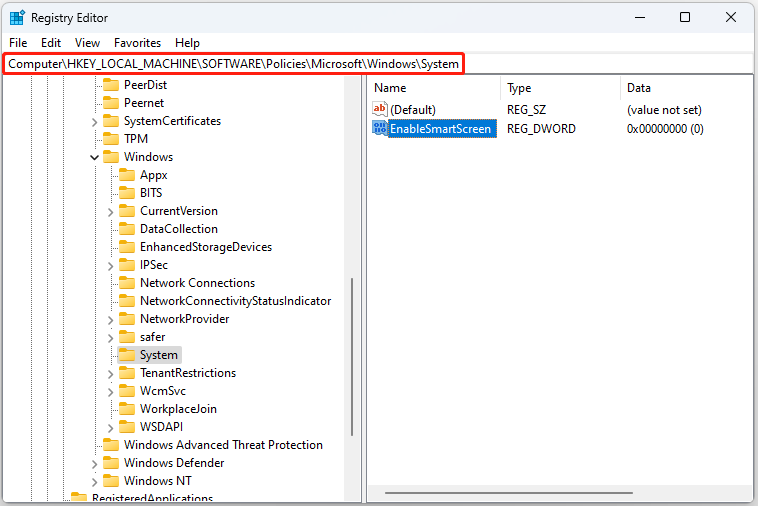
5. Then, double-click it to change its value data to 0.
![How to Enable Windows Defender Application Guard? [5 Ways]](https://mt-test.minitool.com/images/uploads/2023/07/how-to-enable-windows-defender-application-guard-thumbnail.jpg)
Final Words
How to enable or disable SmartScreen on Windows 11? This post provides 3 ways and you can choose one of them based on your needs. I hope that this post can be useful to you.
About The Author

Position: Columnist
Having been an editor at MiniTool since graduating college as an English major, Daisy specializes in writing about data backups, disk cloning, and file syncing as well as general computer knowledge and issues. In her free time, Daisy enjoys running and going with friends to the amusement park.