What is DISM?
DISM refers to DISM.exe, which is a command-line tool that can be used to service and prepare Windows images (.wim) or virtual hard disks (.vhd or .vhdx). DISM is built into all versions of Windows and you can access it from the command line or Windows PowerShell. See what you can do if DISM /Online /Cleanup-image /Restorehealth is stuck.
DISM Source Files Could Not be Found Error
“DISM /Online /Cleanup-Image /RestoreHealth” is one of the frequently used commands to repair a Windows image. You can perform this command in Command Prompt tool easily, but people don’t always succeed. The DISM source files could not be found error will show up when DISM failed. It means that the DISM tool on your PC cannot find the source files needed to restore the Windows image.
How to fix “DISM failed. No operation was performed”?
The DISM restore health process could be interrupted in Windows 10 or other Windows systems. But I’ll take the failure of DISM Online Cleanup Image RestoreHealth Windows 10 as an example to show you how to fix the problem in different ways.
MiniTool Power Data Recovery TrialClick to Download100%Clean & Safe
Causes of “The Source Files Could Not Be Found”
The source files could not be found error message may come with an error code like 0x800f081f or 0x800f0906 or 0x800f0907. There are 4 main reasons for causing it:
- The DISM tool cannot find the files you need to repair online (in Windows Update or WSUS).
- The Windows image file (install.wim) specified as the repair source is not correct.
- The install.wim or install.esd file used as the repair source contains several install.wim files.
- The Windows.ISO file used as the repair source may be damaged or incorrect (it cannot match the version, edition, and architecture 32 or 64 bit of your installed Windows).
Fix DISM Source Files Could Not Be Found Windows 10
What to do when encountering Windows 10 DISM source files could not be found? Please follow the fixes below.
#1. Use Windows Repair Upgrade
Step 1: download Windows Repair Upgrade tool.
- Visit this Microsoft page.
- Click on the Download tool now button to get Windows Media Creation tool.
- Run the installer. Then, accept the license terms and conditions.
- Click Upgrade this PC now.
- Click Next.
- Wait for the actions to end.

Step 2: start the Windows repair process on your PC.
- Press Windows + S.
- Type cmd.
- Right click on Command Prompt.
- Select Run as administrator.
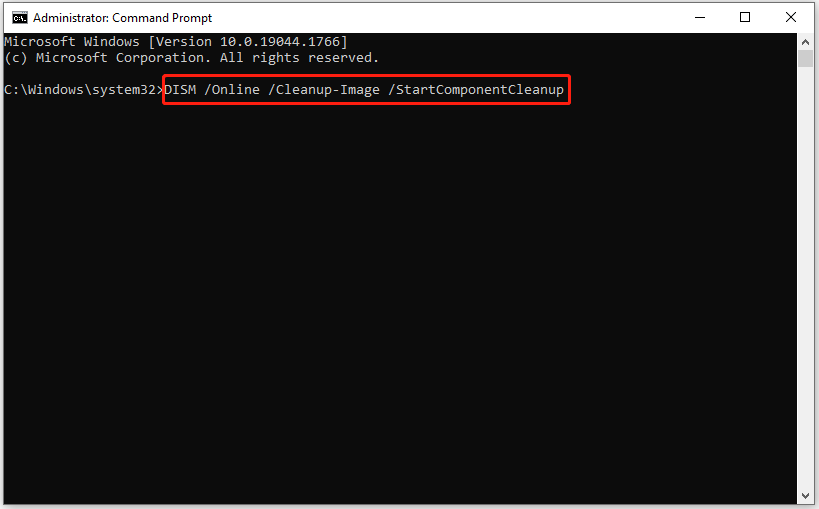
- Type DISM /Online /Cleanup-Image /StartComponentCleanup and press Enter.
- Type DISM /Online /Cleanup-Image /RestoreHealth and press Enter.
- Type sfc /scannow and press Enter.

How To Recover Files Using CMD: Ultimate User Guide?
#2. Clean & Analyze the WinSXS Folder
- Also, you need to run Command Prompt as administrator.
- Type DISM /Online /Cleanup-Image /StartComponentCleanup and press Enter.
- Type sfc /scannow and press Enter.
- Type DISM /Online /Cleanup-Image /AnalyzeComponentStore and press Enter.
- Type sfc /scannow and press Enter.
- Restart your computer.
#3. Use an Alternative Repair Source in DISM
Step 1: check the Index number on your Windows 10.
- Connect the USB drive that contains the Windows installation media (or mount the ISO file) to your computer.
- Press Windows + E to open File Explorer. Then, go to your USB drive.
- Double click on the Sources folder to check whether it contains an install.wim or install.esd file.
- Run Command Prompt as administrator.
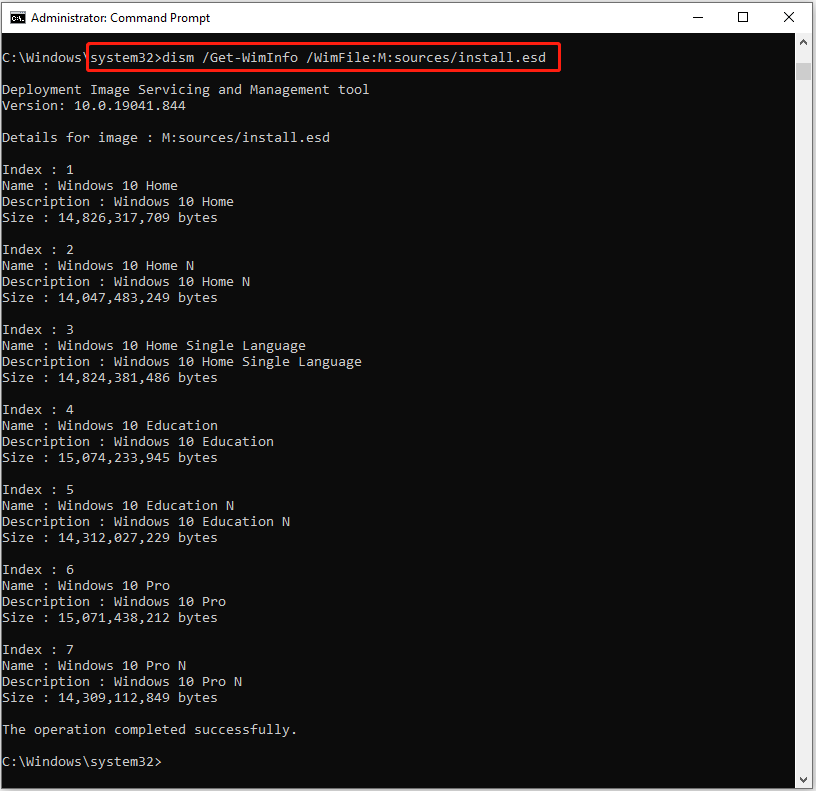
- Type dism /Get-WimInfo /WimFile:*:sources/install.wim or dism /Get-WimInfo /WimFile:*:sources/install.esd (* represents the drive letter). Then, press Enter.

Step 2: repair Windows 10. Please replace * with the drive letter of your USB drive and type the correct Index Number.
- If the Sources folder contain an install.wim: type DISM /Online /Cleanup-Image /RestoreHealth /Source:WIM:*:\sources\install.wim:IndexNumber /LimitAccess and press Enter.
- If the Sources folder contain an install.esd: type DISM /Online /Cleanup-Image /RestoreHealth /Source:ESD:*:\sources\install.esd:IndexNumber /LimitAccess and press Enter.
Step 3: wait for the operation to complete.
In addition, you can try to specify an alternative repair source by using Registry Editor or Local Group Policy Editor when system tells you the DISM source files could not be found.
What about DISM error 2? How to fix it when finding DISM unable to access the image?
