Sometimes, when you want to connect a wireless network on Windows 10, you discover that Wi-Fi stuck on checking network requirements. Don’t worry. In this post, we show you two useful solutions. Additionally, you also need to pay attention to the data security situation on your computer. MiniTool Software can offer you some available solutions.
Wi-Fi Stuck on Checking Network Requirements
When you want to connect to a wireless network in Windows, you may come across some issues. This is a common situation, but it is an annoying case.
Compared to Windows 7 and Windows 8, Microsoft has made some improvements in Windows 10 to solve some issues related to wireless connection. However, this can’t solve all issues about the Wi-Fi network connection. Some of you are still bothered by Wi-Fi stuck on checking network requirements.
When you are trying to connect a wireless network on your computer, two common consequences happen:
- Windows connects to the wireless network successfully
- Windows shows up an error message Can’t connect to this network.
But, if Windows spends a long time checking network requirements, there should be something wrong with the drivers or the network adapter. If you don’t want Wi-Fi checking network requirements forever, you can perform the following 2 fixes to solve this issue.
Fix 1: Update or Reinstall the Drivers
Many users have reported that they get rid of stuck at checking network requirements by upgrading the Network drivers. So, here we will introduce this solution to you.
Update the Network Adapter
Step 1: Press Win and R buttons at the same time to open Run.
Step 2: Type in the following command and press Enter to enter the Device Manager:
devmgmt.msc
Step 3: Find the Network adapters section and press it to open the list.
Step 4: Right-click on the related network adapter and then choose Update Driver Software.
Step 5: Follow the wizard to finish the update process.
When the updating process finishes, you need to reboot your computer to see whether you can connect to the Wi-Fi wireless connection successfully. If your computer still stuck at checking network requirements, you can reinstall the Network adapter to have a try.
Reinstall the Network Adapter
Step 1: Open Device Manager.
Step 2: Use the same method mentioned in the Updating Adapter Driver part to find the related network adapter. Then, right-click on it and choose Uninstall.
Step 3: Follow the guide to uninstall the Adapter driver.
When the uninstalling process ends, you still need to restart your computer and then Windows will reinstall the Network Adapter automatically.
Regarding these two cases, you can also download the latest Network drivers from the manufacturer’s website and then install them.
Fix 2: Use the Network Adapter Troubleshooter
Using the Network Adapter Troubleshooter is also proved to be effective to solve the Wi-Fi checking network requirements forever issue.
It is also easy to operate. You just need to follow these steps:
Step 1: Click on the Start button on the desktop or press the Win button on the keyword.
Step 2: Go to Settings > Network & Internet > Ethernet.
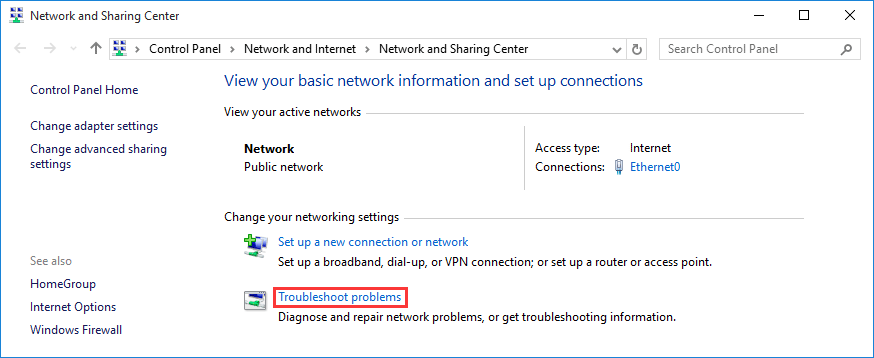
Step 3: Press the Network and Sharing Center option from the right list.
Step 4: Choose the Troubleshoot problems option.

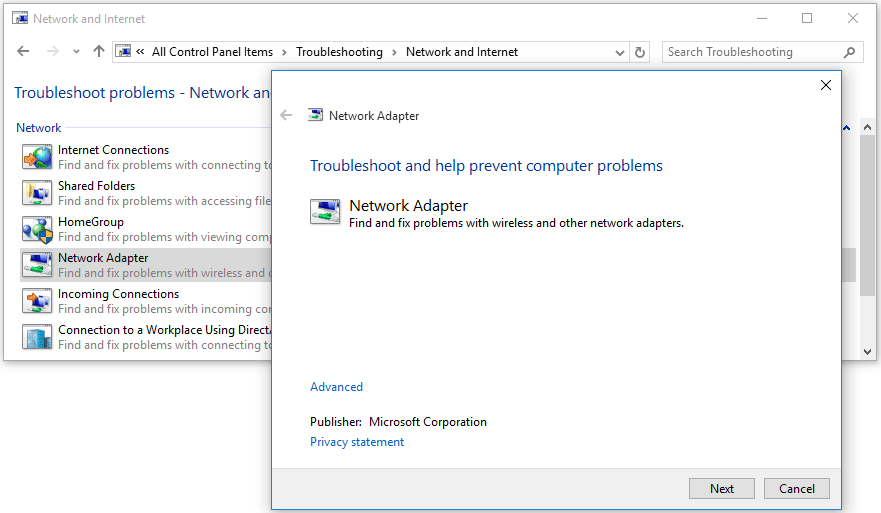
Step 5: Choose Network Adapter and press Next on the popup interface to continue.

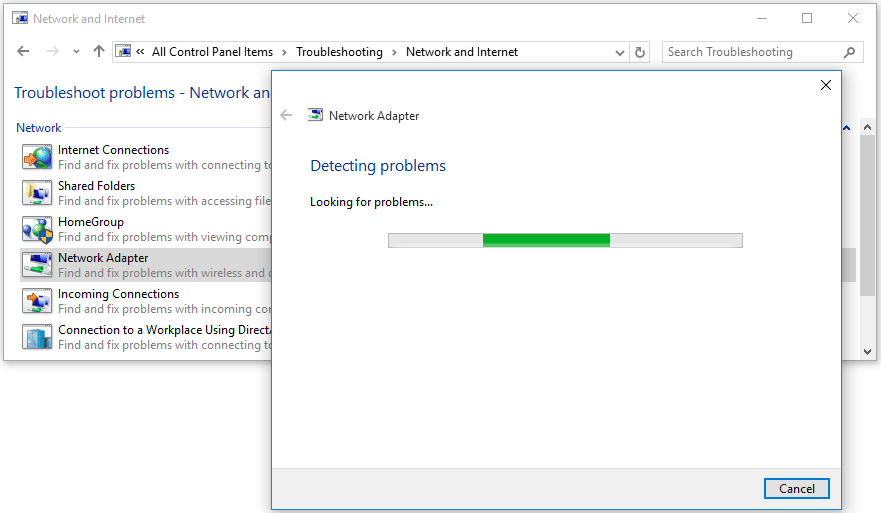
Step 6: The troubleshooter will begin to detect issues on the Network adapter. After that, you can follow the guide to finish the work.

At last, you can go to check whether the Wi-Fi stuck on checking network requirements issue ends
While, if you are bothered by the can’t connect to this network message, you can go to find some methods on the internet.
