Windows will record everything that occurs on your operating system. When the peripherals connected to your computer are conflicted with your computer, you need to inspect which device is the culprit. This post from MiniTool Solution provides you with 3 ways on how to check USB history on your computer.
Why Do You Need to View USB Device History?
Windows keeps logs of a history of device connections on your computer. All the USB devices that are connected to and unplugged from your computer. When you need to troubleshoot your connected peripherals, you can view the USB device history on your PC.
How to check USB history? In the following paragraphs, we will show you 3 ways to do that. Without further delay, let’s get started!
How to Check USB History via Windows PowerShell?
Windows PowerShell is designed to automate system tasks, create system management tools for commonly implemented processes and more. If you don’t want to check USB history via third-party software, you can use some commands in Windows PowerShell to generate a list of USB storage devices currently or previously connected. To do so:
Step 1. Right-click on the Start icon and select Windows PowerShell (Admin).
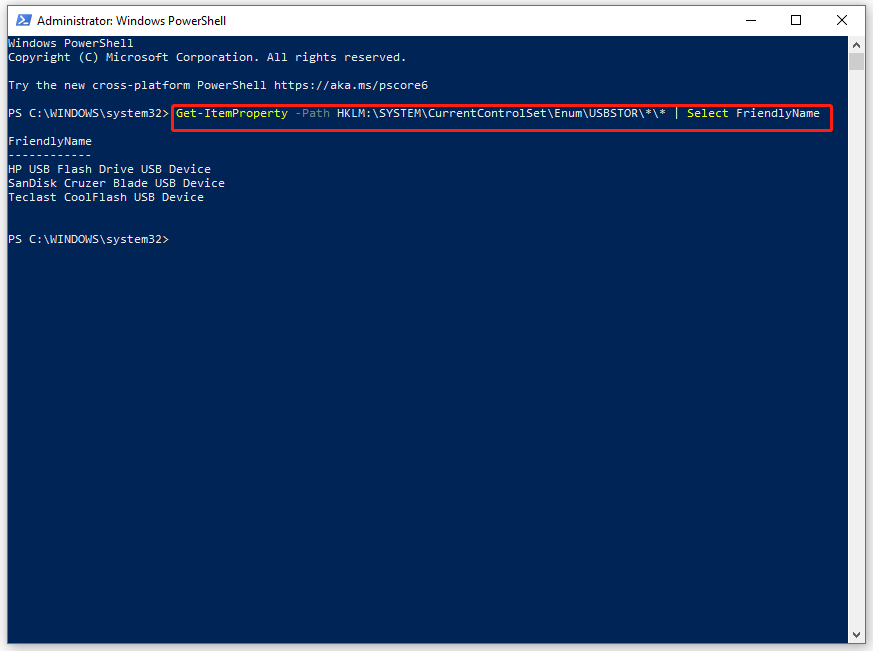
Step 2. In the command window, type the following command and then tap on Enter to view a user-friendly list of the USB storage devices:
Get-ItemProperty -Path HKLM:\SYSTEM\CurrentControlSet\Enum\USBSTOR\*\* | Select FriendlyName
How to Check USB History via Registry Editor?
When the software or hardware is being used, changes made to them will be updated in Windows Registry. Therefore, you can also view USB history via it. Here’s how to
Step 1. Press Win + R to evoke the search bar.
Step 2. Type registry editor and hit Enter.
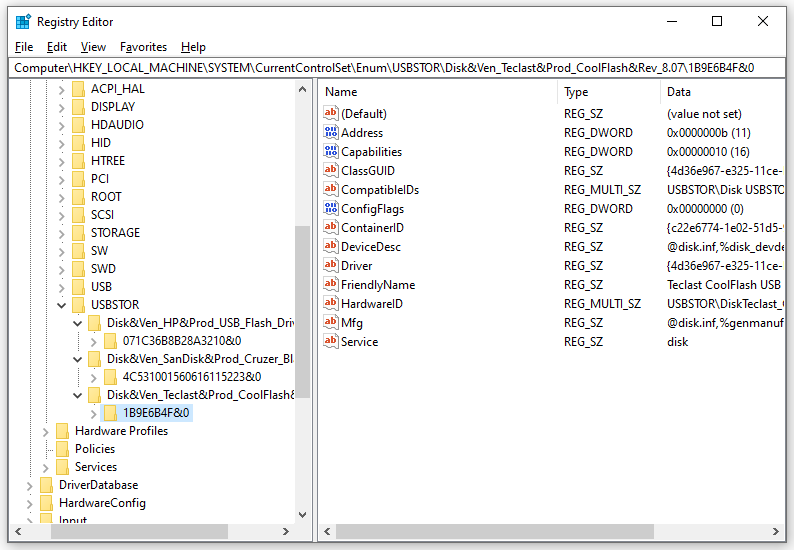
Step 3. Navigate to the following path:
HKEY_LOCAL_MACHINE\SYSTEM\CurrentControlSet\Enum\USBSTOR
Step 4. Under the USBSTOR folder, you can see keys named with all your USB devices. You can expand each one and check for more information about them in the right pane.
How to Check USB History via Event Viewer?
Also, you can view USB history via Event Viewer. This utility provides a log of applications and system messages. Here’s how to check USB usage history via it:
Step 1. Press Win + S to open the search bar.
Step 2. Type event viewer and hit Enter.
Step 3. Expand Application and Services Logs > Microsoft > Windows > DriverFrameworks-UserMode > Operational.
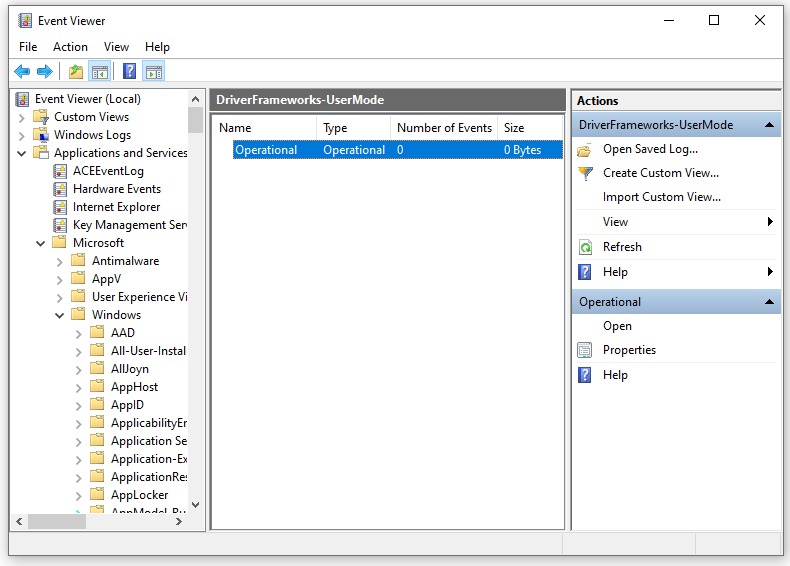
Step 4. By default, this log is disabled, so you need to enable it manually. To do so: click on Properties in the right pane > tick Enable Logging > save the changes.
Suggestion: Back up Anything Important with MiniTool ShadowMaker
Incorrect ejection of a USB drive might damage the file system, making it difficult to access the data on the device. Therefore, to safeguard your data, you had better back up crucial data with a piece of free PC backup software called MiniTool ShadowMaker.
This tool supports backing up and restoring files, folders, the Windows system, selected partitions, and even the whole disk. With a backup copy in hand, it will be much easier to regain your data. Here’s how to create a file backup with it:
Step 1. Launch MiniTool ShadowMaker and hit Keep Trial.
MiniTool ShadowMaker TrialClick to Download100%Clean & Safe
Step 2. In the Backup page, hit SOURCE > select Folders and Files > pick the files you want to protect. Then, go to DESTINATION to choose a storage path for the backup image.
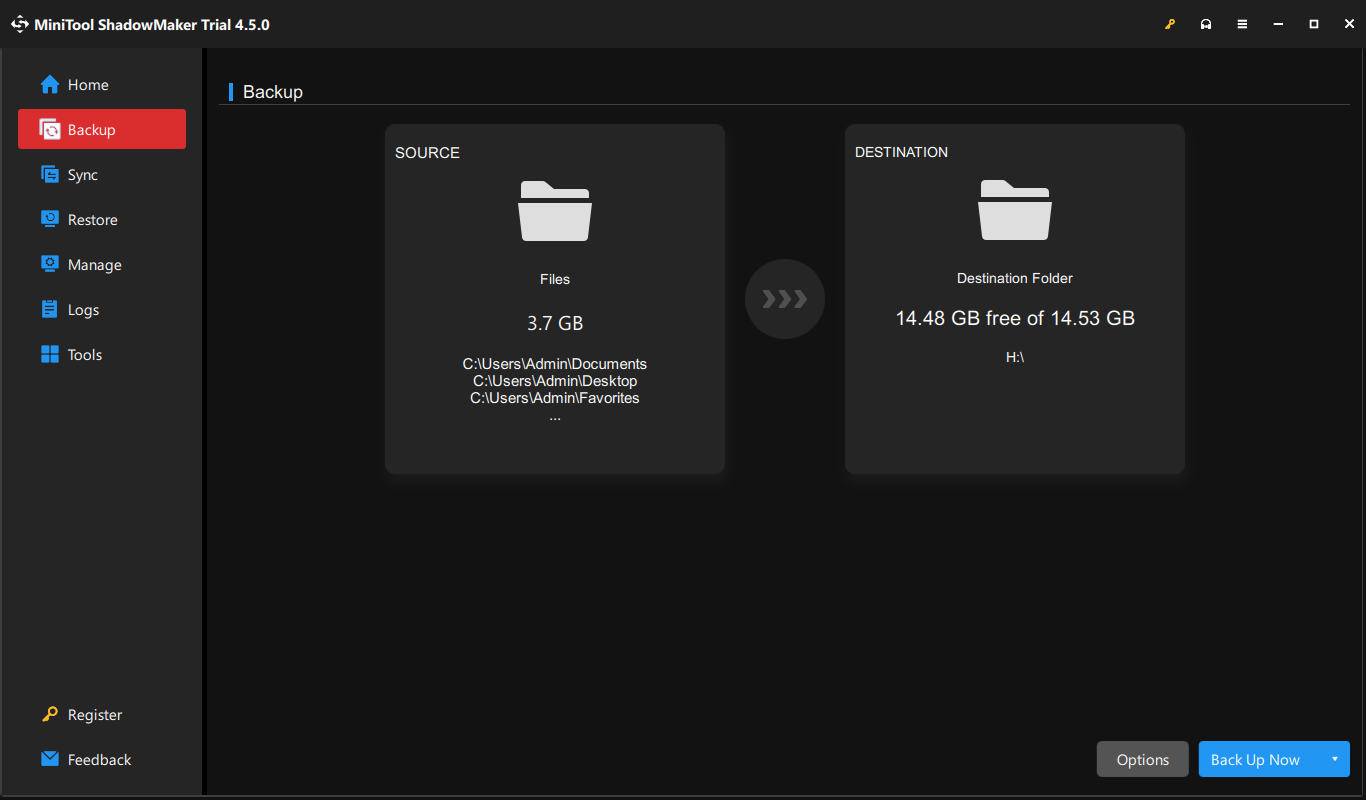
Step 3. Click on Back Up Now to start the process at once.
Final Words
This post illustrates how to detect USB history in 3 ways. Which method do you prefer? Moreover, it is highly suggested to back up important items with MiniTool ShadowMaker to avoid any potential data loss. We sincerely hope that your data can always be safe and sound!
