The Significance of Creating Hidden Partitions on USB Drive
USB drives are commonly used due to their portability, versatility, and plug-and-play nature. Typically, USB drive files can be easily accessed by everyone just by plugging the USB drive into the computer. While this is convenient, it can sometimes put your files at risk of being leaked or lost. To avoid this risk, you can create USB hidden partitions.
Once the USB drive partition is hidden, it won’t be accessible in File Explorer. This greatly improves the security of your files on the disk. There are many ways to set up hidden partitions, which are introduced in detail below.
How to Create Hidden Partition on USB Drive Windows 10
Method 1. Use MiniTool Partition Wizard
First, you can opt for a green and free partition manager to create hidden partition on USB drive. Here we recommend you use MiniTool Partition Wizard due to its versatility, ease of use, and security. As an all-in-one disk management tool, it can help hide/unhide partitions, create/delete partitions, extend/shrink partitions, format partitions, etc.
Now, download MiniTool Partition Wizard and use it to create a hidden partition on USB drive for free.
MiniTool Partition Wizard FreeClick to Download100%Clean & Safe
Step 1. Insert the USB drive into your computer.
Step 2. Launch MiniTool Partition Wizard Free to enter its home page. Select the partition of the USB drive, and then scroll down the left action panel to choose Hide Partition.
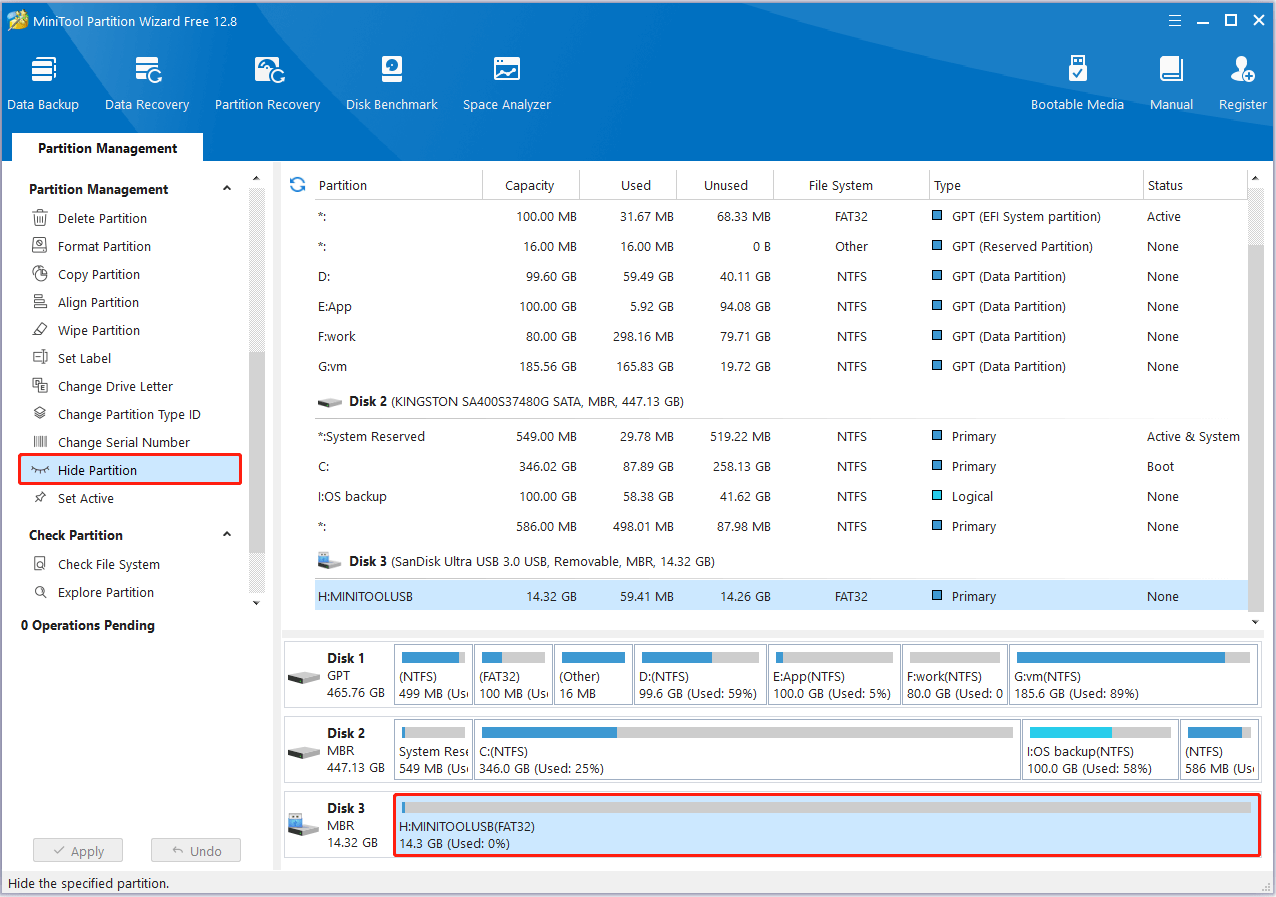
Step 3. Finally, click the Apply button on the bottom left corner to make this change take effect. Once completed, the USB drive will not be accessible through File Explorer and Disk Management until you unhide the partition.
Method 2. Remove the Drive Letter
A disk that is not assigned a drive letter will not be displayed in File Explorer and the data on it cannot be directly accessed. So, if you want to create hidden partition on USB drive, you can remove the drive letter. Here are two ways to perform this task.
Option 1. Use Disk Management
Here is how to create hidden partition on USB drive by removing the drive letter in Disk Management.
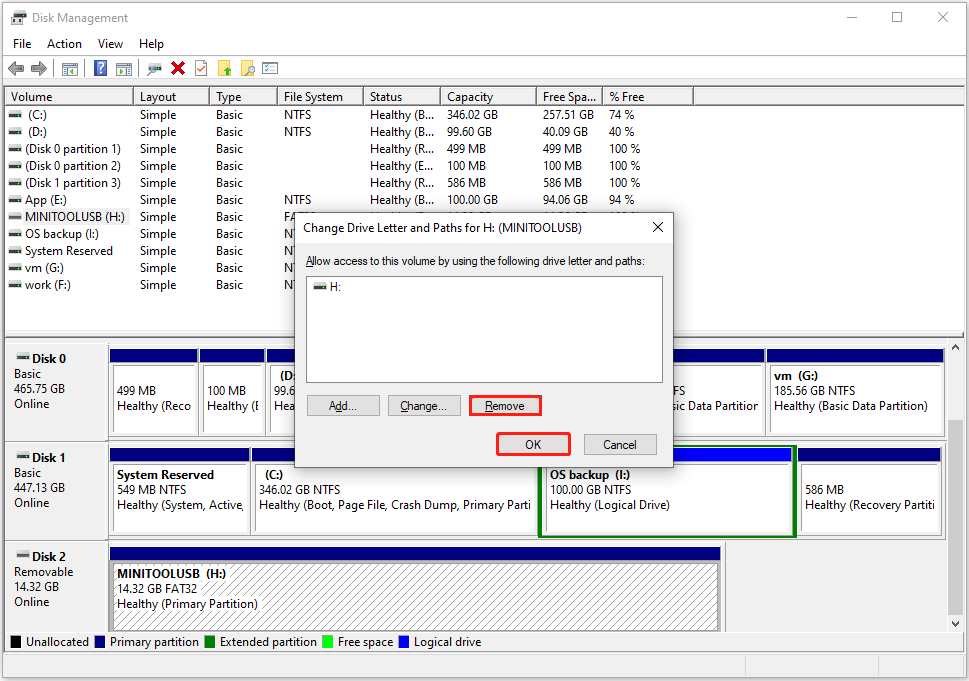
- Right-click the Start button on the taskbar and choose Disk Management.
- Right-click the partition on the USB drive and select Change Drive Letter and Paths.
- In the new window, select Remove > OK.
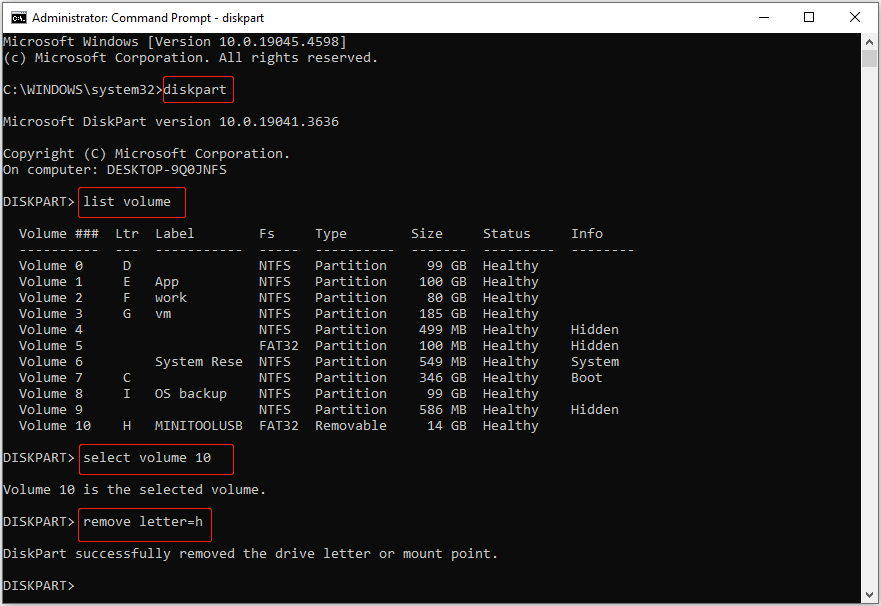
Option 2. Use CMD
In this section, you can see how to remove the drive letter by using command lines.
First, type cmd in the Windows search box. Once the Command Prompt window appears, select Run as administrator from the right panel.
Second, type the following command lines. Remember to press Enter after each command to execute it.
- diskpart
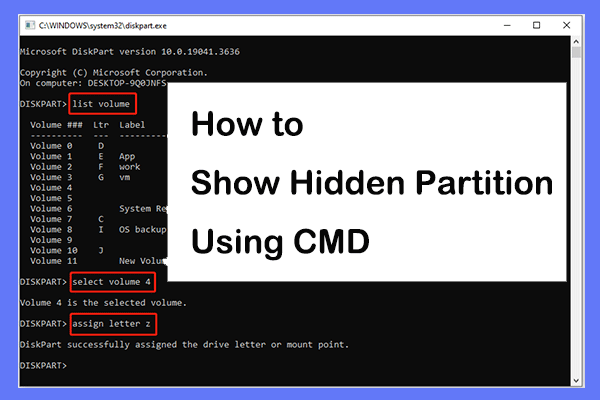
- list volume
- select volume x (replace x with the actual partition number on the USB drive)
- remove letter=x (x represents the drive letter of the USB drive)
Further Reading:
During the disk and partition management process, it is possible to delete significant files or partitions. If you encounter such an issue, you can use MiniTool Power Data Recovery to perform data recovery. This robust file recovery software supports recovering files from existing partitions, lost partitions, and unallocated space.
Download its free edition and employ it to recover 1 GB of files for free.
MiniTool Power Data Recovery FreeClick to Download100%Clean & Safe
Closing Words
In a word, this post introduces how to create hidden partition on USB drive by using MiniTool Partition Wizard, Disk Management, and CMD. Hope can you protect your USB files in this way.
