Can I Delete Unallocated Space
Unallocated space refers to the space on the disk that does not belong to any partition, does not contain any file system, and cannot be used. This space will not be automatically allocated to other partitions, nor will it disappear automatically. Thus, many users have raised such questions: Is it possible to delete unallocated space?
Unfortunately, you cannot delete the unallocated space directly. So, how to remove unallocated space in Windows 10/11? Two methods are available for this goal:
- Create a new partition on the unallocated space: You can create a new data partition on the unallocated space to store files. Also, you can create multiple partitions to store different types of data.
- Extend the unallocated space to an existing partition: In addition to creating new partitions, you can also extend unallocated space to an existing partition to expand the data storage capacity of this partition.
Next, we will show you how to delete unallocated space by creating and extending a partition.
How to Delete Unallocated Space in Windows 10/11
Way 1. Create a New Partition
(1). Create a Partition via Disk Management
To create a new partition, you can make use of the Disk Management tool. This tool displays detailed information about each drive on your PC and all partitions for each drive and allows you to move, expand, shrink, etc. these partitions.
Here is how to create a new partition in Disk Management.
Step 1. Right-click the Windows logo button to select Disk Management.
Step 2. Right-click the unallocated space to choose New Simple Volume.
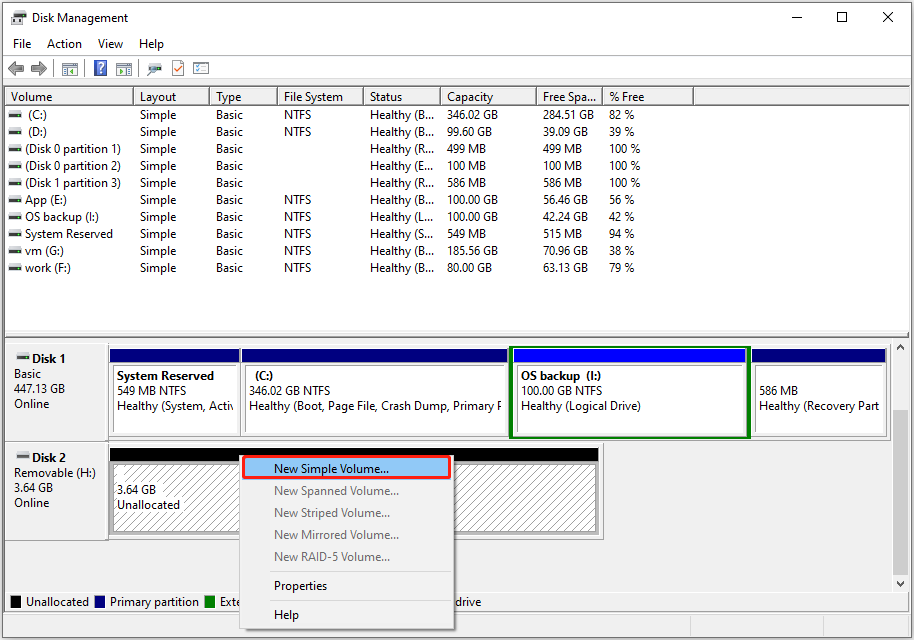
Step 3. Follow the on-screen instructions to specify the volume size, drive letter, file system, and other values. Finally, click the Finish button, and then the unallocated space is removed.
(2). Create a Partition via MiniTool Partition Wizard
If you cannot create a new volume on the unallocated space because New Simple Volume is grayed out or due to some other reason, you can choose to create a new partition via a professional and free partition manager – MiniTool Partition Wizard. With this tool, you can remove unallocated space for free.
Step 1. Download, install, and launch MiniTool Partition Wizard.
MiniTool Partition Wizard FreeClick to Download100%Clean & Safe
Step 2. On its main interface, select the unallocated space, then click the Create Partition option from the left menu bar.
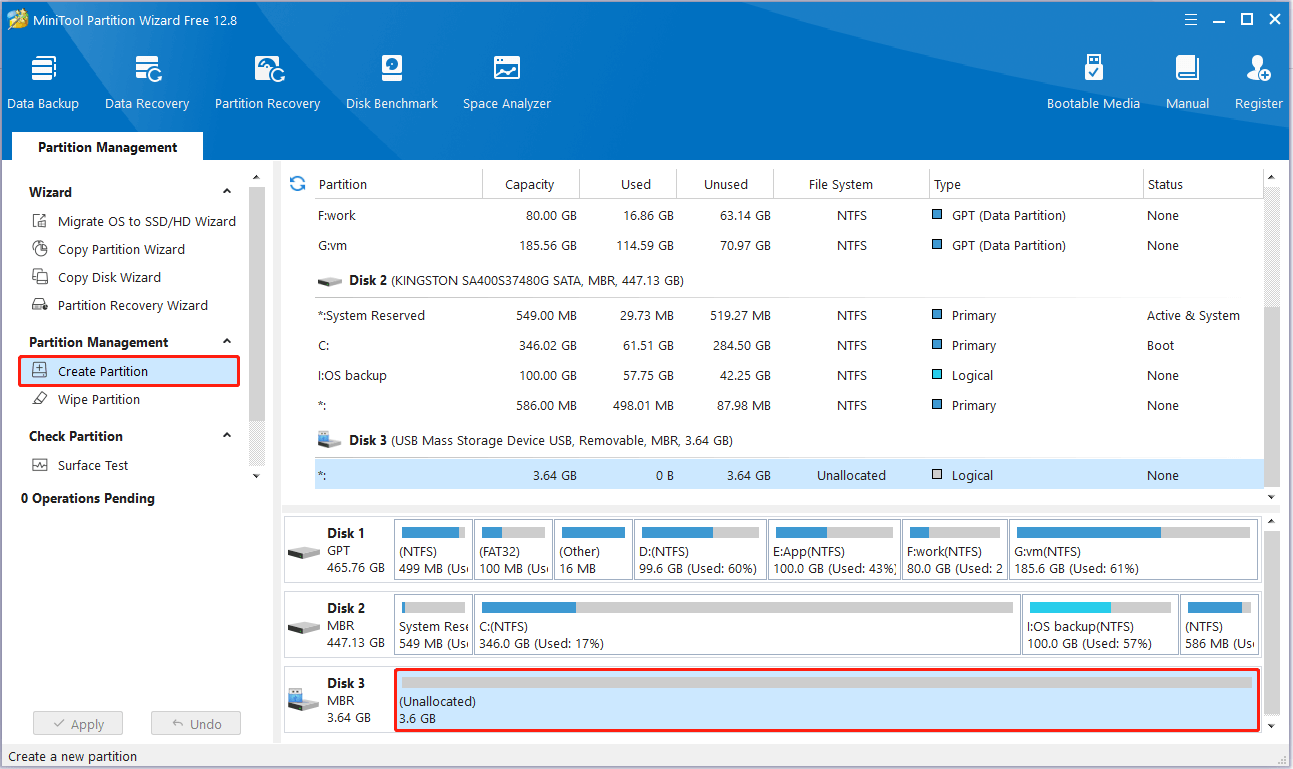
Step 3. In the new window, set up the partition label, drive letter, file system, etc. After that, click OK.
Step 4. Finally, click the Apply button in the lower left corner to make this operation take effect.
This is all about how to remove unallocated partition.
MiniTool Power Data Recovery FreeClick to Download100%Clean & Safe
(3). Create a Partition via CMD
If you are familiar with command lines, you can also choose to create a partition via CMD. The major steps are as follows.
Step 1. Press the Windows + R key combination. Then type diskpart in the text box and click OK. After that, select the Yes option in the pop-up window.
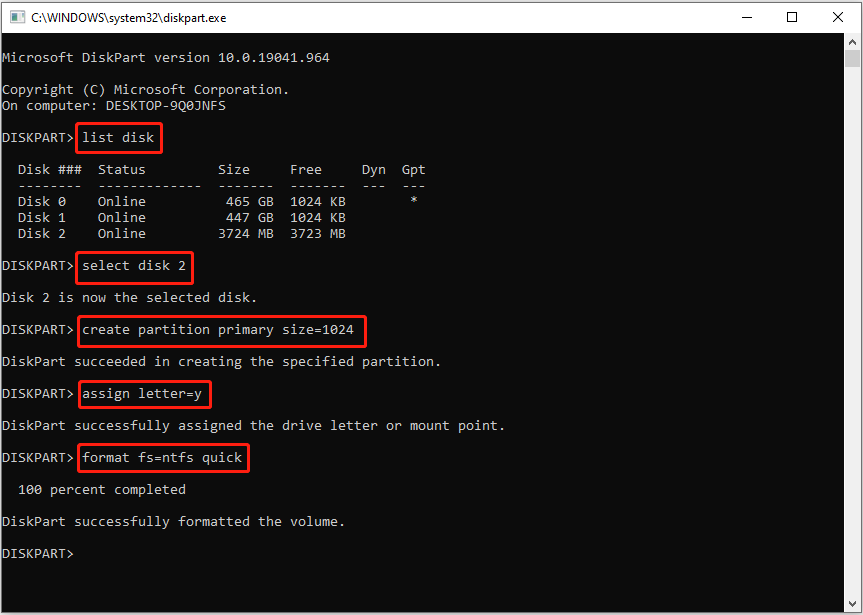
Step 2. In the command line window, type the following commands sequentially. You need to press Enter after inputting each command.
- list disk
- select disk x (x represents the disk number of which has unallocated space)
- create partition primary size=0000 (0000 represents the partition size)
- assign letter=x (replace x with the drive letter you want to assign to the new partition)
- format fs=ntfs quick (replace ntfs with the target file system)
See Also: How to Wipe Unallocated Space in Command Prompt? [Full Guide].
Way 2. Extend an Existing Partition
(1). Extend a Partition With Disk Management
Next, we will explain how to delete unallocated space by extending it to an existing partition using Disk Management.
Step 1. Open Disk Management.
Step 2. Right-click the target partition next to the unallocated space and select Extend Volume.
Step 3. Click Next and then follow the instructions on your screen to complete the necessary actions.
(2). Extend a Partition With MiniTool Partition Wizard
If your partition does not meet the conditions specified by Microsoft, you may encounter the problem of Extend Volume grayed out. In this situation, you can use MiniTool Partition Wizard Free to extend the volume. It breaks Disk Management’s requirement of continuous unallocated space and can help you extend partitions with NTFS and FAT32 file systems.
Step 1. Launch MiniTool Partition Wizard Free.
Step 2. On its home page, select the target partition where you want to extend storage, then click Extend Partition from the left side.
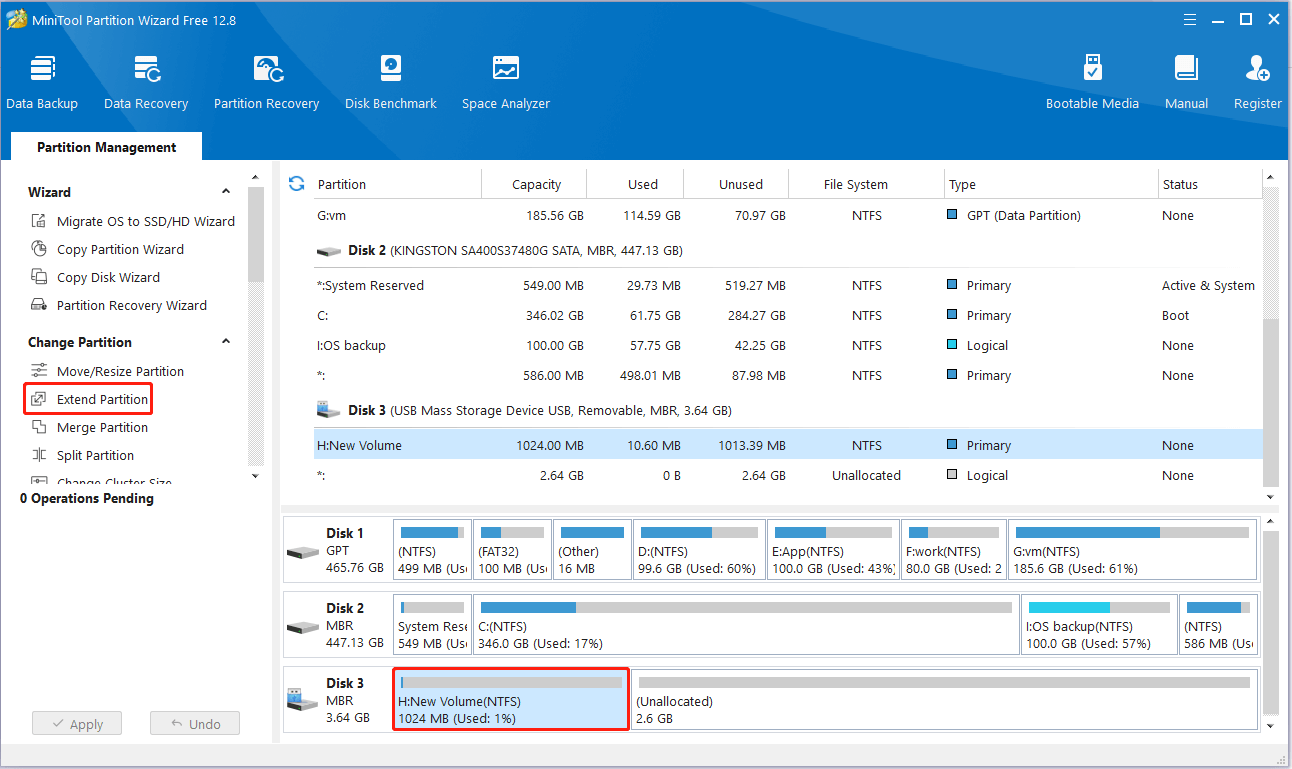
Step 3. Select the unallocated space that needs to be occupied, and then drag the sliding handle to the right to decide how much space to occupy. To remove unallocated space, you need to drag the handle to the end. After that, click OK.
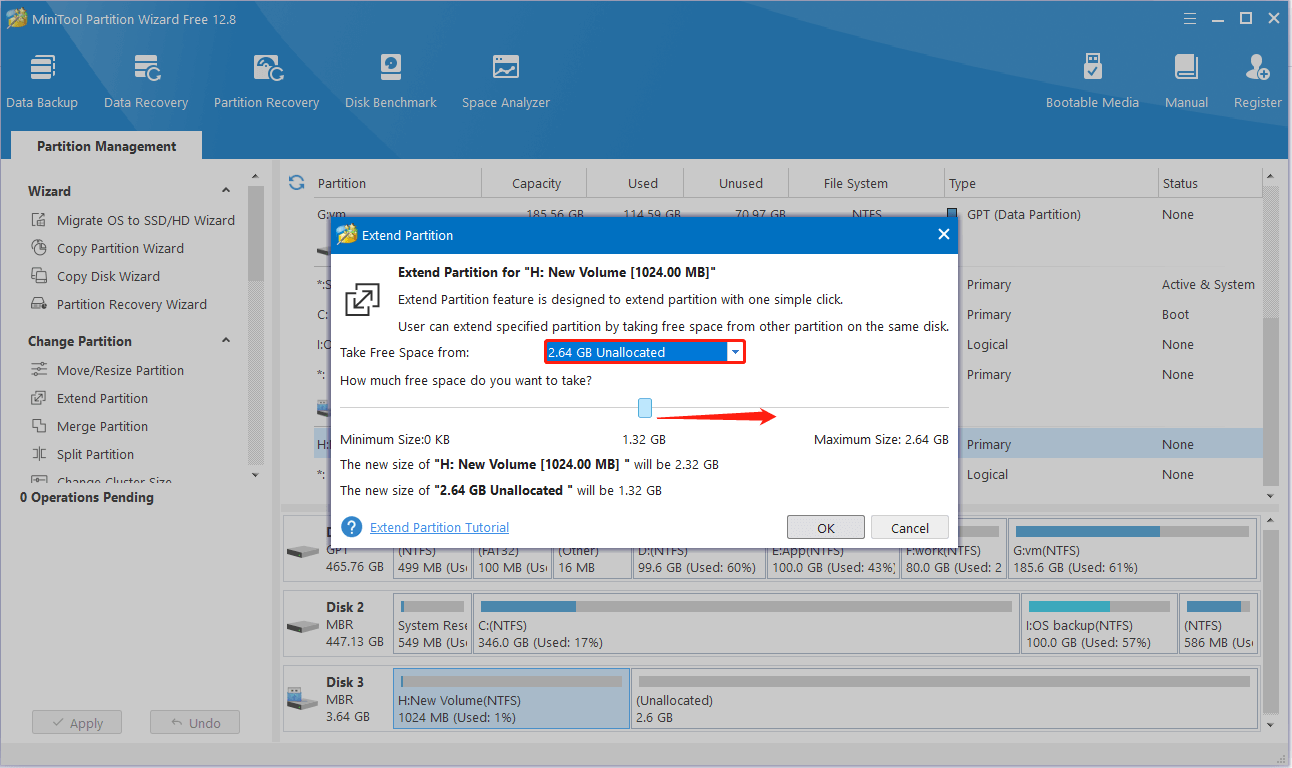
Step 4. Finally, click Apply. Now you won’t see the unallocated space.
Conclusion
This article explains how to delete unallocated space with detailed steps. Hope the instructions are beneficial to you.
Should you have any questions about MiniTool software, please feel free to contact us via [email protected].
![How to Extend the System or Data Partition in Windows 11 [5 Ways]](https://mt-test.minitool.com/images/uploads/2022/07/extend-partition-windows-11-thumbnail.png)