Do you need to download files from the web but hate repeatedly clicking links? PowerShell is a powerful command-line shell that allows you to perform all kinds of management tasks automatically. So, it’s useful and necessary to learn how to download files using PowerShell with the following methods on MiniTool.
Why Use PowerShell to Download Files
When you download files, do you download them by clicking each of them manually? That’s a tedious way. In this article, you will learn how to use PowerShell to download files from command line quickly. There are some benefits of using PowerShell to download files.
- Firstly, unlike before, it will save a lot of time because you can download numerous files at once without clicking each link manually.
- Secondly, it will improve your files and computer safety because it allows you to authenticate with websites that require login credentials to access files.
- Finally, the PowerShell is scriptable, which means you can write a script to automatically download files on a schedule.
What You Should Do Before Downloading
Before starting to download files, you need to meet the minimum system and PowerShell version requirements to make sure you can download a file with PowerShell successfully.
For the device, you should preferably use a computer with Windows 10 or later. For Windows PowerShell, PowerShell 5.1 or PowerShell 7.1 is recommended. For your information, Windows 10 already includes Windows PowerShell 5.1.
How to Download Files Using Windows PowerShell
Regardless of which methods you use, the underlying logic and components are the same. You need an original URL that points to the file location and a target path that will be used to store the downloaded files. In addition, you may be asked to offer the credential if the Web server needs it. Here are the specific ways on how to download files using PowerShell.
Method 1: Download Files With Invoke-WebRequest
The initial method of downloading files in PowerShell is to use the Invoke-WebRequest cmdlet. This cmdlet is probably the most commonly used in this context and is able to download files from HTTP, HTTPS, and FTP links. The operations are as follows.
Step 1: Right-click on the Start button and choose Windows PowerShell to open it.
Step 2: Input the following command in the window and press Enter.
Invoke-WebRequest -Uri “https://example.com/file.zip” -OutFile “C:\Path\To\Save\file.zip”
Method 2: Download Files With Start-BitsTransfer
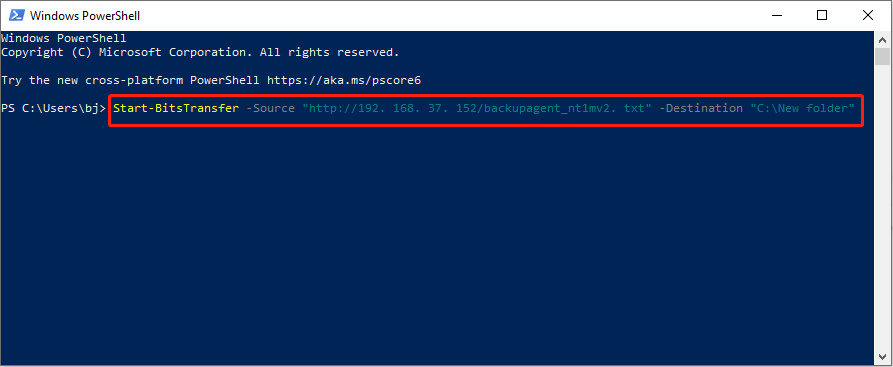
Start-BitsTransfer is designed for transferring files between client and server computers. This PowerShell cmdlet requires BITS to run. Here is a way.
Step 1: Press the Win + S keys to open the Search box, type Windows PowerShell, and press Enter.
Step 2: Type the command below and press Enter:
Start-BitsTransfer -Source “https://example.com/file.zip” -Destination “C:\Path\To\Save\file.zip”

Method 3: Download Files With Curl
The curl tool is familiar to you if you usually use the command-line approach. It can be used to download files from the Internet or server quickly and effectively without the browser. Here is how you can use it.
Step 1: Open the Run dialog by pressing the Win + R keys, type PowerShell in the Open box, and press the Shift + Ctrl + Enter keys.
Step 2: Input the following command in the window and hit Enter.
curl -o “C:\Path\To\Save\file.zip” https://example.com/file.zip
Read Also: 5 Methods to Fix Windows PowerShell High CPU Usage
Method 4: Download Files With Wget
This is the quickest and simplest way to help you download files with PowerShell. Work with the following steps.
Step 1: Open the elevated Windows PowerShell.
Step 2: Type the following command in the window and press Enter.
wget https://example.com/file.zip -OutFile “C:\Path\To\Save\file.zip”
Method 5: Download Files With Certutil
When you need to download files but there are no other tools, you can use the certutil tool in PowerShell to download files. Here are the steps.
Step 1: Open Windows PowerShell.
Step 2: Type the following command in the window and press Enter:
certutil -urlcache -split -f “https://example.com/file.zip” “C:\Path\To\Save\file.zip”
The commands listed above cover all the steps needed to download files using PowerShell. It’s crucial to input the accurate file source and destination path during the process to ensure a successful download.
MiniTool Power Data Recovery FreeClick to Download100%Clean & Safe
Final Words
This post introduces the benefits of using PowerShell to download files, what you should do before downloading files, and how to download files using PowerShell with different commands. With these commands in your toolkit, downloading files in PowerShell can be easy. Hope they can help you.


