Password expiration is an important security feature on Windows 11 that helps you prevent unauthorized access to your PC. This post from MiniTool introduces how to enable or disable password expiration in Windows 11.
If you use your password for too long, someone else may be able to crack it and gain access to your computer. If you want to enhance your Windows account and PC’s security, you should make your passwords expire occasionally.
The password expiration feature on Windows lets you set a maximum password expiration age for user accounts on your PC. This feature is disabled by default for all users and is only available for Windows 10/11 Pro, Education, and Enterprise editions. You can set password expiration for both local users and Microsoft accounts.
While this feature helps enhance your PC’s security, you may find it inconvenient to remember or update your password every few weeks. Some users want to disable this feature after trying it.
MiniTool ShadowMaker TrialClick to Download100%Clean & Safe
This post introduces how to enable or disable password expiration in Windows 11.
How to Enable or Disable Password Expiration in Windows 11
Before proceeding with the following steps, be sure to check the next steps:
- First, make sure you’re using an official version of Windows.
- Make sure your copy of Windows is activated and that you have a valid license.
- Verify that you do not have a disabled user account and that the account is functioning properly.
Way 1: Via the Microsoft Official Website
How to enable password expiration in Windows 11? You can go to the Microsoft Security page to set it. Here is how to do that:
1. Go to the Microsoft Security page, and log in with your account username and password.
2. Next, click Change password security.
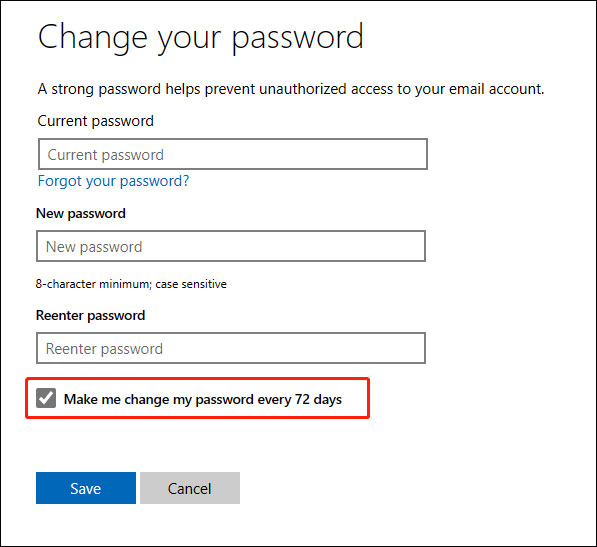
3. Next, enter your current password and the new password. Then, reenter the password and check the Make me change my password every 72 days option. Click Save.

How to disable password expiration in Windows 11? Uncheck the Make me change my password every 72 days option.
Way 2: Via Local Users and Groups
How to enable password expiration in Windows 11? The second method is via Local Users and Groups.
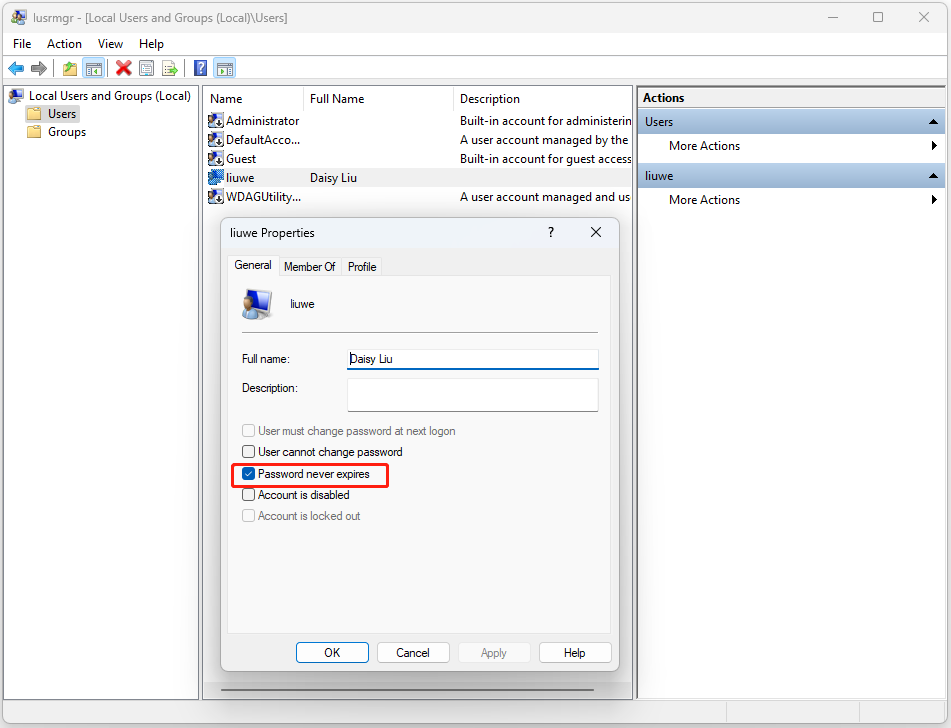
1. Press the Windows + R keys together to open Run and type lusrmgr.msc in it.
2. Click the Users tab and find the user you want to set. Double-click it and uncheck the Password never expires option.

How to disable password expiration in Windows 11? You just need to check th option again.
Way 3: Via Command Prompt
You can also enable or disable password expiration in Windows 11 via Command Prompt.
1. Type cmd in the Search box and choose Run as administrator.
2. Type the following command and press Enter.
net accounts
3. Then, if you want to enable password expiration, run the following command. Replace the user name with the account you want to enable:
wmic UserAccount where Name=”user name” set PasswordExpires=True
To disable password expiration in Windows 11, type in the following command:
wmic UserAccount where Name=”user name” set PasswordExpires=False
How to Extend the Password Expiration Time Limit?
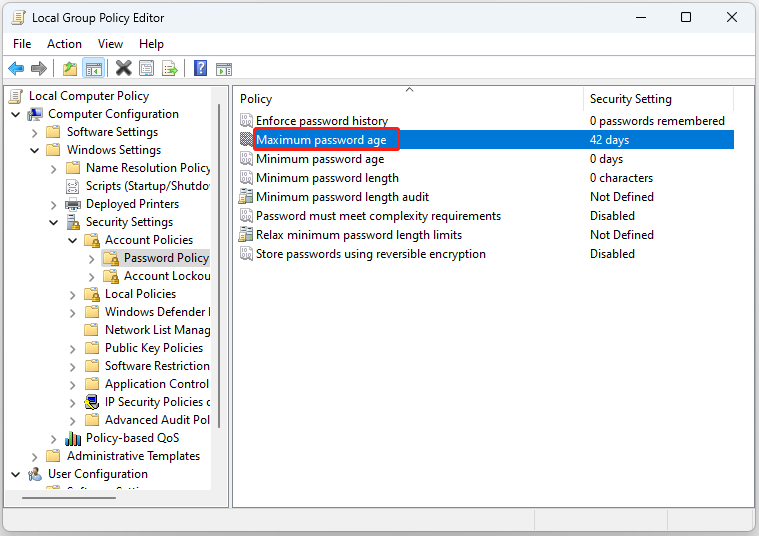
Although the default expiry period for local accounts is 42 days while Microsoft accounts are 72, you can extend the password expiration time limit.
1. Press Win + R to open Run. Type gpedit.msc and click OK to open Group Policy Editor.
2. Go to the following location:
Computer Configuration > Windows Settings > Security Settings > Account Policies > Password Policy
3. In the right pane, right-click Maximum password age and select Properties.

4. Change 42 days to 999 days.
Also see: How to Set a Password Expiration Date on Windows 10 for Security
Final Words
How to enable or disable password expiration in Windows 11? This post provides 3 ways and you can choose one of them based on your needs. Besides, you can know how to extend the password expiration time limit.
