Drive names (volume labels) are displayed before the drive letters by default in Windows. Do you know how to show drive letters before drive names? This post from MiniTool tells you how to show drive letters first in File Explorer.
The drive letter is the letter identifier (A – Z) of the disk storage device in the Windows system. When your computer detects a new internal or external hard drive, the Windows operating system automatically assigns it an available drive letter and displays it by default after the drive name.
In the previous post, we explained how to fix the “drive letter not available“ issue. Today we are going to tell you how to show drive letters before drive names.
Note: The drive letter is critical for your drive. Mishandling the drive letter can render your drive inaccessible. So, before making any changes to the drive letter, you had better back up your files, folders, partitions, and even the entire disks by using MiniTool ShadowMaker.
MiniTool ShadowMaker TrialClick to Download100%Clean & Safe
Now let’s see how to display drive letters before drive names in File Explorer.
How to Show Drive Letter Before Drive Name
To show drive letters first in File Explorer, you need to make changes to the Windows registry.
Note: Before tweaking the registry, it is recommended you back up the registry so that in case of any failure you can restore the registry from the backup file.
Step 1. Press Windows + R key combinations to open the run window.
Step 2. In the input box, type regedit and press the Enter key. You should click Yes in the UAC window so that you can open Registry Editor. Here you may be interested in this post: How to Fix UAC Yes Button Missing or Grayed Out?
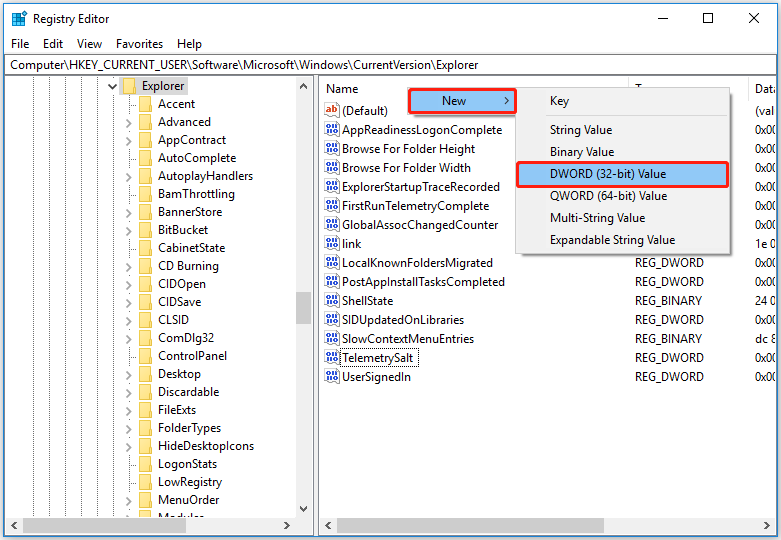
Step 3. In Registry Editor, navigate to the following location:
Computer\HKEY_CURRENT_USER\Software\Microsoft\Windows\CurrentVersion\Explorer
Step 4. In the right panel, right-click any blank area to select New > DWORD (32-bit) Value. Then name the created DWORD value to ShowDriveLettersFirst.
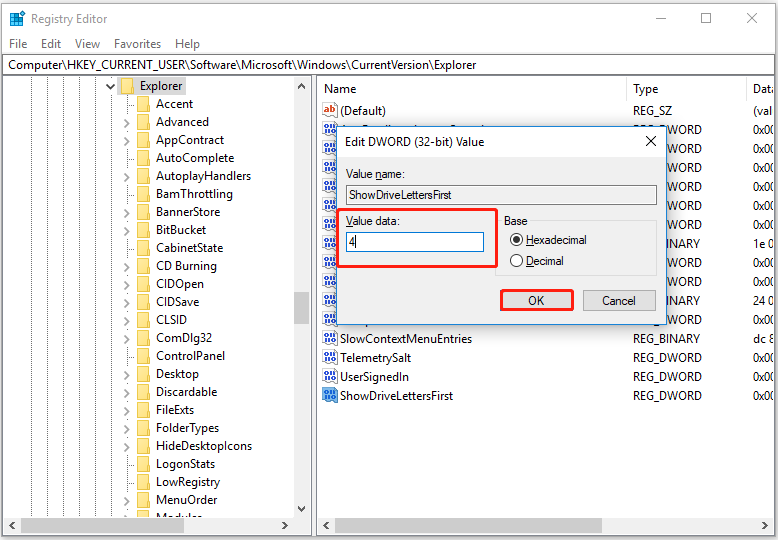
Step 5. Double-click ShowDriveLettersFirst. In the pop-up window, set up the value data to 4, and then click OK to save your changes.
Now you can open File Explorer and check whether the drive letter is displayed before the volume label as shown in the figure below.
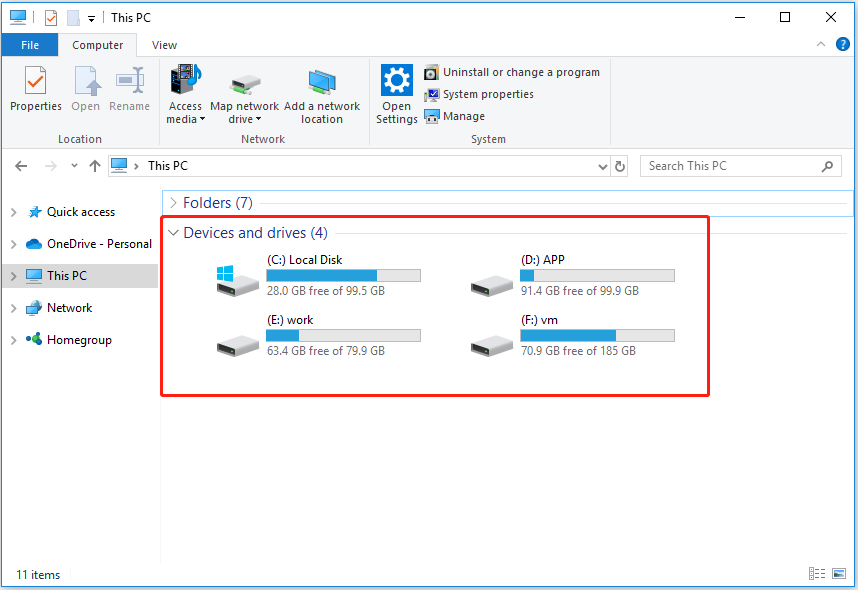
If you want to restore the display order of the drive letter and drive name to the default state, you can right-click the ShowDriveLettersFirst DWORD value and delete it.
Further Reading – How to Hide the Drive Letter
Some users have indicated that they want to hide the drive letter so that the drive letter does not show in File Explorer. Do you know how to accomplish this task? Follow the steps below to hide the drive letter.
Step 1. Press Windows + E key combinations to open File Explorer.
Step 2. On the top, move on to the View tab and click Options.
Step 3. In the new window, go to the View tab, and then scroll down to uncheck Show drive letters. Finally, click OK to make the changes take effect.
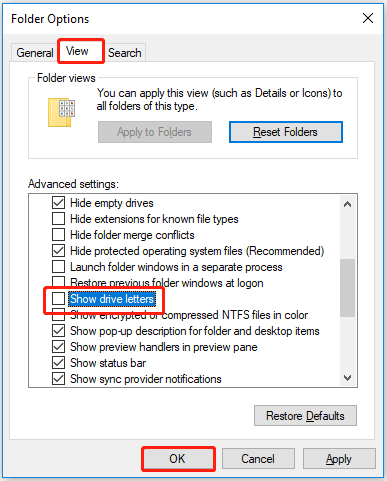
Now you cannot see the drive letter in File Explorer. For more information about how to hide drive letters, you can refer to this post: How to Remove the Drive Letter in Windows 10.
Top Recommendation
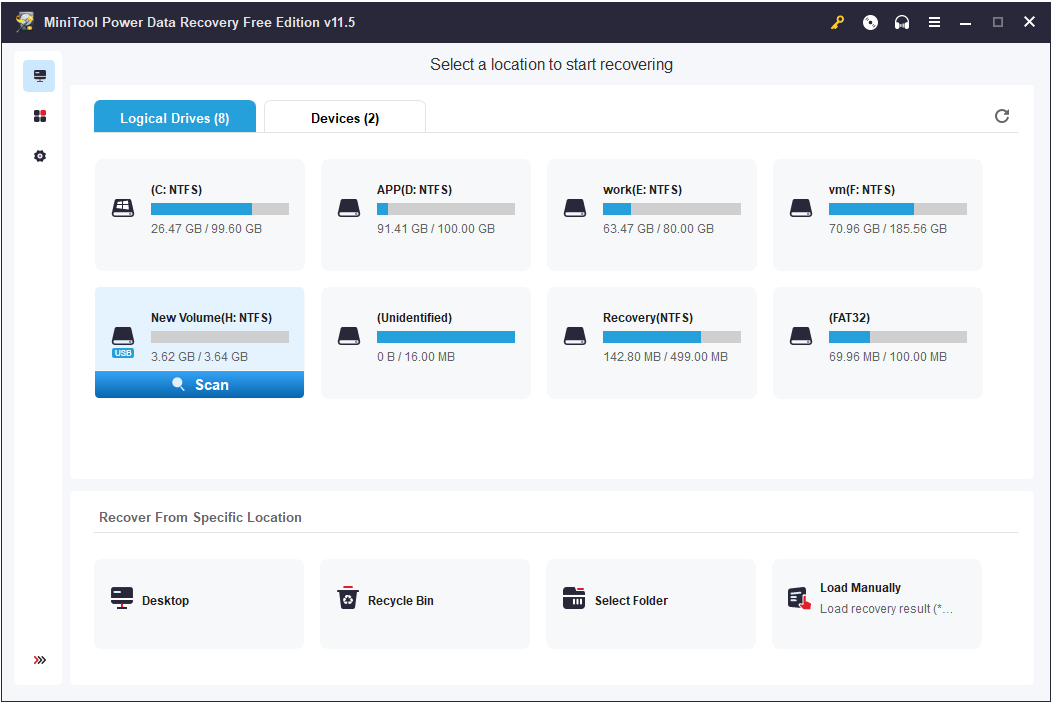
As said before, sometimes you may not access your drive due to some errors, such as “drive is not accessible access is denied”. In such situations, to rescue your data, you need to use a piece of free data recovery software. MiniTool Power Data Recovery is the best choice.
MiniTool Power Data Recovery can help to recover deleted or lost files, including Office documents, pictures, videos, emails, and so on. It can also retrieve folders, such as recovering the Users folder, the Pictures folder, and more.
Now click the button below to free download it and try it out.
MiniTool Power Data Recovery FreeClick to Download100%Clean & Safe
Bottom Line
Reading here, you should know how to show drive letters before drive names, how to hide drive letters, and how to recover deleted files by using MiniTool Power Data Recovery.
If you have any questions about drive letters, welcome to let us know by leaving your comments below.
