Are you recently being plagued by repeated crashes or constant computer freezes? You may suspect that RAM errors are the culprit and want to check RAM for problems. This article from MiniTool dives into the steps and let’s see how to test RAM for errors and what to do if some error lies in RAM.
Why RAM Test Windows 10/11 Matters?
RAM (Random Access Memory) is a temporary storage space for your computer to run programs and processes. However, it is very volatile and tends to lose its data easily when the power is off.
If you enjoy enough RAM, it means you can run multiple tasks at the same time without slowing your computer down. On the other hand, once your RAM has some issues such as fault, corruption, or incompatibility, it could lead to different errors and problems on your computer.
There are several typical symptoms listed below.
- The BSOD error
- Corrupt files or software
- Installation failure
- Video loading failure
You may have come across the errors mentioned above without realizing it. Now, it’s time to do a RAM test on Windows so you can escape from repeated crashes.
How to Test RAM for Errors?
You first need to check your RAM specifications and compatibility. To know the type of RAM your computer has and how many RAM sticks you can install, you can see your system information or motherboard manual.
And make sure that the RAM module is placed in the slots correctly. If the modules are not compatible or do not match, replace or upgrade them. Then you can have a RAM test on Windows 10/11.
1. Use Windows Memory Diagnostic
Windows Memory Diagnostic is a built-in RAM testing tool. This tool can make the testing process easier, which is optional if you dislike downloading other testing tools. Take the steps below.
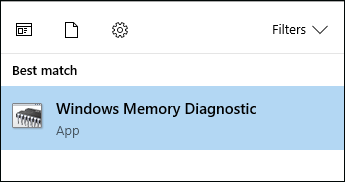
Step 1: Type Windows Memory Diagnostic in the search box and choose it.
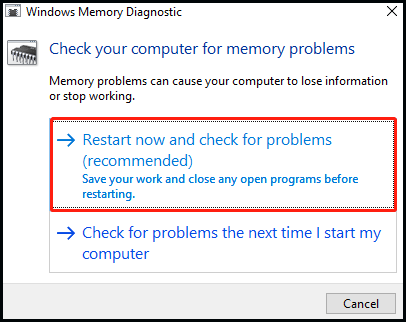
Step 2: Click Restart now and check for problems (recommended) from the pop-up windows.

Step 3: Then your computer will shut down and you will see a blue screen when Windows Memory Diagnostic detects RAM errors. If it finds any problem, the tool will show you. This process will go on for a long time so wait patiently.
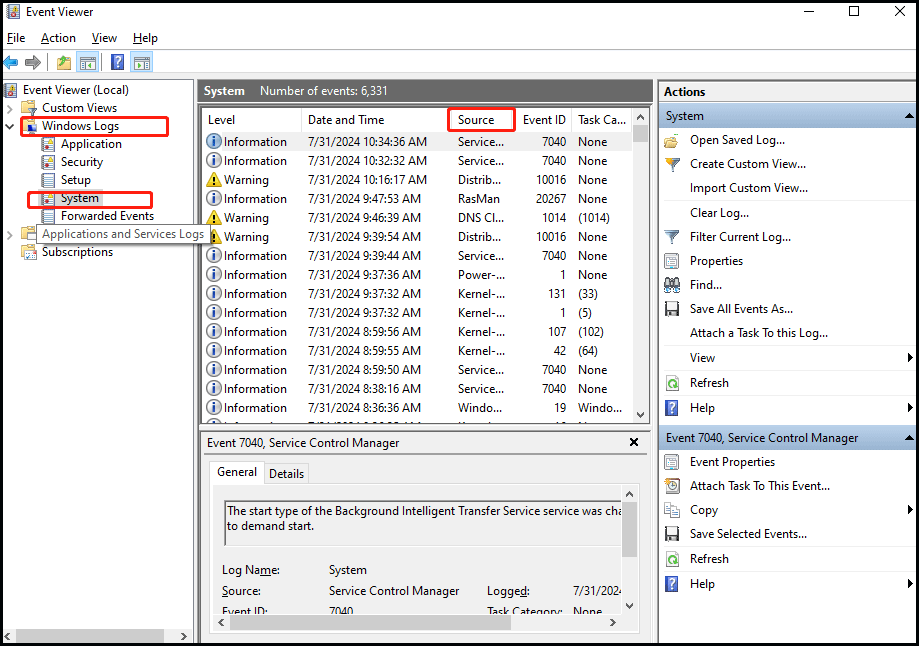
Step 4: When finished, you will return to the desktop, and the tool is supposed to show its testing results. If not, you can also find them in Event Viewer. Right-click Start and click the Event Viewer tab.
Step 5: Choose Windows Logs on the left panel and click on System. Look for MemoryDiagnostics-Results in the Source column and click it. Then the results of the RAM test will be displayed in the pane below.

2. Try MemTest86
If you want a deeper diagnostic, you can click here to download MemTest86 and make a thorough investigation with it. MemTest86 is a reliable and free third-party tool that tests for bad RAM. It can bypass issues in OS and test RAM without interruptions. This tool is designed to be executed from a USB drive so ensure that you have one available.
MiniTool ShadowMaker TrialClick to Download100%Clean & Safe
Firstly, download the ISO file from the official site and create a bootable USB or CD. Then restart your PC and then boot from the USB or CD to access MemTest86. After that, MemTest86 will boot and begin to investigate your RAM.
You can test your memory as long as you want and it will tell you if any error is found. In the end, exit it and restart your PC.
Bottom Line
This guide shows you how to test RAM for errors and the necessity of fixing memory errors. Just check RAM for problems and solve them in time.

