About Linux Mint 22 Wilma
Linux Mint, a Linux distribution based on Ubuntu, now is upgraded to version 22 and its codename is Wilma. Linux Mint 22 has long-term support that will extend until 2029. With updated software and many new improvements & features, you will get a more comfortable desktop experience after you install Linux Mint 22.
Let’s explore some highlights:
- Uses Linux Kernel 6.8
- Ships with modern components and the new Ubuntu 24.04 package base
- Switches to default sound server Pipewire
- Updates themes to support GTK4
- Makes HiDPI support improvements in the boot sequence, in Plymouth and Slick-Greeter
- Deletes preinstalled packages for languages other than English and the one you choose once you install Linux Mint 22
- More…
Interested in Linux Mint 22 Wilma? Want to install it on your Windows 11/10 PC for dual-boot? Do as the instructions below say.
Linux Mint 22 Download
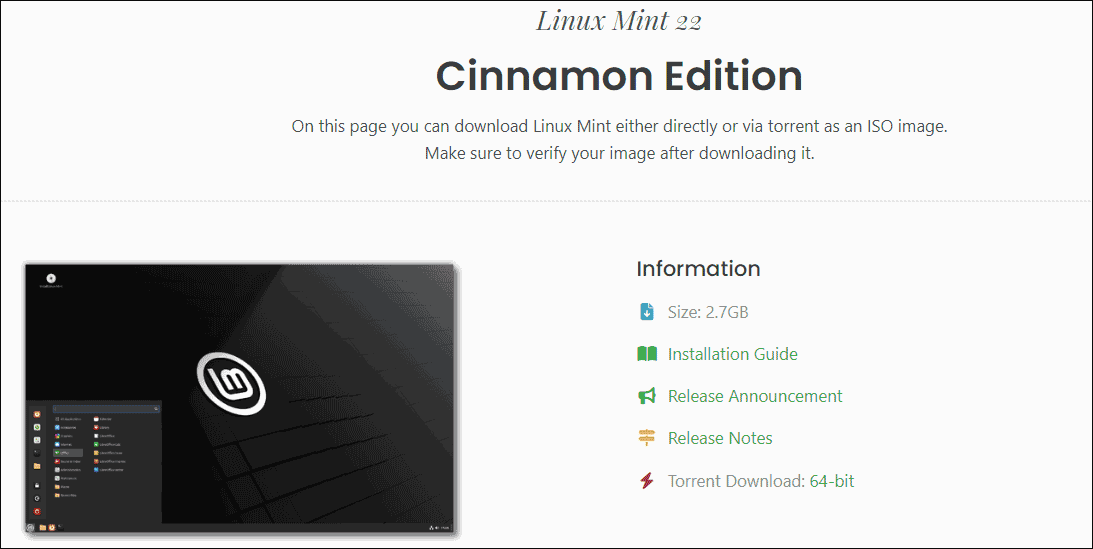
To start the installation process, you should download Linux Mint 22 ISO first. This release includes three editions:
Cinnamon Edition: Primarily developed by Linux Mint, it is the most popular version that is beautiful, slick, modern, and full of new features.
Xfce Edition: It doesn’t support all the features, but it focuses on a lightweight environment using lighter resources.
MATE Edition: It is a continuation of GNOME 2 and uses a classic desktop environment.
Go to https://www.linuxmint.com/download.php or https://www.linuxmint.com/download_all.php, choose a proper edition, download the iso.torrent file, and then open the torrent file. Or scroll down the page to the Download mirrors section and hit one click to directly get ISO.
Create Bootable Media
How to install Linux Mint 22 Wilma on a PC? The second step should be creating a bootable USB drive so that you can use it to boot the machine for the installation process.
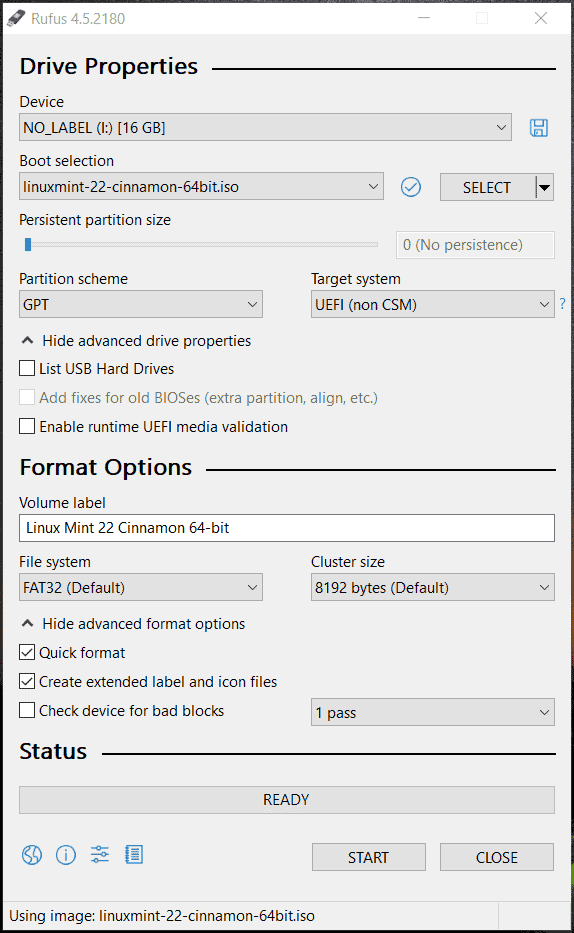
- Access the website of Rufus on your Windows PC and download it.
- Connect a USB flash drive to the machine and launch this tool.
- Hit SELECT to find Linux Mint 22 ISO, make some settings, and hit START > Write in ISO Image mode (Recommended) to start burning ISO to USB.
Back up Files
Before the last step to install Linux Mint 22 on your Windows 11/10 PC, we highly recommend backing up your important data for prevention as mistaken operations during the installation process can result in data loss. MiniTool ShadowMaker will be an assistant in file backup, system backup, disk and partition backup.
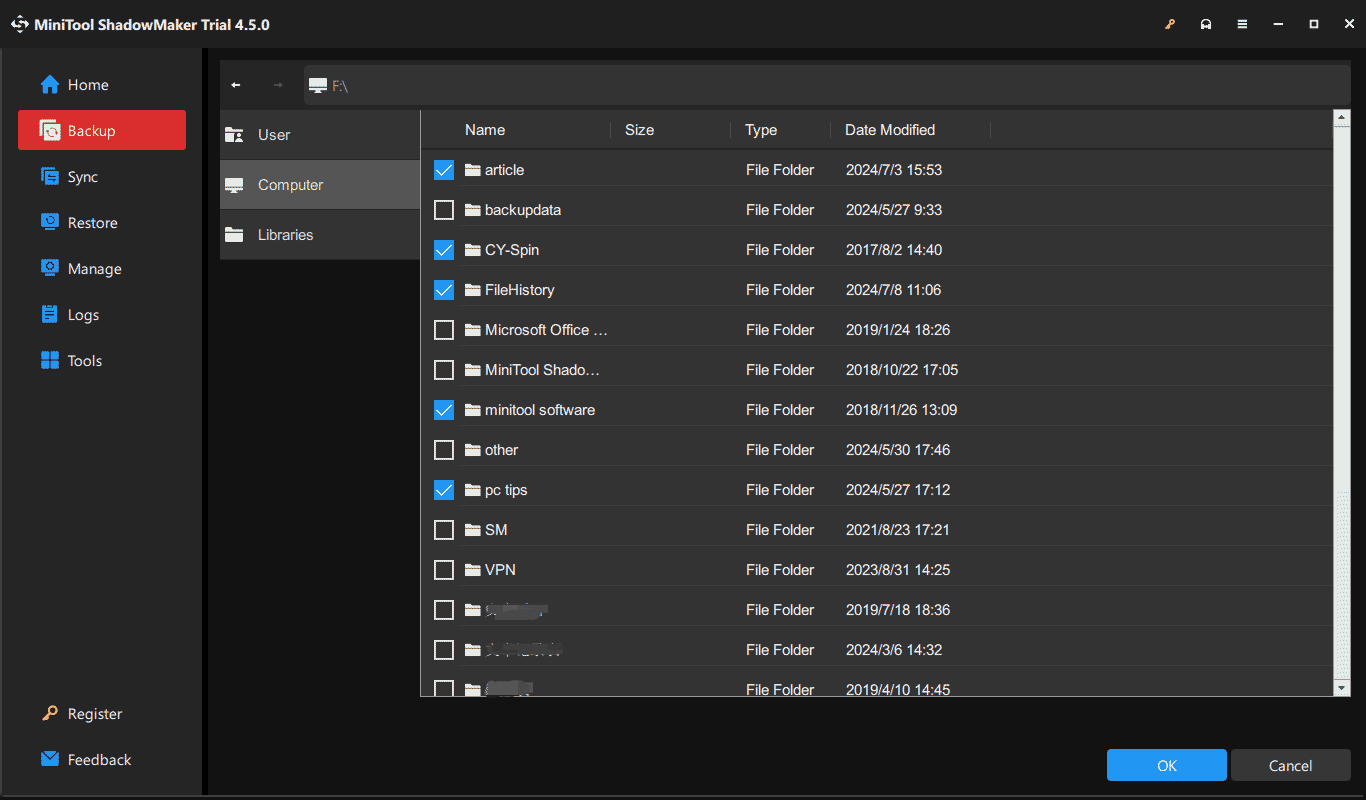
Just download this PC backup software on Windows 11/10, install it, and then launch it to the main interface. Next, go to Backup > SOURCE > Folders and Files to choose vital data, hit DESTINATION to choose a path, and click Back Up Now.
Install Linux Mint 22 Wilma – Complete Setup
Now you get everything ready, and it is time for you to begin the last installation of Linux Mint 22.
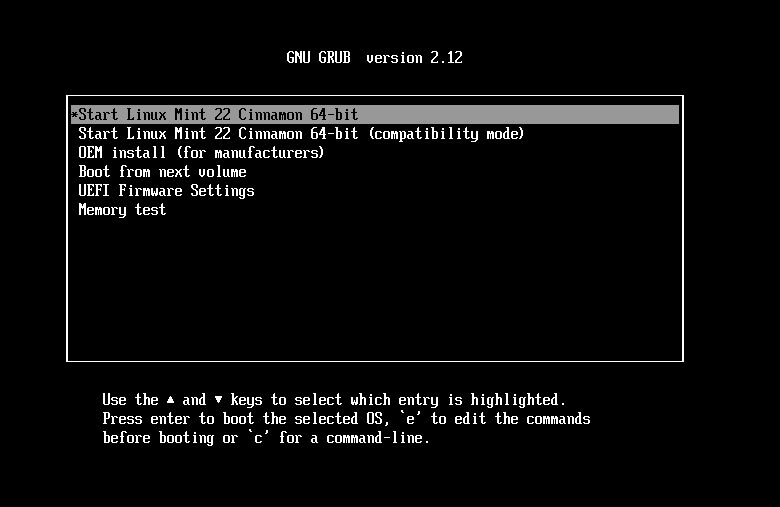
Step 1: First and foremost, connect the bootable USB drive to your computer, restart the system to the BIOS menu, change the boot sequence to USB, and then you will enter the setup interface. Highlight the first option and press Enter to boot the OS.
Step 2: Wait for the system to finish the startup and then you should hit the desktop icon of Install Linux Mint.
Step 3: Choose a language and keyboard layout, and tick Install multimedia codecs to play some video formats.
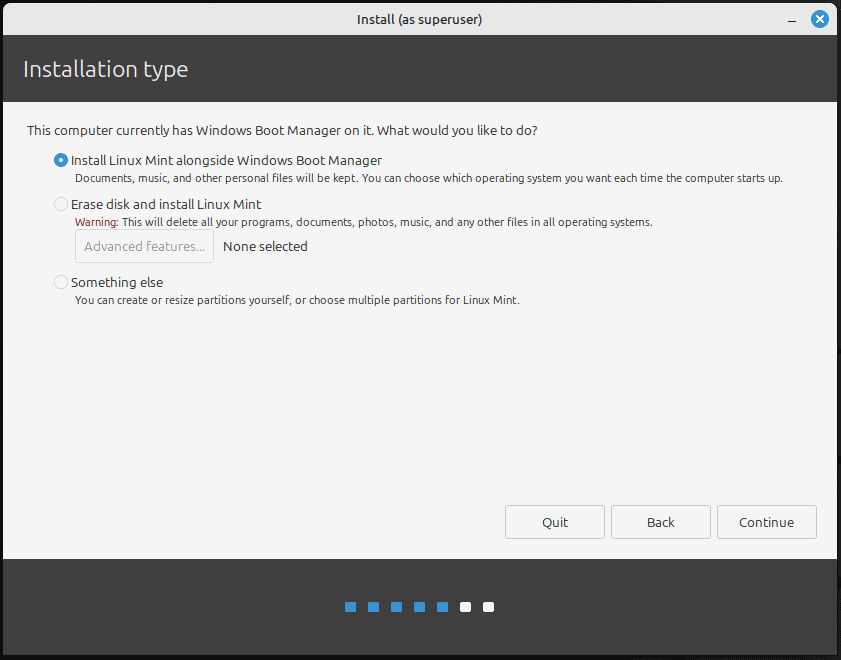
Step 4: While preparing Ubuntu drivers, check the box of Install Linux Mint alongside Windows Boot Manager if you want to dual boot Windows 11 with Linux Mint 22.
Step 5: Proceed with the installation process by hitting the Install Now button, and complete the setup by following the on-screen instructions.
At the end of installation, you will see the dual boot screen, choose to boot Linux Mint and make some customization settings for this system. If you need to run Windows 11, also go to the dual boot screen and choose Windows Boot Manager.
Also read: How to Dual Boot Windows 10 and Linux Mint 20.3 (With Pictures)
Verdict
How to install Linux Mint 22 on your PC for dual-boot with Windows 11/10? This step-by-step guide helps you greatly. Download ISO, burn it to USB and then begin the setup now if needed.
