Do you want to install Windows on Mac? Do you want to dual boot Windows on Mac? Do you know how to install Windows on Mac? This post will show you the step-by-step guide on installing Windows on Mac.
What You Need to Install Windows on Mac?
Nowadays, it is common for users to make dual boot on their computers. So some users would like to dual boot Windows on Mac. However, some users don’t know how to install Windows on Mac. But don’t worry, this post will show you the step-by-step guide on installing Windows on Mac with the Boot Camp Assistant.
But before going on, you need to know what is needed to install Windows on Mac.
Mac Models
First of all, you need to which Mac models allow you to install Windows on Mac. In general, the MacOS, which includes the Boot Camp Assistant, allows you to install Windows on Mac. Here, we will list the Mac models for you.
- MacBook introduced in 2015 or later
- Mac Pro introduced in 2013
- MacBook Air introduced in 2012 or later
- MacBook Pro introduced in 2012 or later
- Mac mini introduced in 2012 or later
- iMac introduced in 2012 or later
- iMac Pro (all modules)
Disk Space
In order to install Windows 10 on Mac, please make sure that you have at least 64GB free space on your hard drive for the Windows installation. Of course, more free space can provide better performance and user experience. Later, Windows automatic update still requires more space.
Besides enough free space on hard disk, you also need an external USB flash drive with 16GB or more, which is used to create the Windows installation media.
Windows 10 ISO Disk Image
In order to install Windows 10 on Mac, apart from those we have mentioned in the above section, you also need a Windows 10 ISO image or the Windows installation media. Thus, you can download the Windows 10 disk image from the Microsoft.
After getting the necessary things reading, you can start to install Windows on Mac. You can continue following the instruction below.
How to Install Windows on Mac?
Step 1: Launch Boot Camp Assistant
- Insert the Windows installation media to your computer.
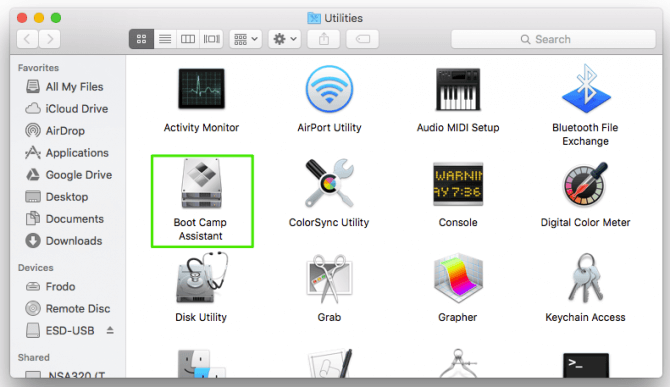
- Launch the Boot Camp Assistant. It can be found from the Utilities folder in Application.

Step 2: Select the Windows 10 ISO and Change the Partition Size
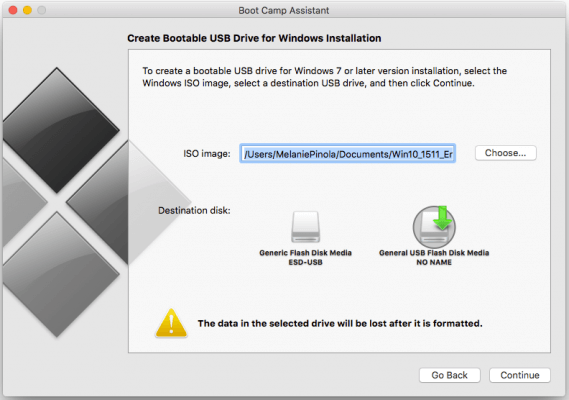
- After launching the Boot Camp Assistant, click Continue.
- Boot Camp Assistant will automatically locate ISO file on your system and select it.
- Click and drag the slider in the partition section. You shout at least set the minimum storage space requirement mentioned in the above section.

Step 3: Start to Install Windows on Mac
- Next, click Install to continue.
- Input the password.
- Click OK to continue.
- Select the language.
- Then click Install Now to continue.
- Next, you can follow the wizard to continue. The whole process might take a few minutes, so you need to wait patiently.
When all processes are finished, you have successfully installed Windows 10 on Mac and can also dual boot your computer. You can switch between Windows Mac as well.
How to Install Windows 10 on a New Hard Drive (with Pictures)
Final Words
To sum up, this post has shown the requirements of reinstall Windows on Mac and shown how to install Windows 10 on Mac Boot Camp. If you need to dual boot your Mac, you can refer to the method listed in the above.


