About Microsoft Surface Data Eraser
Surface Data Eraser refers to a tool to help securely wipe all data from a compatible Surface device. It requires you to perform the wipe task by booting from a USB stick which should be created beforehand. In case you plan to sell, recycle, or throw up your old Surface, or prepare it for repair, it is necessary to wipe the device to protect data security & privacy.
Note that the current version of this eraser tool is not compatible with the latest Surface devices including Surface Laptop 6 and Surface Pro 10. To know the compatible Surface devices, see the following screenshot:
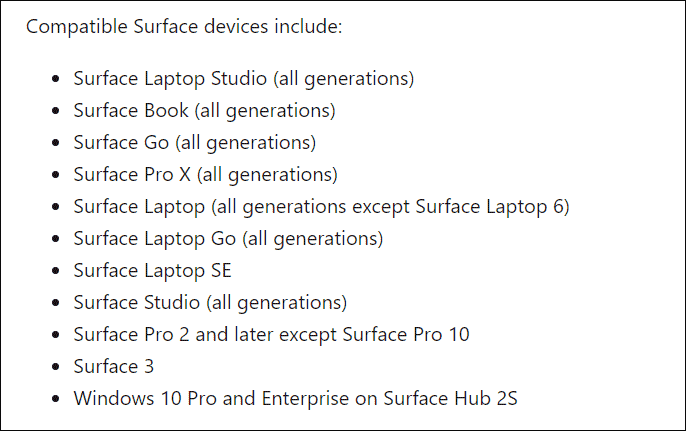
To use Microsoft Surface Data Eraser, make sure you use a compatible device and then follow the step-by-step guide for wiping data.
Move 1: Back up Files in Advance
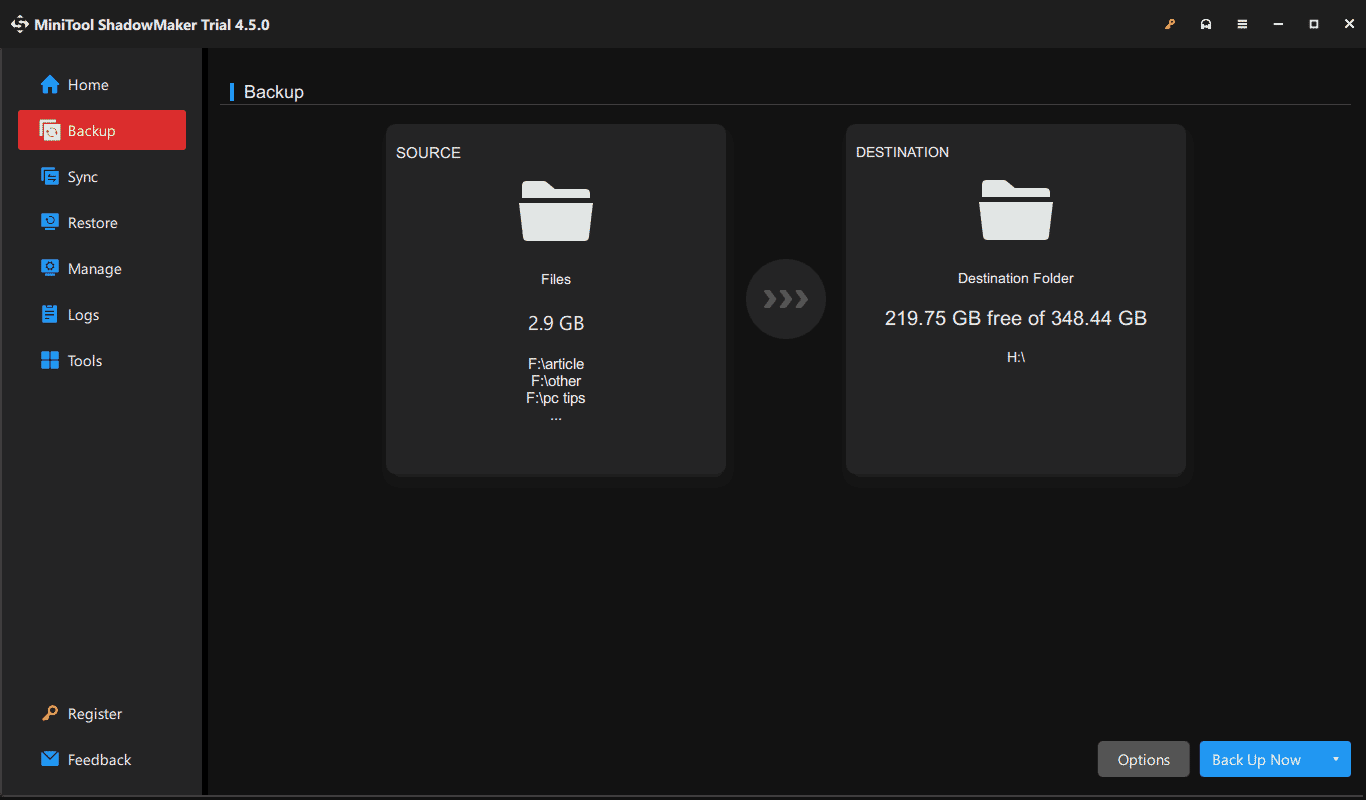
Before proceeding, you ought to create a backup for your important data saved on the Surface as you may still need to use some files/folders in future. MiniTool ShadowMaker, an excellent and professional PC backup software, plays a great role in computer backup on Windows 11/10/8.1/8/7.
It covers multiple backup methods, such as data backup, disk backup, system backup, scheduled backup, incremental backup, different backup, etc. Also, it supports cloning HDD to SSD for disk upgrade or backup. Get it now to back up all the important data before running Surface Data Eraser to wipe the device.
MiniTool ShadowMaker TrialClick to Download100%Clean & Safe
Step 1: Connect a USB drive or external disk to your PC and run MiniTool ShadowMaker to its main interface.
Step 2: Head to Backup > SOURCE > Folders and Files, choose what you want to backup, and click OK.
Step 3: Tap DESTINATION and choose a drive to continue.
Step 4: Hit Back Up Now.
Move 2: Create a Surface Data Eraser USB Stick
Prepare a USB flash drive that has 4GB of storage or more and supports USB 3.0. Next, connect it to your Surface and then create a Surface Data Eraser USB stick using these steps:
Step 1: Download this Microsoft disk wipe utility via this link from Microsoft.
Step 2: Run the downloaded .msi file and complete the setup as per the instructions on the screen.
Step 3: Launch Microsoft Surface Data Eraser after the installation and then tap on Build to create a bootable USB drive.
Step 4: Hit Continue and then choose a version based on your Surface’s architecture.
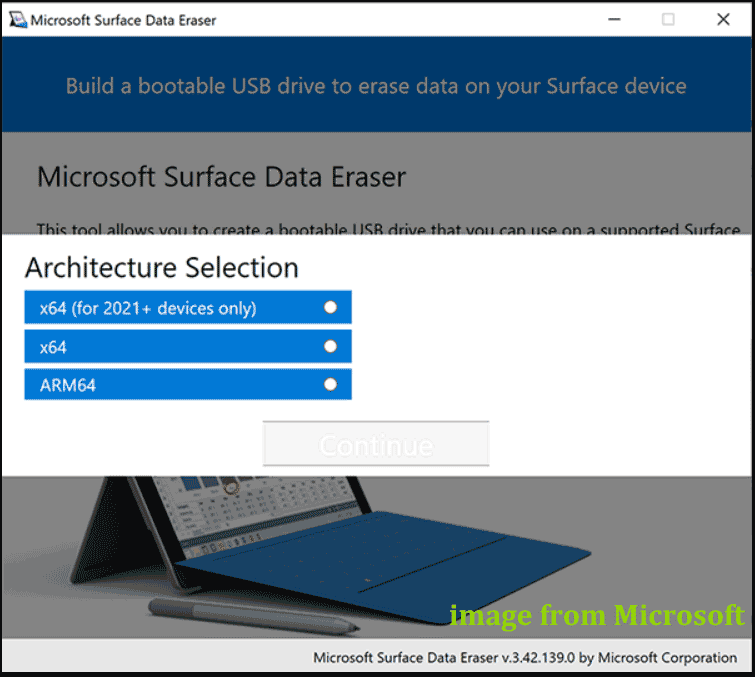
Step 5: Choose your USB drive and click Start Format.
Step 6: Once done, click Success > Complete.
Move 3: How to Wipe Surface
Now you have a bootable USB flash drive that allows you to boot the device from it to securely wipe disk data.
Step 1: Insert that USB stick into the supported Surface. Then, turn off Surface, press and hold Volume down, press and release Power, and release Volume down to run Windows from the USB drive.
Step 2: Read the popped-up software license terms and close Notepad.
Step 3: Type Accept into the Command Prompt window to accept the terms.
Step 4: Type Y to run the eraser tool to remove all data from your Surface.
Try Other Ways to Wipe Surface
You have a clear understanding of Microsoft Surface Data Eraser now. This Microsoft disk wipe utility requires you to create a bootable USB drive and then perform the wiping task, which is a bit troublesome. Besides, it is only compatible with old Surface devices. Sometimes you may encounter Microsoft Surface Data Eraser not working. Hence, you can try to wipe your Surface in some other ways.
1. Run MiniTool System Booster: As PC tune-up software, it allows you to clean up your PC, uninstall apps, disable startup/background processes, scrub your drive, etc.
MiniTool System Booster TrialClick to Download100%Clean & Safe
2. Run MiniTool Partition Wizard: This partition manager offers a feature called Wipe Disk to fully wipe your entire hard drive.
3. Factory Reset: By resetting the Surface, everything on the device will be deleted.
To know details, you can refer to our previous post – How to Wipe a Computer in Windows 11/10? 4 Ways for You.
