You can free download Nexus LiteOS 8.1 (64-bit/32-bit) ISO. It is designed to improve gaming performance in low-end PCs. This post from MiniTool teaches you how to download and install it in one-by-one steps.
Windows 8.1 is a major release of the Windows NT operating system developed by Microsoft. It went into production on August 27, 2013, and went to wide retail on October 17, 2013, about a year after the retail release of its predecessor. Nexus LiteOS 8.1 significantly improves gaming performance in low-end PCs.
Features of Windows Nexus LiteOS
- Based on the tweaked edition
- Improve gaming performance
- Works in low-end PCs
- Removed things from this version
- All-Metro Apps
- Mobile PC
- Hyper-V
- Zip
- Wordpad
- Screen Magnifier
- Narrator
- Recovery Drive creator
- Windows Defender
- Internet Explorer
- Windows Media Player
- Speech
- Print Spooler (disabled)
- Windows Search Index (disabled)
How to Download Nexus LiteOS 8.1
Before you download and install Nexus LiteOS 8.1, you should ensure that your PC meets the requirements below. They are the minimum system requirements of Nexus LiteOS 8.1.
- Operating System: Windows XP/Vista/7/8/8.1/10
- Memory (RAM): 2 GB
- Hard Disk Space: 1 GB
- Processor: Intel Pentium 4 Dual Core GHz or higher
- Machine: PC, or laptop
To download Nexus LiteOS ISO, you can search for its ISO file on the Internet. When searching for “Nexus LiteOS 8.1 ISO”, “Nexus LiteOS 8.1 ISO image”, or “Nexus LiteOS 8.1 ISO download” in Google Chrome, you can find a download link from Internet Archive. Then, you can go to this website to download Nexus LiteOS 8.1 ISO.
You can click the ISO IMAGE link directly, and you can also click SHOW ALL to find more Nexus LiteOS 8.1 Lite ISO images.
How to Install Nexus LiteOS 8.1
Then, let’s see how to install Nexus LiteOS 8.1. There are detailed steps:
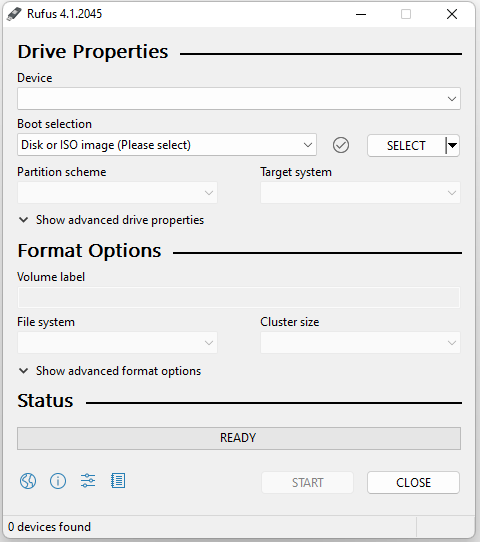
Step 1: Download and install Rufus on your PC. Connect a USB flash drive to your computer.
Step 2: Then, run Rufus. Click the select drop-down menu to choose the downloaded Nexus LiteOS 8.1 ISO file. Then, click the START button.

Step 4: After the process is finished, connect the bootable drive to the computer you want to install Nexus LiteOS 8.1.
Step 5: Enter the boot menu and choose the connected USB drive. Then, press Enter to continue. Then, your PC will boot from it.
Step 6: Then, choose a drive to install Nexus LiteOS 8.1 and click Next. Follow the on-screen instructions to finish the installation.
Tip: After installing Nexus LiteOS 8.1, it’s recommended to create a system backup for it since backing up the system can provide better protection for it. To do this task, you can use the free backup software - MiniTool ShadowMaker, which supports different operating systems including Windows 7, Windows 8, Windows 10, Windows 11, etc.
MiniTool ShadowMaker TrialClick to Download100%Clean & Safe
Final Words
What is Nexus LiteOS 8.1? How to free download and install the Nexus LiteOS 8.1 ISO? The above content provides answers. Besides, it’s highly recommended to back up the operating system after installing it.


