OneDrive Unable to Move Shortcut Windows 11/10
OneDrive allows you to share files or folders with different users or organizations. It has a protocol that manages shared folders. If you click on Add shortcut to my files in OneDrive, it will build a shortcut in the root directory folder in the OneDrive folder. However, when you are trying to relocate a shortcut to a new place, you might receive the error message below:
Unable to move shortcut – We’re currently unable to move shortcuts and moved the shortcut back to its original location.
If you are bothered by this annoying issue at the moment, scroll down the guide to find some viable solutions now!
MiniTool ShadowMaker TrialClick to Download100%Clean & Safe
How to Fix OneDrive Unable to Move Shortcut Windows 10/11?
Fix 1: Move the Shortcut back to the Root Folder
If you have moved the problematic shortcut from OneDrive’s root directory, you might get errors like OneDrive unable to move shortcut. To fix this issue, you can move the shortcut back to the root folder and then move it to your preferred location again.
Fix 2: Stop Syncing and Delete the Shortcut
It is reported that deleting the shortcut and stopping syncing is also helpful to fix OneDrive unable to move shortcut. Follow these steps:
Step 1. Right-click on the OneDrive icon and click on Help & Settings.
Step 2. Click on Settings > Account > Choose folders.
Step 3. Uncheck the folder that contains the problematic shortcut and hit OK to save the changes.
Fix 3: Update OneDrive
Running an outdated OneDrive app might also lead to some problems like OneDrive unable to move shortcut. Therefore, you need to update the application in time. To do so:
Step 1. Right-click on the OneDrive icon on the system tray.
Step 2. Go to Settings > About > version link under About Microsoft OneDrive.
Step 3. After clicking on the version link, Windows will download and install the latest version of OneDrive for you.
Fix 4: Delete the Shortcut via the OneDrive Web
Another fix for OneDrive unable to move shortcut is to delete the problematic shortcut from the OneDrive web. Here’s how to do it:
Step 1. Launch your browser and go to the official website of OneDrive to sign in to your Microsoft account.
Step 2. Find the problematic shortcut, select it and choose Delete.
Step 3. Navigate to the Recycle bin tab and delete the shortcut again.
Step 4. Reboot your computer to see if OneDrive unable to move shortcut is fixed.
Fix 5: Reset OneDrive
If OneDrive unable to move shortcut still persists, the last option is to reset the app. Here’s how to do it:
Step 1. Press Win + R to open the Run box.
Step 2. Type the following command and hit Enter.
%localappdata%\Microsoft\OneDrive\onedrive.exe /reset
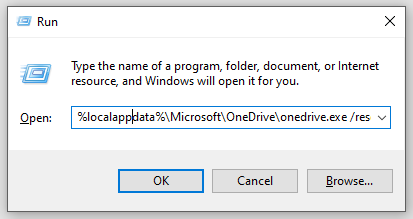
ALT= reset OneDrive
Step 3. If you get any errors when using the command above, you can execute the following commands in the Run dialog.
C:\Program Files\Microsoft OneDrive\onedrive.exe /reset
C:\Program Files (x86)\Microsoft OneDrive\onedrive.exe /reset
Step 4. Reboot your computer to see if OneDrive unable to move shortcut is still there.

Final Words
OneDrive unable to move shortcut indicates that the target of the shortcut is either deleted or is no longer shared with you. Therefore, moving the shortcut to the root folder, stopping syncing & deleting the shortcut, updating the app, and resetting the app can be effective workarounds to address this issue. You can try them one by one until the problem gets fixed.
About The Author

Position: Columnist
Aurelie is a passionate soul who always enjoys researching & writing articles and solutions to help others. Her posts mainly cover topics related to games, data backup & recovery, file sync and so on. Apart from writing, her primary interests include reading novels and poems, travelling and listening to country music.