Realtek audio driver is important for obtaining high-quality audio effects and more audio setting options. However, sometimes Realtek audio driver keeps crashing on your computer. Here this post on MiniTool explores possible reasons and potential solutions.
Why Realtek Audio Driver Keeps Crashing
Realtek sound card driver is a driver for analog audio on the motherboard, helping you obtain sound playback functions and a better audio experience. Many motherboards have built-in Realtek sound card chips, which will be automatically recognized and enabled when you install the Windows operating system. However, sometimes you may encounter a situation where the Realtek audio driver keeps crashing, causing audio playback to fail.
Realtek audio driver crashes are usually associated with outdated sound drivers, Windows Audio service faults, driver or software conflicts, and so on. Listed below are some troubleshooting steps you can try to address the problem.
Solutions to Realtek Sound Driver Crashing Windows 10/11
Solution 1. Run the Playing Audio Troubleshooter
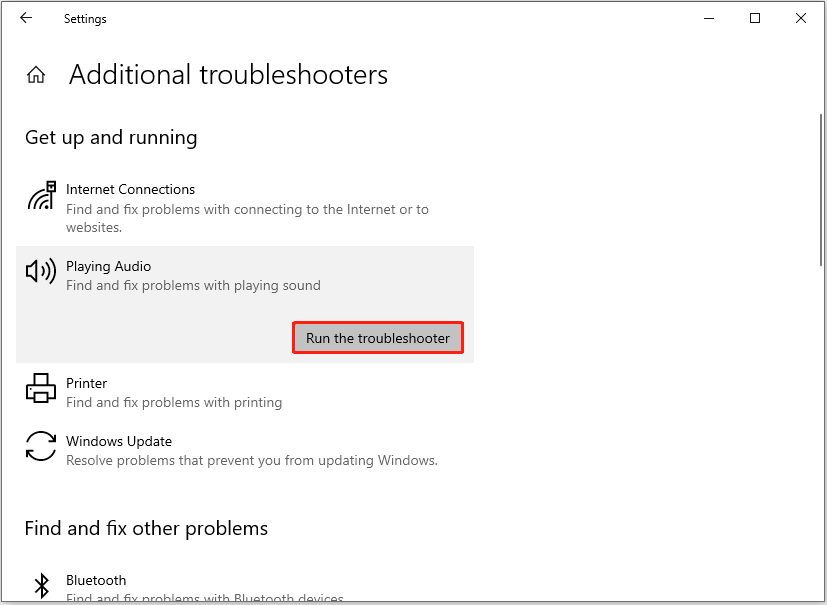
If you encounter Windows audio problems, you should first consider running the Playing Audio troubleshooter. It is a Windows built-in troubleshooter that is designed to detect and fix issues related to the audio.
Step 1. Right-click the Windows logo button and choose Settings.
Step 2. Choose Update & Security > Troubleshoot > Additional troubleshooters.
Step 3. Find and select Playing Audio, then hit Run the troubleshooter. After that, the repair process will start automatically, and you should wait patiently until it is completed.
Solution 2. Update/Roll Back the Realtek Audio Driver
If the sound card driver crash occurs after a driver update has just been completed, then rolling it back to the previous version is a good solution. Additionally, outdated Realtek sound card drivers may also keep crashing, at which point you need to update it.
First, right-click the Start button and choose Device Manager.
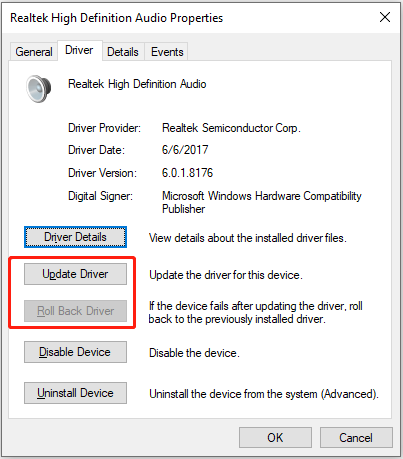
Second, expand the Sound, video and game controllers category, then right-click Realtek High Definition Audio and choose Properties.
Third, choose Update Driver or Roll Back Driver according to the actual situation, then follow the instructions on your screen to complete the tasks.
Solution 3. Uninstall and Reinstall the Realtek High Definition Audio Device
If updating or rolling back the Realtek audio driver does not fix the issue, you can try to uninstall the audio device.
- Go to Device Manager.
- In the Sound, video and game controllers section, right-click the Realtek audio device and choose Uninstall device.
- Click Uninstall to confirm.
- Restart your computer, and the target driver should be installed automatically.
Solution 4. Restart the Windows Audio Service
The Windows Audio service manages audio for Windows-based programs. If there is a problem with its status, it may cause the Realtek audio driver keeps crashing. You can check its status and restart it by following the steps below.
Step 1. Press the Windows + R key combination, then type services.msc in the input box and hit Enter.
Step 2. Scroll down to find and right-click Windows Audio, then choose Restart from the context menu.
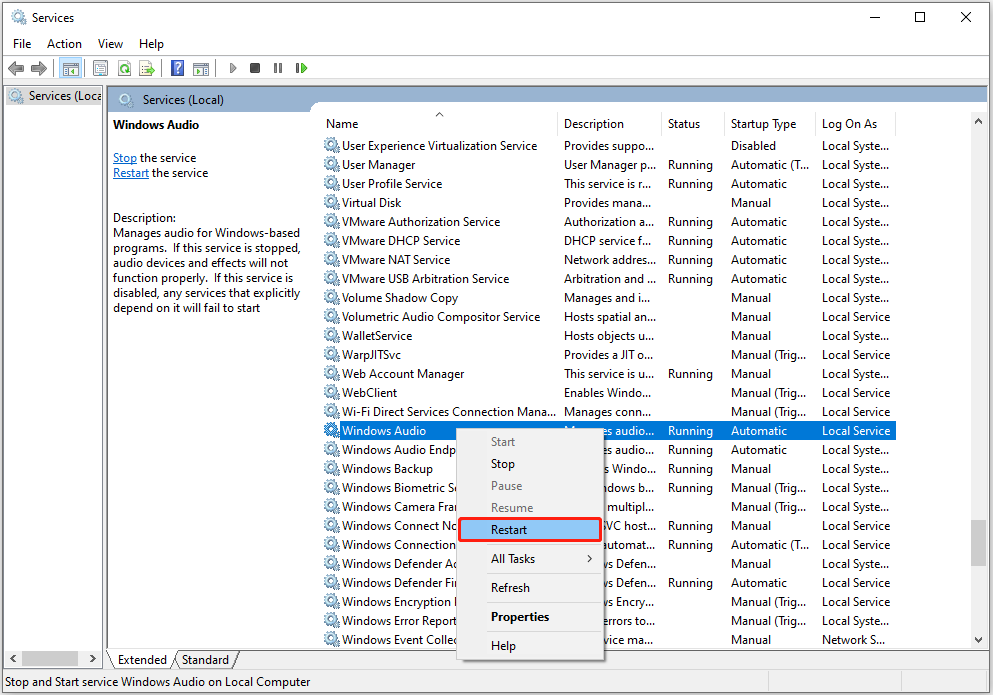
Step 3. Finally, check if the Realtek audio driver works well.
Solution 5. Check Driver/Software Conflicts
Sometimes newly downloaded software or drivers may conflict with existing Realtek drivers, causing driver crashes. To rule out this cause, you can recall and check if there is such a software or driver. If so, uninstall it temporarily to see if the problem is solved.
MiniTool Power Data Recovery FreeClick to Download100%Clean & Safe
Bottom Line
To sum up, the methods listed above are used to solve the Realtek sound driver crashing Windows 10/11. Thanks for your reading and hope the approaches are beneficial to you.
