Did the Snip & Sketch tool close unexpectedly before you could save your screenshot? How to recover unsaved Snip & Sketch screenshots effectively? Now this tutorial on MiniTool Software will walk you through detailed recovery steps.
Snip & Sketch is a powerful screenshot tool. It provides a convenient screenshot function, allowing you to directly open the screenshot tool through the shortcut Windows + Shift + S, and select a rectangular selection, free selection, window, or full-screen screenshot. After the screenshot is completed, you can also mark and crop the screenshot. However, sometimes you may forget to save the screenshot before closing it or the app closes automatically without asking you to save the screenshot.
In such situations, you can follow the instructions below to recover unsaved Snip & Sketch screenshots with the help of the clipboard history and the TempState folder.
How to Recover Unsaved Snip & Sketch Screenshots Windows 10
Way 1. Check the Clipboard History
The Windows clipboard is a temporary storage area that temporarily stores the content you copy. Screenshots captured by Snip & Sketch will be automatically copied to the clipboard as well. First, you should press the Windows + V keyboard shortcut to access the clipboard history. Then you can browse the content here and check whether the wanted screenshots are there. If yes, you can double-click on each of them to copy them and paste them where you want.
Related Post: Enable and Customize Clipboard History in Windows 10
Way 2. Check the TempState Folder
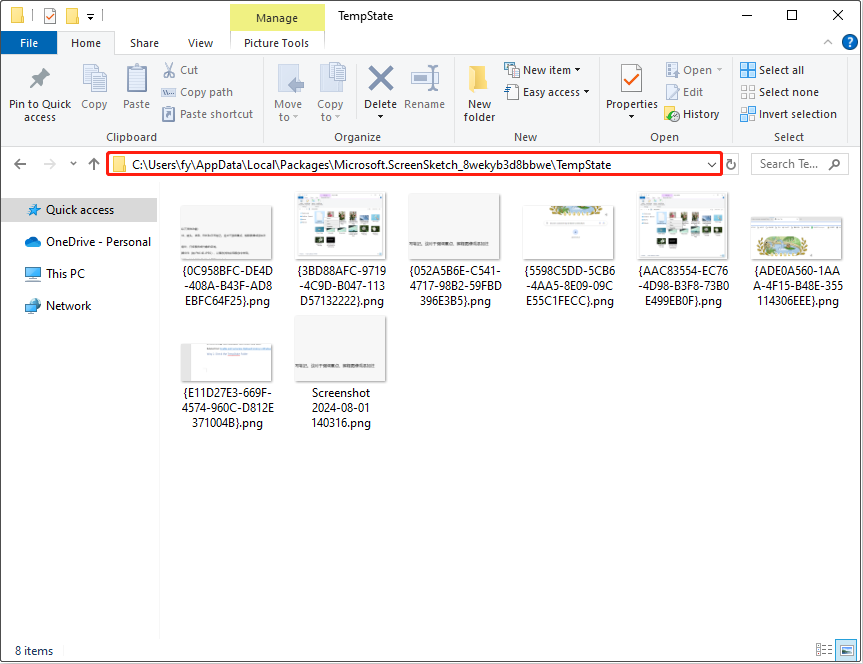
In addition to copying the screenshot to the clipboard, Snip & Sketch will copy the captured image to a temporary folder – the TempState folder. You can access this folder and check if you can find the required snips there by following the steps below.
Step 1. Press the Windows + R key combination to bring up the Run window.
Step 2. Type %LOCALAPPDATA%\Packages\Microsoft.ScreenSketch_8wekyb3d8bbwe\TempState in the text box and press Enter.
In the File Explorer address bar, this path should be:
C:\Users\username\AppData\Local\Packages\Microsoft.ScreenSketch_8wekyb3d8bbwe\TempState
Step 3. Browse the listed screenshots here, and then you can save or copy the needed ones to another location.

Top Recommendation: Enable Prompts for Saving Screenshots
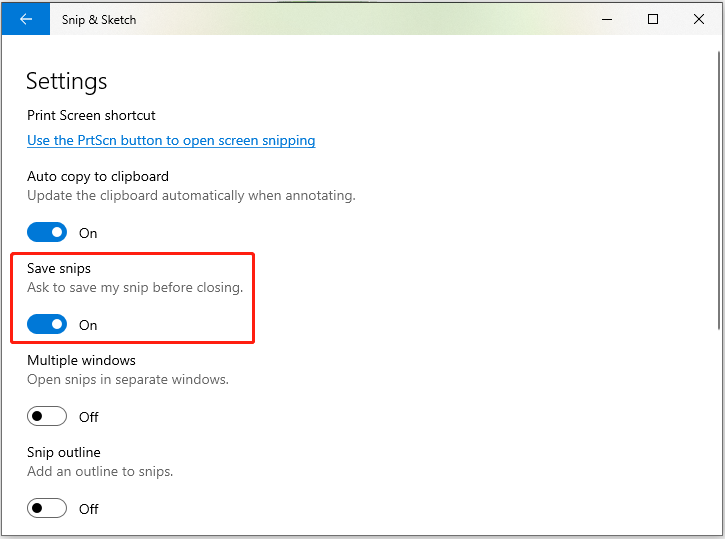
Snip & Sketch includes a function that prompts you to save your screenshot when exiting the program. If you haven’t saved your capture, a prompt will appear giving you the option to save or discard it, preventing any accidental loss of your screenshots. If you have not enabled this feature yet, you can enable it.
Step 1. Open Snip & Sketch.
Step 2. Click the three-dot icon in the upper right corner and choose Settings.
Step 3. In the new window, switch the button under Save snips to On.

How to Recover Deleted Snip & Sketch Screenshots
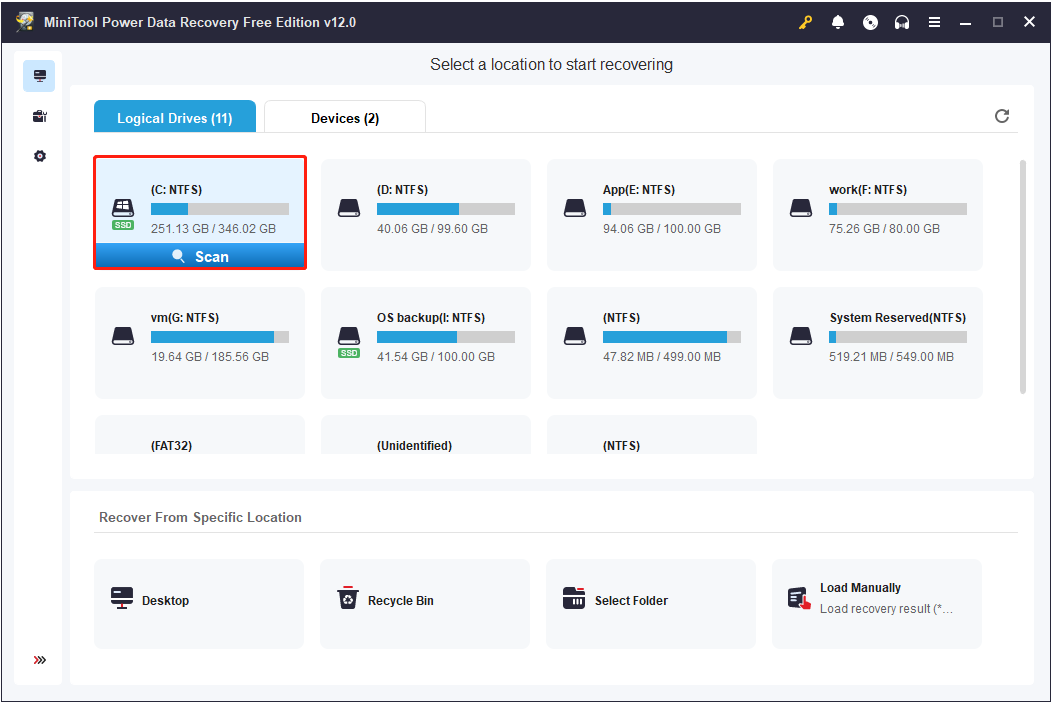
What if you accidentally delete our screenshots from the TempState folder? Is there a chance to recover deleted Snip & Sketch screenshots? Fortunately, yes. To recover permanently deleted screenshots or other types of files, you can use MiniTool Power Data Recovery, the best free data recovery software for Windows OS.
The free edition of this secure file restore tool supports 1 GB of free recovery of screenshots, images, videos, audio, documents, emails, and other types of data.
MiniTool Power Data Recovery FreeClick to Download100%Clean & Safe
With only 3 steps, you can get your screenshots back:
- Select the target partition or location from which you want to recover screenshots and click Scan.
- Find and preview the screenshots.
- Select the required screenshots and click Save.

Bottom Line
To sum up, you can go to the clipboard history or the TempState folder to recover unsaved Snip & Sketch screenshots on Windows 10. Suppose the screenshots are permanently deleted, you need to seek help from MiniTool Power Data Recovery.

