This article from MiniTool mainly introduces how to set up Windows 10 without internet, which is very friendly to users who do not have the Internet temporarily.
Similar to the mobile phone operating system we use every day, Windows 10 is an operating system applied to devices such as laptops and desktops. But if we do not have internet, can we install Windows 10 offline? Yes! The specific processes will be described below.
Prepare for Offline Installation of Windows 10
- A USB drive (preferably no smaller than 16 GB).
- A working computer.
- A Windows 10 product key (optional).
Major Processes to Set up Windows 10 Without Internet
Process 1: Create a Windows 10 Installation Media
Just like copying files in a USB drive to the computer, we first need to burn the Windows 10 system image into a USB drive (CD, hard drive, or external hard drive are also available, but USB drive is the most commonly used), that is, create a Windows 10 installation media.
Tip: Before performing all the following operations, please confirm that you are using a USB drive that does not contain usable files. Because the following steps will cause all data in the USB drive to be lost. Or you can use MiniTool ShadowMaker to back up the files first.
Step 1: Download and run the Windows 10 Media Creation Tool from the official website of Microsoft.
Step 2: Accept license terms (This process may take a long time, please be patient and do not close the window).
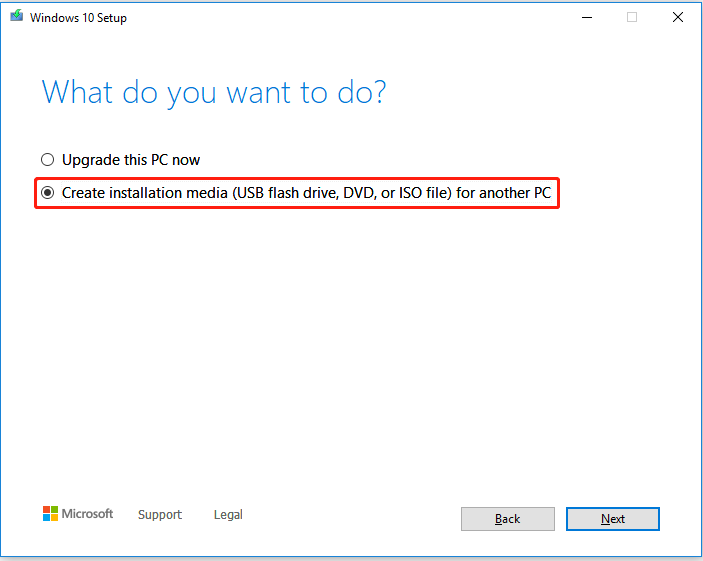
Step 3: Select the option of creating installation media and go to the next step.
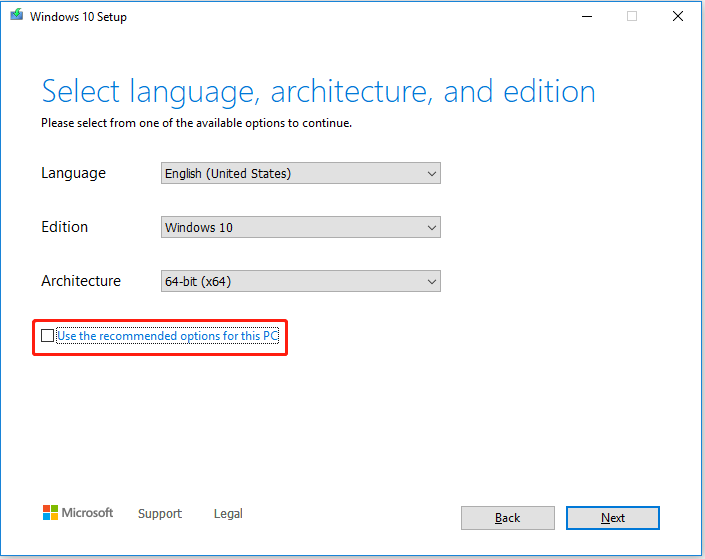
Step 4: Choose the language and other settings according to the actual situation (You can only make changes to other options after unchecking recommended options).
Step 5: Choose the media you use (here we select USB flash drive).
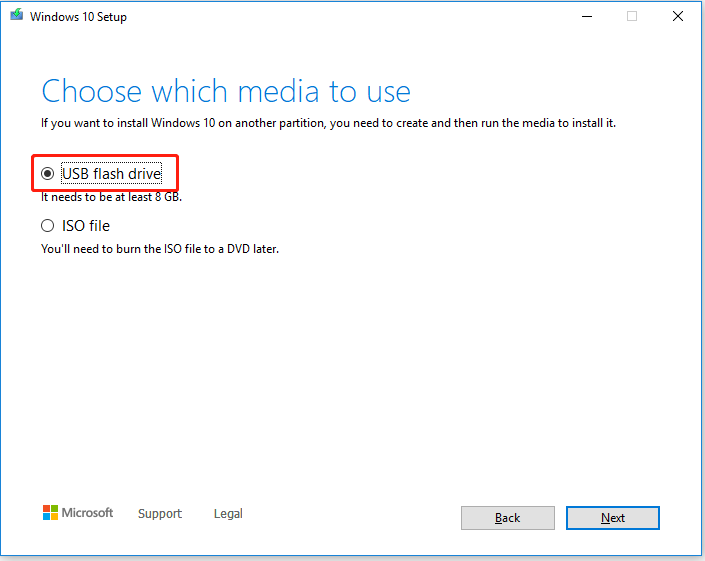
Step 6: Select the corresponding USB drive ready to store Windows 10 system files.
Step 7: The Media Creation Tool will start wiping out the files on the USB drive, repartitioning the drive to store usable Windows 10 system files.
For more information, please refer to: A Complete Guide to Windows 10 Media Creation Tool: How to Use
Process 2: Select the Correct Boot Device
After installing the Windows 10 files in the USB drive, we need to use the USB drive to install Windows 10. Here are the major steps:
Step 1: Connect the bootable USB drive to your unbootable computer.
Step 2: Press F12 to enter BIOS menu (Different computers may have different settings. Please refer to the prompts on the startup interface).
Step 3: Move to the Boot section, use the up, down, left, and right keys on the keyboard to move the USB drive to the first place (Your mouse might not be working right now).
Step 4: Press F10 to save the change (please select the save button actually prompted on the page).
Process 3: Install Windows 10 Without Internet
After completing all the above steps, the process of installing Windows from the USB drive will be very simple. Here are detailed instructions:
Step 1: Click the Install now button after selecting the language.
Step 2: You will be prompted to enter your Windows product key. If you do not have it, please select the I don’t have a product key option.
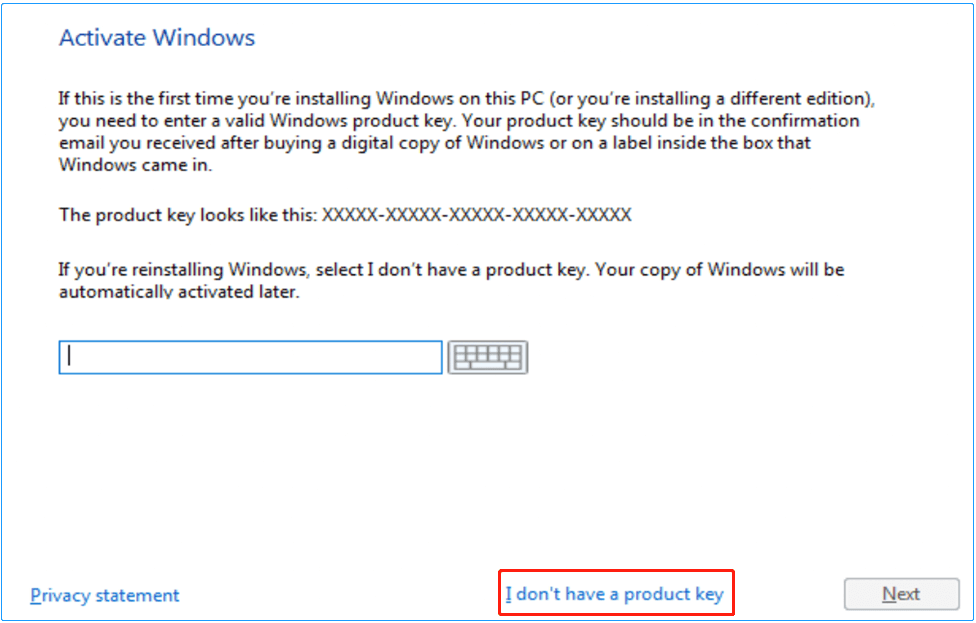
Step 3: Select the operating system you want to install and accept the license terms.
Step 4: Select Custom: Install Windows only (advanced) and then choose which partition you want the system to be installed on.
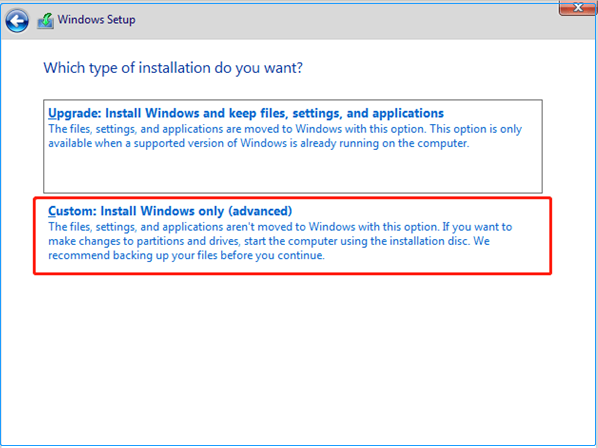
Step 5: Wait for the system installation to complete and your computer will restart automatically.
Step 6: Set up your region and keyboard layout according to your preference in the Basics section.
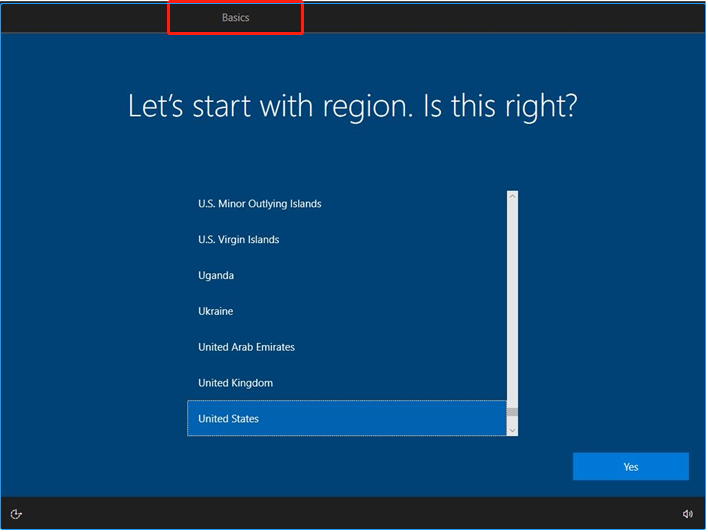
Step 7: Select I don’t have internet in the Network section.
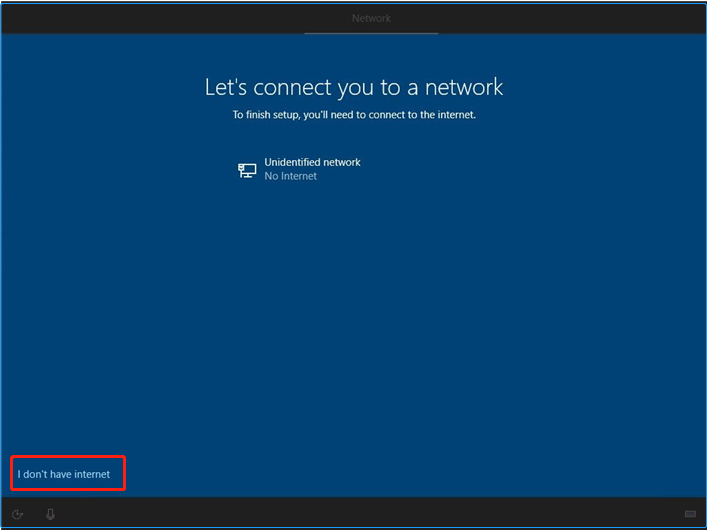
Step 8: Click Continue with limited setup in the lower left corner.
Step 9: Set up your name and password in the Account section.
Step 10: Click Accept in the Services section.
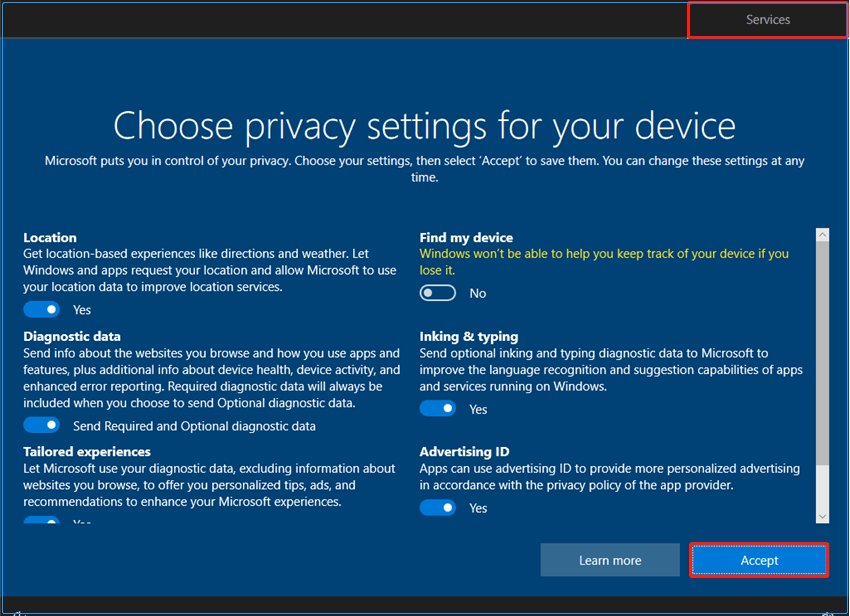
Step 11: The process of installing Windows 10 without a network is complete.
Under normal circumstances, you can successfully set up Windows 10 without internet by following the above instructions.
Wrapping Things Up
The above is the discussion on how to set up Windows 10 without internet. I hope you will no longer be troubled by how to install Windows 10 without networking. You can leave a message in the comment area below to discuss with us. If you have any questions about the use of MiniTool software, please feel free to contact us via [email protected].
