Microsoft SQL Server is one of the most popular professional database servers on the market. Microsoft SQL Server has 7 editions – SQL Server 2022, SQL Server 2019, SQL Server 2017, SQL Server 2016, SQL Server 2014, SQL Server 2012, and SQL Server 2008 R2.
1. Until now, you can only download the Microsoft SQL Server 2022 Preview edition. It hasn't been officially released yet.
2. The support for SQL Server 2012 Extended is ending on 12 July 2022.
SQL Server 2019 is available in five different editions.
- Developer Edition
- Express Edition
- Enterprise Edition
- Standard Edition
- Web Edition
Next, we will introduce how to download and install SQL Server 2019 on Windows 11/10/8/7 and Windows Server.
Requirements of Downloading SQL Server 2019
Before downloading, you should know the hardware/software/oprating system requirement of the SQL Server 2019.
Hardware
- Hard disk space: At least 6 GB of free hard-disk space.
- Monitor: Super-VGA 800X600 Resolution
- Memory: 1 GB
- Processor Speed: x64 Processor: 2.0 GHz
- Processor Type: x64 Processor, AMD Athlon 64, Intel Xeon EM64TT, Pentium 4 with EM64T
Software
NET Framework 4.6
Operating System Supported
- Developer/Express/Standard Edition: Windows 10 Home/Professional/Enterprise, Windows Server 2016/2019 DataCenter, Standard & Essentials
- Enterprise/Web Edition: Windows Server 2016/2019 DataCenter, Standard & Essentials
How to Download SQL Server 2019
How to get the SQL Server 2019 donwnload? The following are the detailed steps:
Step 1: Go to Microsoft SQL Server official download page.
Step 2: Scroll down to find the SQL Server 2019 download part. There are 2 free editions for you – Developer or Express. You can choose one of them based on your system.
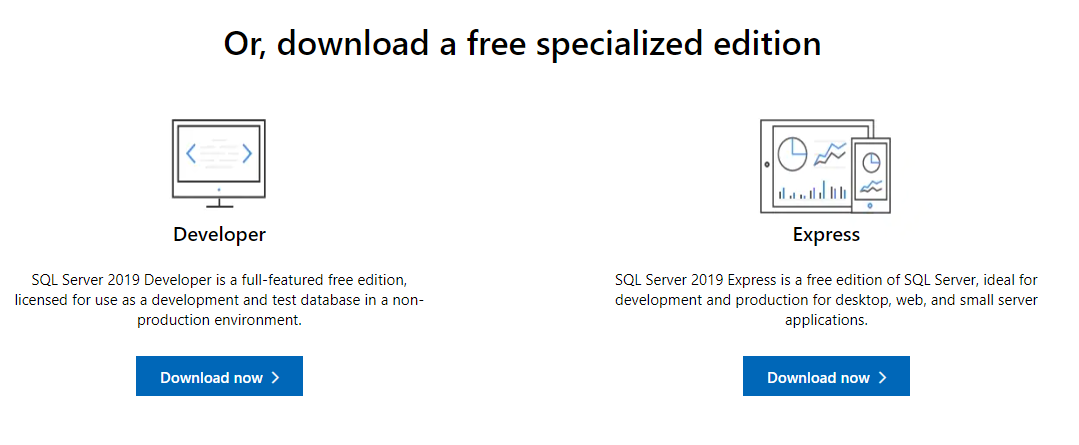
Step 3: Click Download now to download the package on your PC. Then, you can save the package on your hard disk.
How to Install SQL Server 2019
After downloading SQL Server 2019, you can start to install it. Continue to read this part to get the details.
Step 1: Doble-click the SQL Server 2019 exe file to run it.
Step 2: After launching it, you need to choose an installation type – Basic, Custom, and Download Media.
- Basic option – It installs only the essential features of SQL Server. It only asks for the License agreement and installation path.
- Custom option – It allows you to choose the features you want to install.
- Download Media option – It allows you to download all the installations to a local folder. You install the SQL Server 2019 later without the Internet.
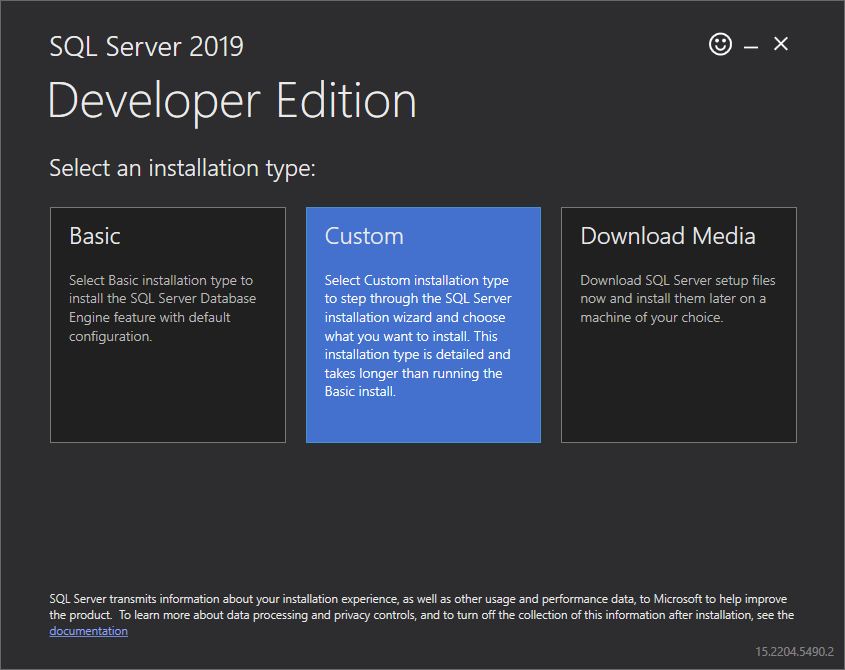
Step 3: Here, we take choosing Basic as an example. Then, the License Terms page will appear and you need to click Accept.
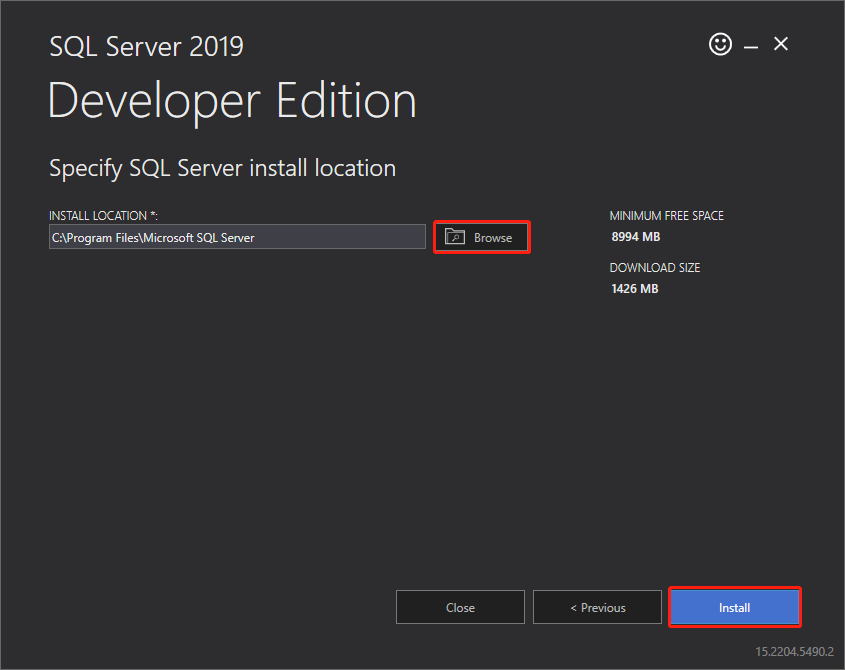
Step 4: Next, you need to sepecify the SQL Server 2019 install location by click the Broswse option. After choosing the path, you need to click Install.
Note: You need to make sure the free space is available as per the download size of the software.
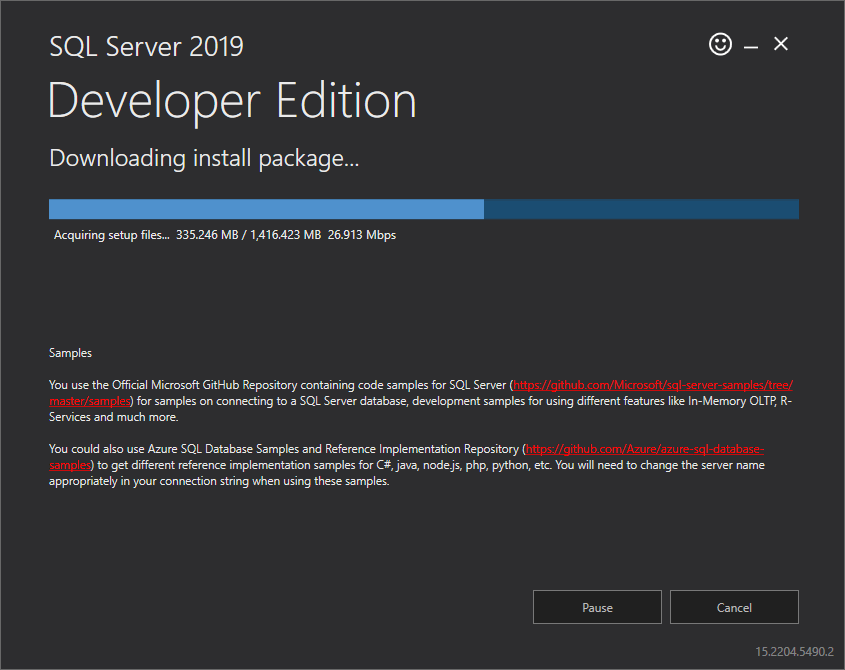
Step 5: Then, it will start to download install package. Once the download is successful, the installation process will begin.
Step 6: After installing SQL Server 2019, you can start to use it. You can also choose Connect Now or Install SSMS into your system.
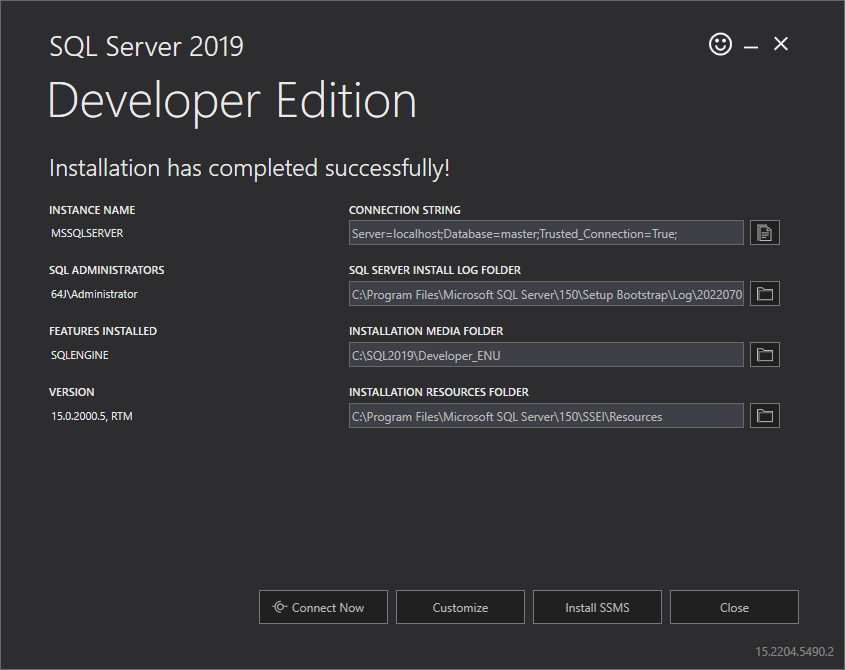
Step 7: With the SQL Server 2019 now setup, you can use it to connect it to your applications and other software.
Final Words
In this article, we have introduced SQL Server 2019 and how to download and install it in our system. Depending on the use case and system, there are different ways and versions of SQL Server 2019.
