The Memory Could Not Be Written or Read
When you are conducting various operations on your computer such as powering off or restarting your PC, browsing web pages, playing games, and more, the following error message might pop up:
The instruction at 0x000000006D1FB90D referenced memory at 0x000000006D1FB90D. The memory could not be written. Click on OK to terminate the program.
This error indicates that there is a severe issue within the memory access protocols of the operating system. A few causes can lead to this warning, such as:
- Improper shutdown of your PC.
- Interference of third-party programs and services.
- Damaged system files.
- Faulty memory modules.
- Insufficient virtual memory.
MiniTool ShadowMaker TrialClick to Download100%Clean & Safe
How to Fix the Memory Could Not Be Written Windows 11/10?
Fix 1: Close All Running Programs Before Shutting Down the PC
If you receive the memory could not be written error when shutting down your computer, chances are that there are some programs running in the program. Therefore, you need to make sure to close all the apps before powering off your PC.
Fix 2: Repair Corrupted System Files
The system stability can be impacted negatively by any system file corruption. If there are some corrupted system files on your system, running the combination of System File Checker (SFC) and Deployment Image Servicing and Management (DISM) might be helpful. To do so:
Step 1. Type cmd in the search bar to locate Command Prompt and run it as an administrator.
Step 2. Input sfc /scannow and hit Enter.
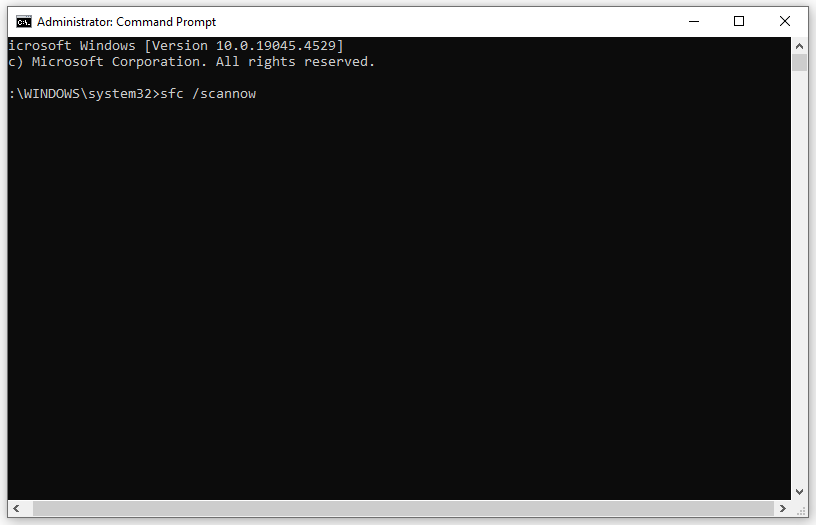
Step 3. After the process is done, run the following command:
DISM /Online /Cleanup-Image /RestoreHealth
Fix 3: Perform A Clean Boot
Certain third-party services or applications might also be responsible for instruction at referenced memory could not be read or write. To identify and eliminate their potential conflicts, it’s a good option to perform a clean boot. By doing so, it will start Windows with a minimal set of drivers and programs. Here’s how to do it:
Step 1. Right-click on the Start menu and select Run.
Step 2. Input msconfig and hit OK to open System Configuration.
Step 3. Go to the Services tab > check Hide all Microsoft services > hit Disable all.
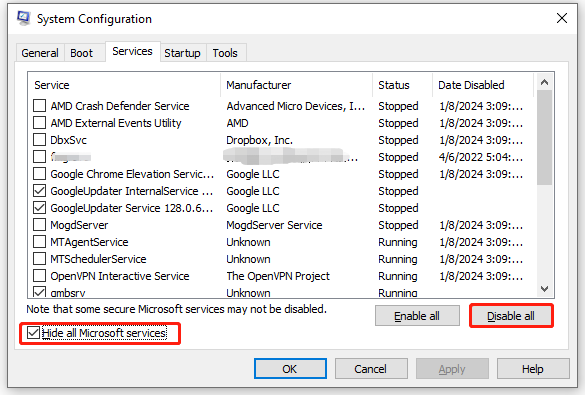
Step 4. In the Startup tab, click on Open Task Manager.
Step 5. Right-click on each startup and select Disable.
Step 6. Go back to System Configuration and hit OK to save all the changes you’ve made.
Step 7. Restart your computer and then it will boot into a clean environment.
Fix 4: Run Windows Memory Diagnostics
Faulty memory modules or sticks can also trigger the memory could not be written or read. To check your computer for memory issues, you can run Windows Memory Diagnostics to see if it will make a difference. Follow these steps:
Step 1. Press Win + R to open the Run box.
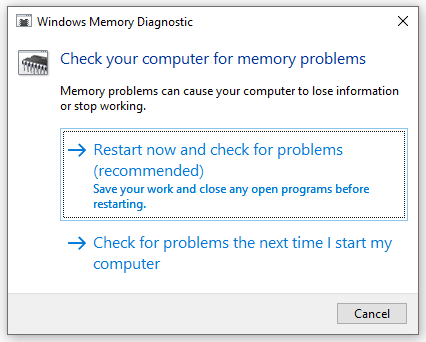
Step 2. Type mdsched.exe and hit Enter to launch Windows Memory Diagnostic.
Step 3. Click on Restart now and check for problems (recommended) to start the process.
Fix 5: Increase Virtual Memory
When the RAM isn’t enough to perform some resource-intensive tasks, virtual memory works as a supplement to your physical RAM to alleviate its pressure. Therefore, to cope with memory-related issues like the memory could not be written Windows 10/11, you can consider allocating more virtual memory. To do so:
Step 1. Open File Explorer and right-click on This PC to select Properties.
Step 2. Scroll down to find Advanced system settings and hit it.
Step 3. In the Advanced tab, click on Settings under Performance.
Step 4. Go to the Advanced tab and hit Change.
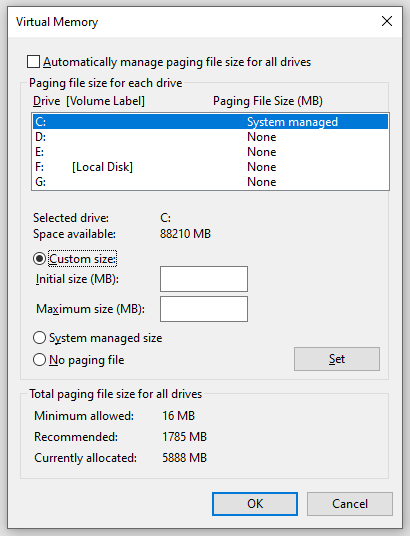
Step 5. Uncheck Automatically manage paging file size for all drives > tick Custom size > enter Initial size and Maximum size > hit Set > save the changes.
Fix 6: Perform A System Restore
If the memory could not be written occurs after you made any big changes on your system, you can perform a system restore to cancel the recent changes you’ve made. To do so:
Step 1. Type create a system point in the search bar and hit Enter.
Step 2. In the System Protection tab, hit System Restore and then hit Next.
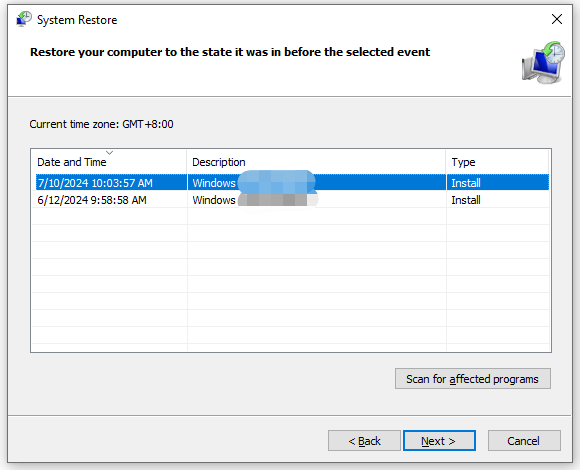
Step 3. Choose a desired restore point and hit Next.
Step 4. After confirming all the details, click on Finish to start the processes.
Final Words
The memory could not be written is one of the most annoy issues you might run into on the computer. Luckily, you can figure out why it occurs and solve it with one of the solutions mentioned above. Appreciate your time and support!
