If a request was initiated to start a service but it did not respond in the time window, then a timeout will occur. That’s why the error message “Error 1053: The service did not respond to the start or control request in a timely fashion” appears. Read this post from MiniTool to get some solutions to fix this error.
You may be encountering an error message “Error 1053: The service did not respond to the start or control request in a timely fashion”.
Here are multiple reasons for this error: timeout settings, missing DLL file, corrupted/missing system files, outdated Windows, corrupted installation, bad network configurations or administrator access error. For developers, this error may occur because of using a release build, missing frameworks or an issue in DB service.
There are many variations of “the service did not respond” error. This post will show you all the variations of it and introduce how to solve this problem.
Before you move to the following part, log in as an administrator on the computer and make sure you have an active internet connection.
Solution 1: Change Timeout Settings with Registry Editor
The very first solution you can try is changing the timeout settings of your services with Registry Editor.
Step 1: Press the Win key + R key to open the Run utility. Next, input regedit and press Enter.
Step 2: Now, navigate to this file path:
HKEY_LOCAL_MACHINE\SYSTEM\CurrentControlSet\Control.
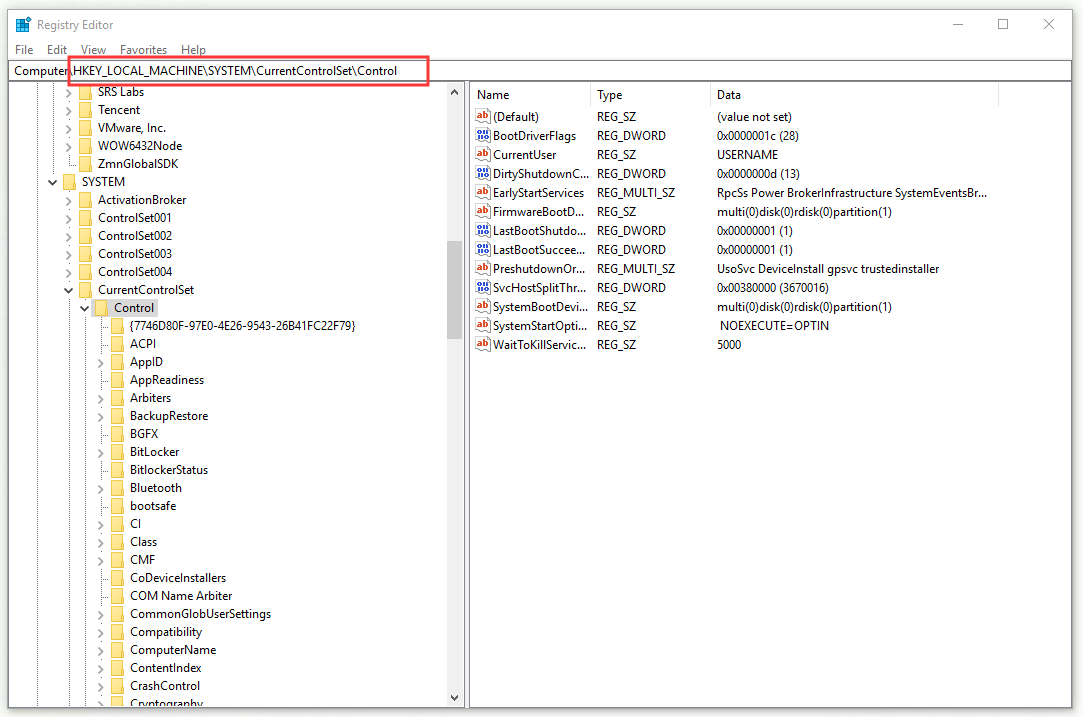
Step 3: Find the ServicesPipeTimeout key. If you don’t find it, select Control, right-click any blank area at the right side and select New > DWORD. Then name the key as ServicesPipeTimeout.
Step 4: Double-click ServicesPipeTimeout and then change its Value data to 180000. Click OK.
Step 5: Restart your computer.
Try launching the service and check if “the service did not respond” error is resolved.
Solution 2: Check for System File Corruptions
Another method you can try is to check whether your system has any corruption or not.
Step 1: Type cmd in the Search bar, right-click Command Prompt and choose Run as administrator.
Step 2: Run the following commands one by one:
sfc /scannow
DISM /Online /Cleanup-Image /RestoreHealth
Step 3: After running the scan, restart your computer.
Now check if “the service did not respond” error is resolved for good.
Solution 3: Reinstall the Application
Another useful solution to fix the service error 1053 is to reinstall the application that is requesting the service.
Step 1: Press the Win key + R key to open the Run utility. Next, input appwiz.cpl and press Enter.
Step 2: Find the application which is requesting the service, click it and click Uninstall.
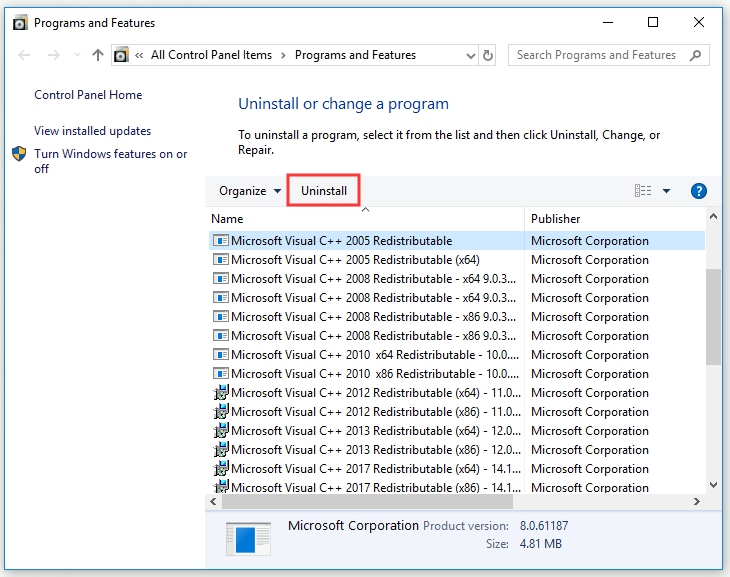
Step 3: Restart your computer and continue to reinstall this app.
Now check if “the service did not respond” error is fixed.
Solution 4: Reset Network Cache and Configurations
You can also reset the network configurations to eradicate this error message.
Step 1: Type cmd in the Search bar, right-click Command Prompt and choose Run as administrator.
Step 2: Run the following commands one by one:
netsh winsock reset
ipconfig /renew
After resetting your network, check through your browser to ensure that you have internet access. Now, check if “the service did not respond” error is resolved.
Solution 5: Get Ownership of the Application
If the application doesn’t have enough elevated access, this error may occur. Thus, you need to get ownership of the application.
Step 1: Navigate to the file/folder of the application, right-click it and select Properties.
Step 2: Switch to the Security tab and click Advanced.
Step 3: Click Change.
Step 4: Now enter your user account name and click Check Names.
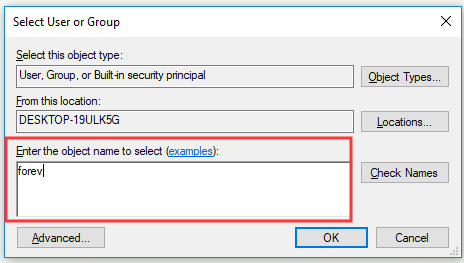
Step 5: Click OK.
Step 6: Check Replace all child object permission entries with inheritable permission entries from this object and click Apply and OK.
Step 7: Close the files and restart your computer.
Now, try launching the application and check if “the service did not respond” error has been resolved.
Solution 6: Update Windows to the Latest Build
Another thing to try is updating Windows to the latest build. You need to check whether there is an updated version of Windows installed on your computer.
Step 1: Press the Win key + I key, click Update & Security and then click Windows Update from the left side.
Step 2: Click Check for updates from the right side.
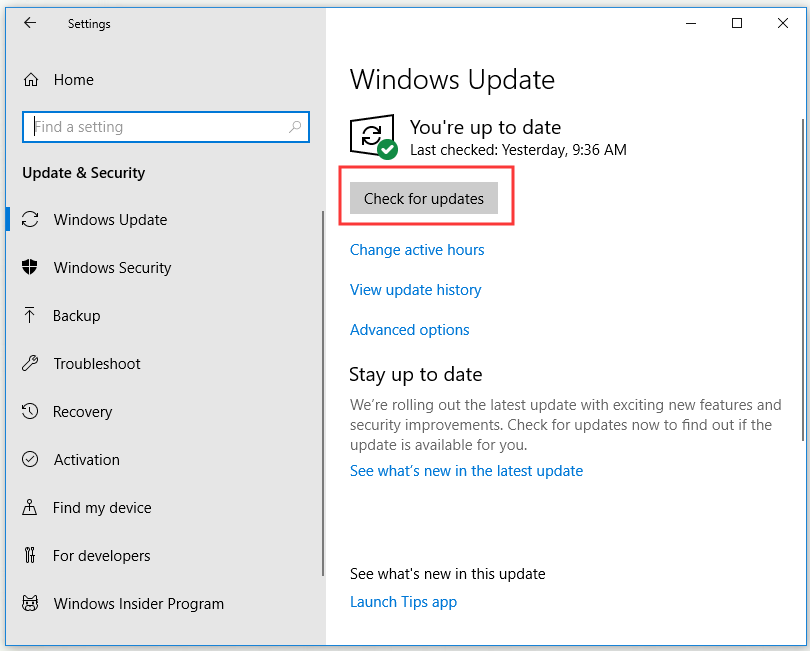
If there are any available updates, they will be downloaded and installed automatically.
Step 3: Reboot your computer.
Now, this service did not respond error should be fixed.
Bottom Line
After reading this post, you should know how to fix “the service did not respond” error. If you are experiencing this error, try the methods mentioned above.
