Windows 11 24H2 Bug Causes Time Zone Glitch
Microsoft confirmed the Windows 11 24H2 bug causes time zone glitch and is scrambling to resolve these frustrating problems in Windows 1124H2, including time zone configurations. Windows 11 24H2 has encountered numerous problems since its rollout began in October, and there appears to be no resolution forthcoming. Therefore, to fix the vexing issue, for instance, date and time settings are broken in Windows 11 24H2, follow this article to make your computer work well.
According to the Windows Release Health Notes for Windows 11 24H2, it has been noted by developers that after upgrading to Windows 11 24H2, users lacking administrative rights will be unable to modify the time zone settings within the Windows interface under Settings > Time and language > Date and time.
Users without administrative privileges will not have the expected option to change the time zone visible or available to them. Consequently, any changes to local time settings will necessitate assistance from an administrator, which could be a hassle for standard users who may need to adjust settings according to their local area. Therefore, it is important for users to understand this limitation after the update, as it might affect their capability to set the correct time zone independently.
If you encountered the issue that the Windows 11 24H2 bug causes time zone glitch and want to change your PC’s time zone, keep reading to find the solutions.
Workaround 1: Use the Control Panel to Change PC’s Time Zone
Consider you want to stay in the Windows 11 24H2 version and have the need to change the PC’s time zone without an administrator privilege. You can follow the instructions to change the time and data settings via Control Panel.
Step 1: Open the Windows Search bar, type Control Panel in the box and press Enter.
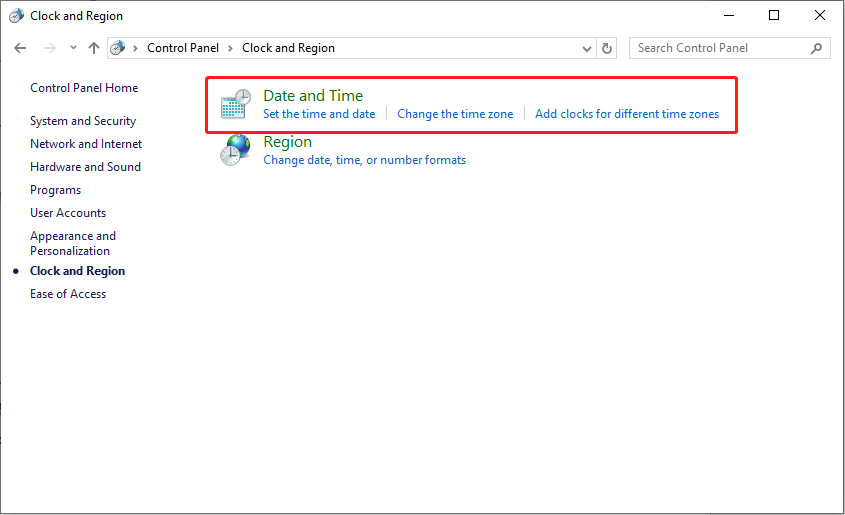
Step 2: Once in the Control Panel, go to Clock and Region > Date and Time > Change time zone….

Step 3: Set the wanted time zone from the drop-down menu and press OK to save the change.
Workaround 2: Run the Command to Change PC’s Time Zone
A more straightforward method to adjust the time zone in Windows 11 version 24H2, particularly for users without administrative privileges, is by utilizing the Run dialog. This approach allows users to quickly access the necessary settings without navigating through multiple menus. To do it:
Step 1: Access the Run dialog by pressing the Windows key + R keyboard shortcut.
Step 2: In the Run dialog box, type timedate.cpl and press Enter to run the command.
Step 3: In the pop-up window, click the Change time zone… button.
Afterward, you can change your computer’s time zone.
Workaround 3: Uninstall Windows 11 24H2
Unless you have administrative rights in Windows, you might not be able to modify the time zone in the Date & Time section of Windows Settings. The official 24H2 update for Windows 11 from Microsoft has been burdened with numerous bugs. If you want to have a smooth computer environment, we recommend you uninstall Windows 11 24H2 temporarily until Microsoft fixes all the problems.
Step 1. Press Win + I simultaneously on your keyboard to access Windows Settings.
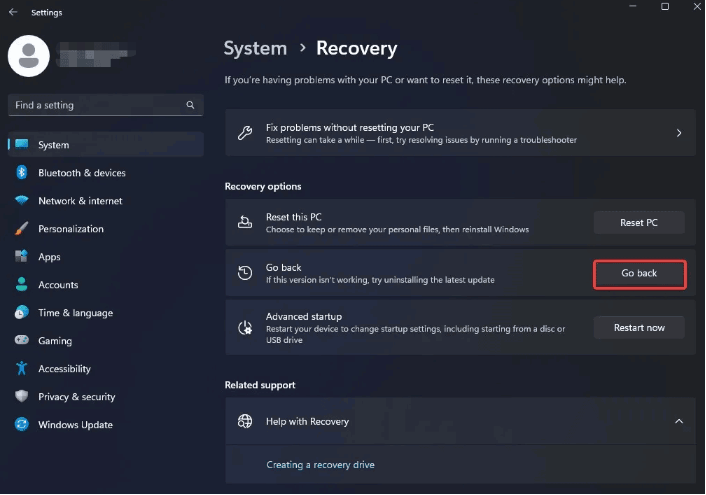
Step 2. Navigate to System > Recovery and click the Go back button in the Recovery options.

Step 3. Click Next > No thanks, and then press Next several times to proceed.
Step 4. Select Go back to earlier build to begin the rollback to Windows 11 24H2.
Once this process is finished, the substantial update will be uninstalled from your system, reverting it to a previous version. If you want to attempt the 24H2 update, consider upgrading to it after it has been officially released.
Additionally, check out the related article: Downgrade/Rollback/Uninstall Windows 11 24H2 – 3 Ways for You!
MiniTool Power Data Recovery FreeClick to Download100%Clean & Safe
Summary
In a word, the Windows 11 24H2 bug causes time zone glitch and other issues like game crashing, and audio not working. This post explains several methods to deal with the time zones not working on Windows 11 24H2 issue. Hope the information is helpful for you.

