When you connect a shared printer on Windows 11 Pro 23H2, you may receive the Operation could not be completed (error 0x00000709) pop-up message. This post from MiniTool introduces how to remove the Windows 11 Pro 23H2 error 0x00000709.
Many users complain that they receive the Windows 11 Pro 23H2 error 0x00000709 when connecting the shared printer. The following are the 2 forums:
I have an issue I am unable to solve. It's a new Dell Optiplex 7010 and Dell can't help with this. I don't have a support contract with MS so here I am. It is running Windows 11 23H2 fully up to date. I added one network printer (by IP or hostname didn't matter) that is not shared, just a standard network printer that works fine. No issue with it working but I get the error pop up at every logon. No employee will want to deal with this.Microsoft
There seems to be an issue in sharing printers from Windows 11 (23H2) to previous versions of Windows. If I try to access the properly shared printer on Windows 11 from Windows 7 OS, double clicking on the printer gives a 0x00000709 error, and trying to connect to a printer gives a "Can't connect to the printer" error.https://www.ntlite.com/
If you are facing the same problem, follow the below 5 ways to solve it.
Fix 1: Run the Windows Printer Troubleshooter
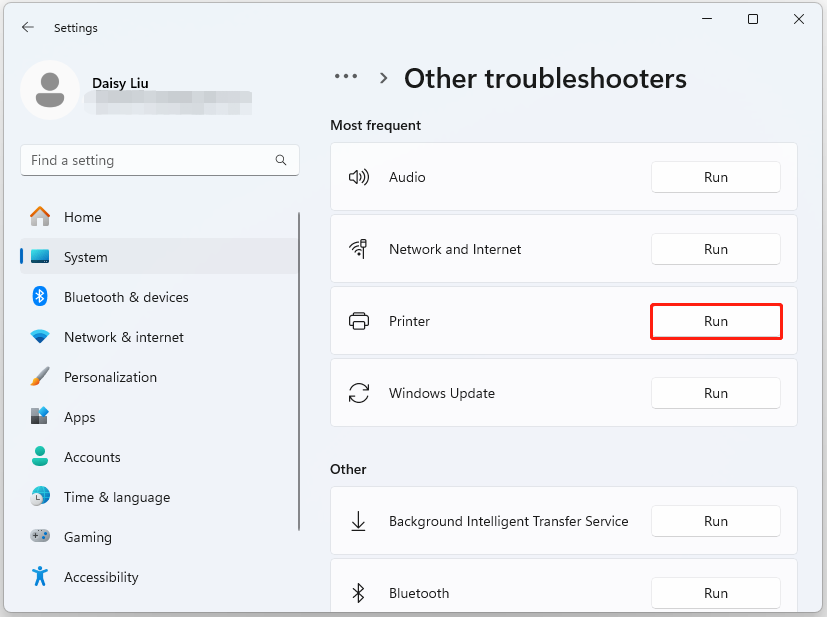
You can fix the Windows 11 Pro 23H2 printing error 0x00000709 by running Windows 11 built-in troubleshooter. Here is how to do that:
1. Press the Windows key + I key to open the Settings application.
2. Go to System > Troubleshoot > Other troubleshooters.
3. Find Printer and click the Run button.
Fix 2: Change RPC Connection Settings
To fix the error 0x00000709 Operation could not be completed on Windows 11 Pro 23H2, you can change RPC connection settings.
1. Press the Windows + R keys together to open Run. Then, type gpedit.msc in it.
2. In the left-sidebar, select Administrative Templates > Printers.
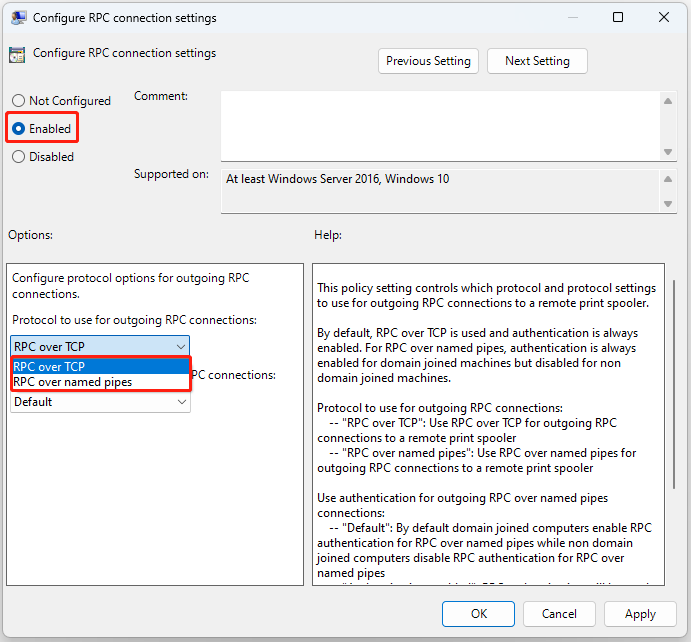
3. Find and double-click Configure RPC connection settings.
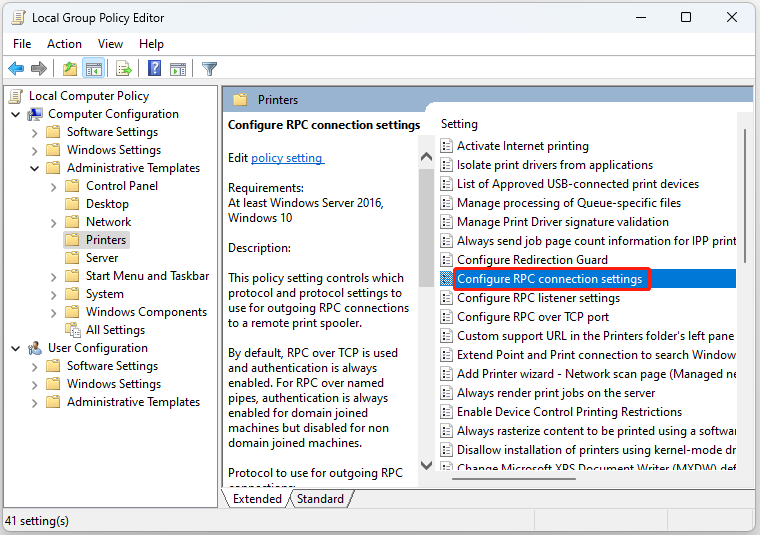
4. Then, choose the Enabled option. Select RPC over named pipes from the drop-down menu. Then, click Apply > OK.
Fix 3: Change the Registry
You can also change the registry items to fix the “Windows 11 Pro 23H2 error 0x00000709”. Follow the guide below:
1. Press the Windows + R keys together to open Run. Then, type regedit in it.
2. Go to the following path:
HKEY_LOCAL_MACHINE\Software\Policies\Microsoft\Windows NT\Printers\RPC
3. On the right side, find and double-click RpcUseNamedPipeProtocol. If you can’t see it, right-click on space and select New > DWORD (32-bit) Value, and name it RpcUseNamedPipeProtocol.
4. Two values need to be configured:
RpcOverTcp (default) – set it to 0.
RpcOverNamedPipes – set it to 1.
Fix 4: Restart Print Spooler service
You can restart the Printer Spooler Service to fix the Windows 11 Pro 23H2 error 0x00000709.
1. Type Services in the Search box to open it.
2. Find Printer Spooler and right-click it to select Restart.
3. Try to connect to the printer again after the service restarts.
Fix 5: Uninstall the Rcently Update
If you receive the Windows 11 Pro 23H2 printing error 0x00000709 after installing the recent update, you should uninstall it. To do that, follow these steps:
MiniTool ShadowMaker TrialClick to Download100%Clean & Safe
1. Press Windows + I to open Settings.
2. Go to Windows Update > Update history.
3. Under Related settings, click Uninstall updates.
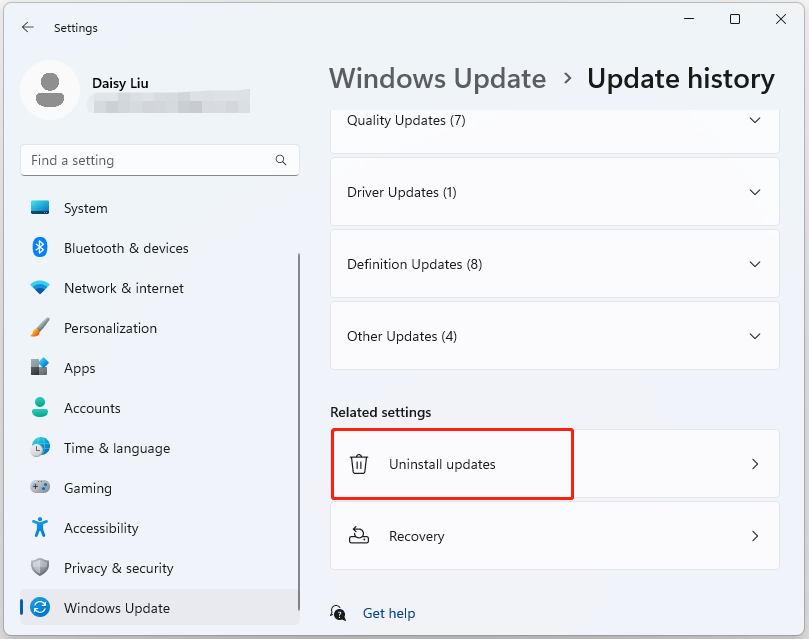
4. Find the most recent update in the Control Panel app by checking its installation date. Once it has been located, right-click it and click Uninstall.
Final Words
To sum up, this post has introduced 5 useful methods to fix the Windows 11 Pro 23H2 error 0x00000709 when connecting the shared printer. If you meet the same issue, you can try the methods mentioned above.
