While editing a Microsoft Word document, it often happens that the file is not saved due to human error or a system crash. Does Word have a temporary file location and how to find it? Here this post on MiniTool tells you how to perform unsaved Word document recovery from Word temporary file location.
Word is a component of Microsoft Office that provides powerful document creation and editing functions. However, many users are often troubled by forgetting to save Word files. Fortunately, Word creates and stores a copy of unsaved content. Whenever you make changes to a Word document, the changes are saved to a temporary file in the .wbk or .asd format and stored in a designated temporary folder on your computer. These temporary files enable you to easily recover unsaved content.
In the following part, we will introduce where the Word temporary file location is on Windows 10.
How to Find Word Temporary File Location
The default Word temporary file location is:
C:\Users\username\AppData\Roaming\Microsoft\Word
As long as you enable the AutoSave/AutoRecover feature, the temporary files will be stored in this location by default.
You can open each temporary file to identify the needed one and resave it.
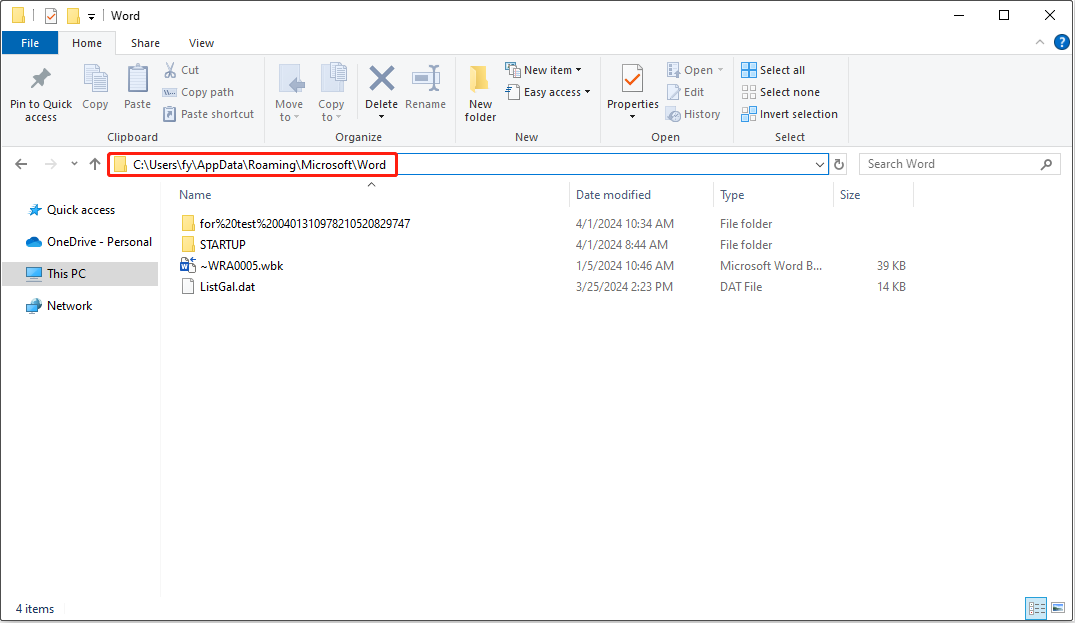
Alternatively, you can go to the Word temporary file location from an opened Word document.
Open a Word document, and click File > Info > Manage Document > Recover Unsaved Documents. After that, the temporary files will be displayed, and you can open the target folder to recover unsaved Word documents.
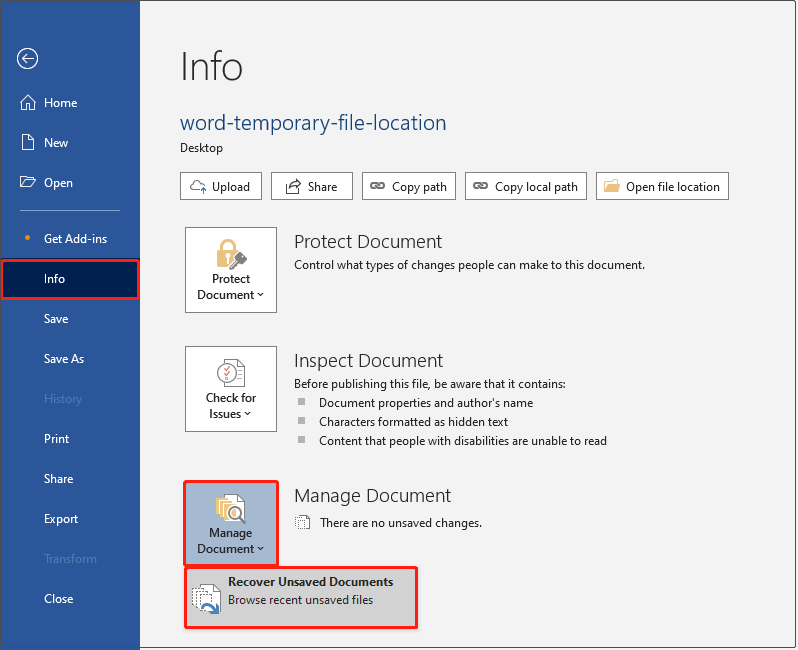
In addition, you can view Word temporary files by going to File > Open > Recover Unsaved Documents (at the bottom of the window).
How to Change Word Temporary Files Location Windows 10
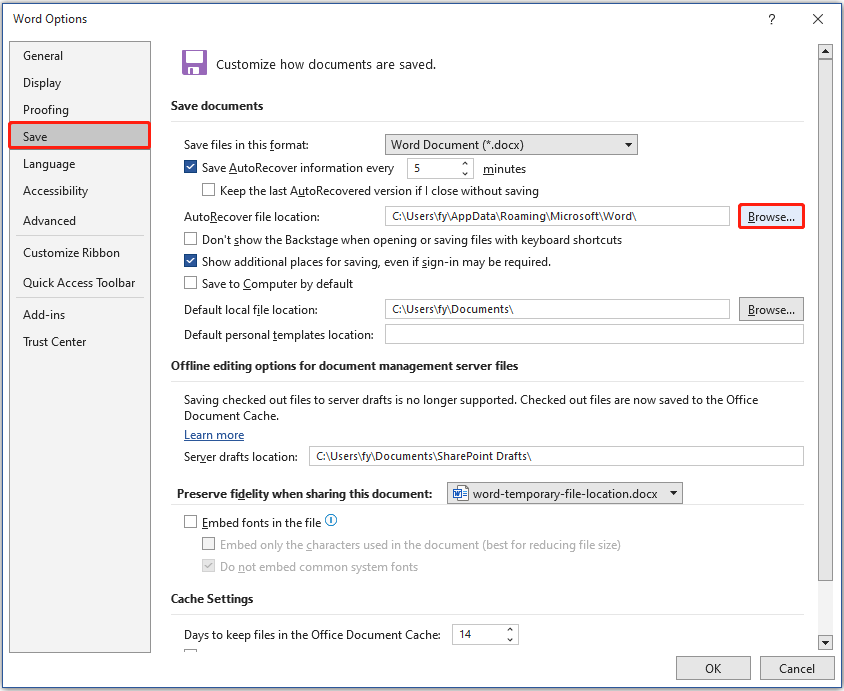
Word offers you the option to change the Word temporary file location. To complete this task, you need to open a Word document, and then click File > Options > Save. To change the AutoRecover file location, you need to click the Browse button and choose a preferred location.
Also, you can customize the autosave time interval on this page.
How to Recover Deleted/Lost Word Documents
For unsaved Word documents, you can recover them from temporary files. If you need to recover deleted/lost Word documents, you need to check the Recycle Bin. Double-click on the Recycle Bin icon on your desktop, then check if the required items are there. If yes, you can right-click on them and restore them.
If the Recycle Bin has been emptied, to recover Word files, you need to seek help from professional data recovery software like MiniTool Power Data Recovery. This software is effective in recovering Word documents, Excel files, PowerPoint files, PDFs, pictures, videos, audio, and other types of files.
You can download the free edition of this software to scan your computer and check if the needed files can be found. If yes, you can use MiniTool Power Data Recovery Free to recover 1 GB of files without paying a penny.
MiniTool Power Data Recovery FreeClick to Download100%Clean & Safe
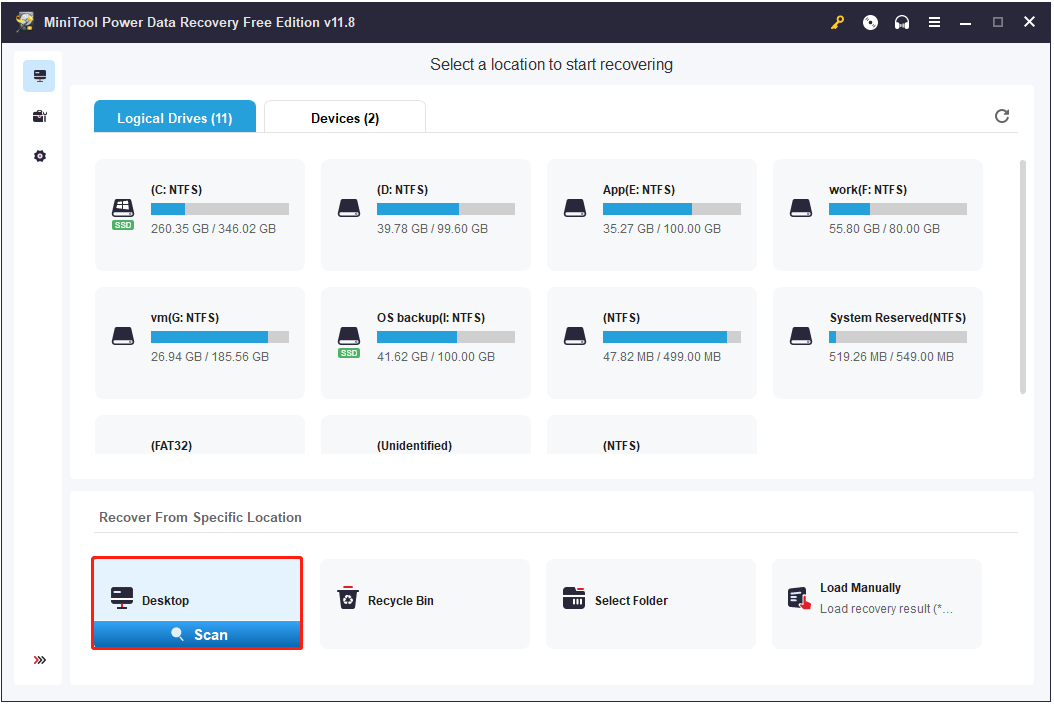
Step 1. Launch MiniTool Power Data Recovery Free to go to its main interface. Here, select the target drive or location where the lost Word documents should exist and click Scan.
Step 2. After scanning, you can expand each folder under Path to find the needed Word file or go to the Type category list to view all Word documents by file type. To ensure that the files found are the ones you need, you can double-click on them to preview them.
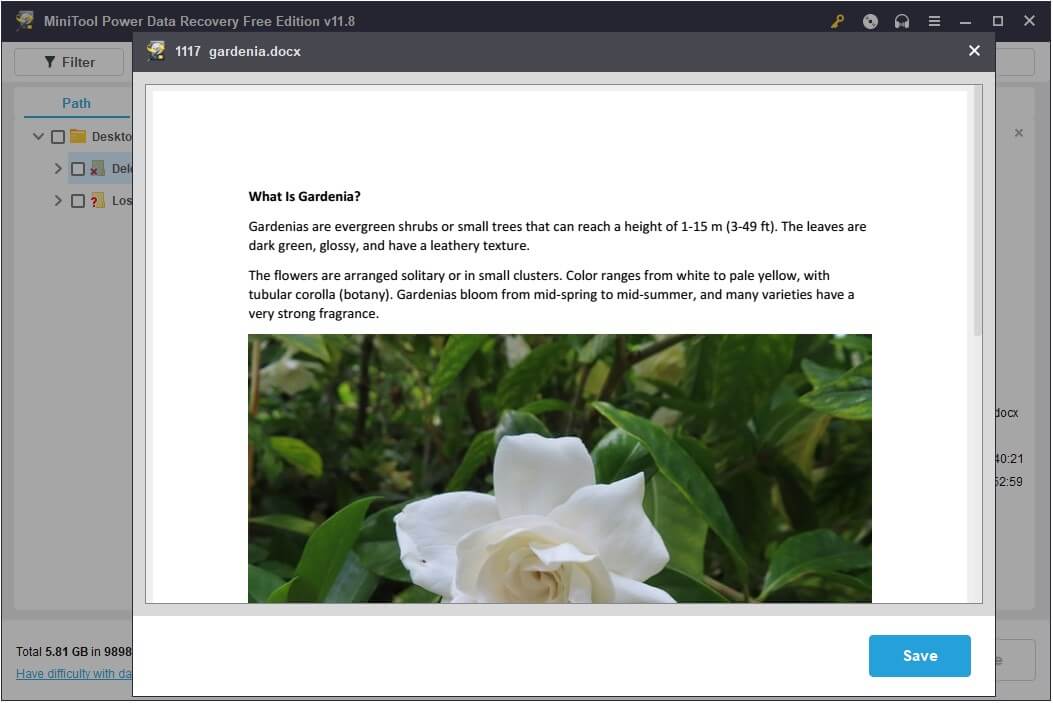
Step 3. Tick all needed Word documents, then click the Save button to choose a location to store them.
Bottom Line
All in all, this article talks about where to find the Word temporary file location to recover unsaved Word documents. Also, it introduces a significant file recovery tool, MiniTool Power Data Recovery, to help you recover deleted Word documents.
MiniTool Power Data Recovery FreeClick to Download100%Clean & Safe
![[Solved]: Word Not Showing Recent Documents Win 10/11](https://mt-test.minitool.com/images/uploads/2023/07/word-not-showing-recent-documents-thumbnail.png)
