When moving, transferring, or deleting a file/folder on your computer or external hard drive, you might get an error message, telling that you require permission from everyone to change this file. How to resolve this error to finish your operation? This article from MiniTool will walk you through full guidance.
You must know that different kinds of accounts have different permissions to operate your computer. Due to insufficient rights, you might receive error messages like Windows 10 can’t copy or move files, You need to provide administrator permission to delete this folder, or You require permission from everyone to change this file.
You may receive an error message: File Access Denied, You require permission from Everyone to make changes to this file in some cases when making changes to some files. This problem is usually caused by a lack of permissions or viruses or malware. Then, how to solve it? Keep reading to find solutions.
Fix the You Require Permission from Everyone to Change This File Problem
Method 1: Change Permissions of a File
Do you know how to give permission to make changes to a file? Follow the next steps to take full control of the file.
Step 1: Right-click on the file and choose Properties from the context menu.
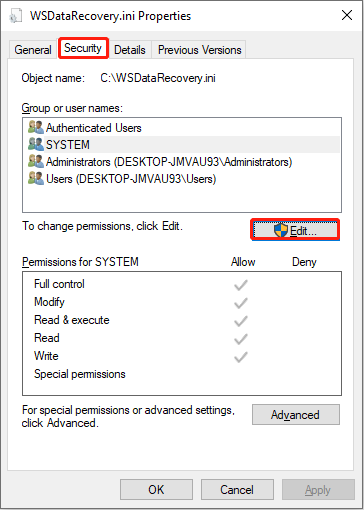
Step 2: Turn to the Security tab and click on the Edit button.
Step 3: Select your account in the Group or user names section, then check Full control in the Allow box to get the full control of this file.
Step 4: Click on the Apply button, then choose OK to close the window.
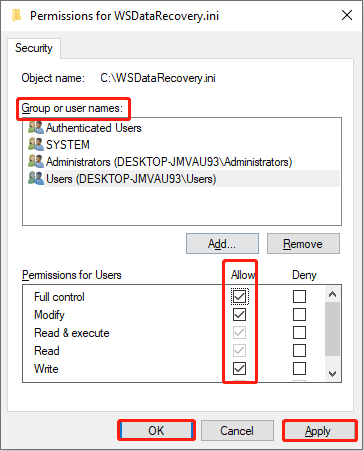
After settings, you can go to change the file to see whether the window will prompt or not.
Method 2: Delete a File/Folder Using Command Prompt
If you can’t access the first method, you can try to delete the file by using Command Prompt, the Windows built-in tool.
Step 1: Press Win + R to open the Run window.
Step 2: Type cmd into the box and press Shift + Ctrl + Enter to run Command Prompt as administrator.
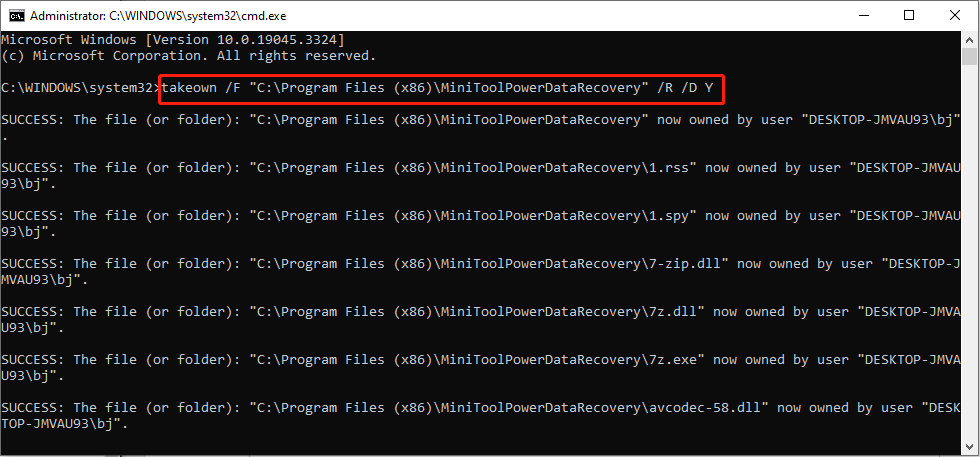
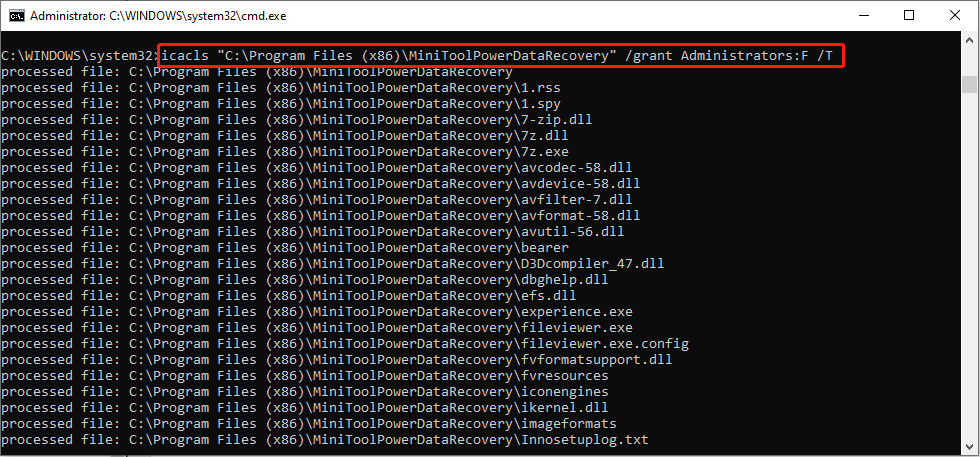
Step 3: Type the following commands and hit Enter after each command.
takeown /F “<file/folder path>” /R /D Y
icacls “<file/folder path>” /grant Administrators:F /T
rd <file/folder path> /S /Q

You can run the above three commands to take the ownership of the file, grant specified user access rights, and delete the chosen file.
MiniTool Power Data Recovery FreeClick to Download100%Clean & Safe
Method 3: Temporarily Disable Antivirus Software
If the permission-required information is caused by antivirus software interference, it can be easily rectified by disabling antivirus software temporarily.
Step 1: Press Win + I to open Windows Settings.
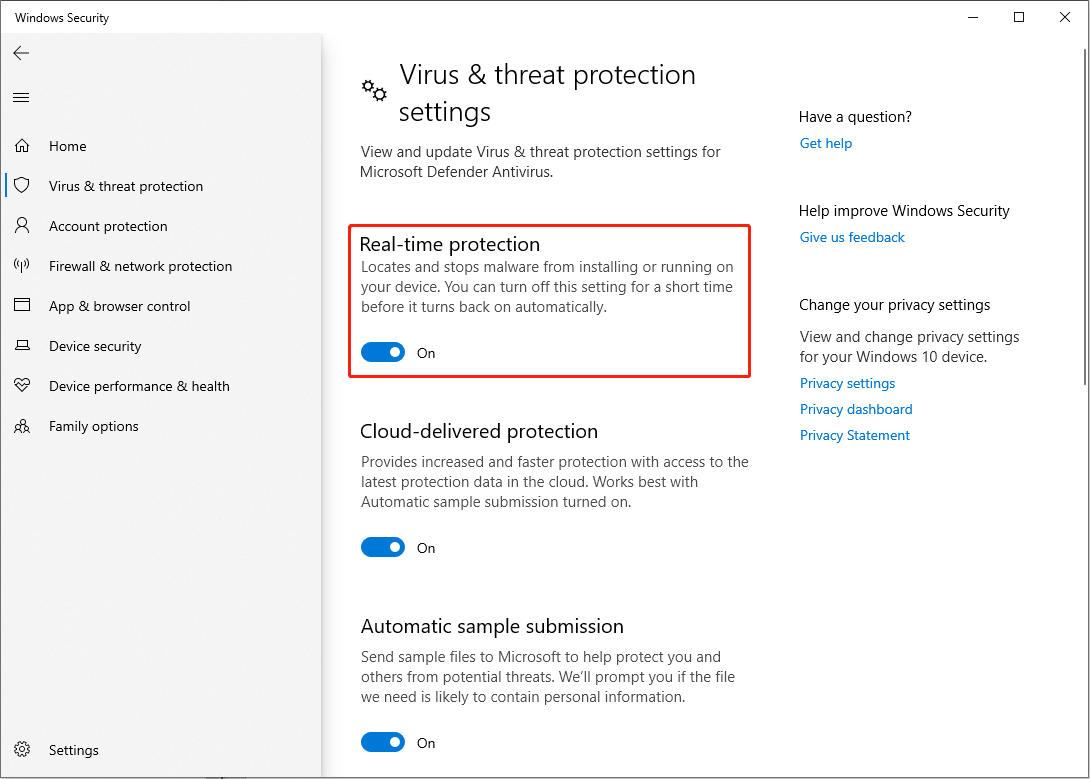
Step 2: Navigate to Update & Security > Windows Security > Virus & threat protection.
Step 3: Click on Manage settings under the Virus & threat protection settings on the right pane.
Step 4: Turn off the Real-time protection. You don’t need to turn it on manually since it will be enabled automatically.
Method 4: Change a File in Safe Mode
The last method is to change the file in Safe Mode. A majority of programs will not be activated in Safe Mode; thus, you can try to change the file and skip messages like you require permission from everyone to change this file.
Step 1: Press Win + R to open the Run window.
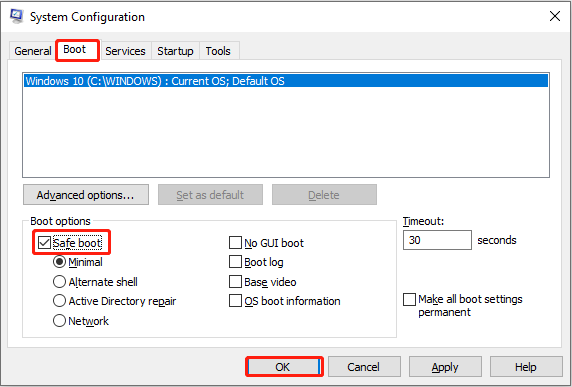
Step 2: Type msconfig into the box and hit Enter to open the System Configuration window.
Step 3: Turn to the Boot tab and check Safe boot in the Boot options section.
Step 4: Click on OK then click on Restart to boot your computer into Safe Mode.
Now, you can make changes to the file. After this, repeat steps 1-2 and uncheck the box of Safe boot. You can click OK and Restart to exit the Safe Mode.
Bottom Line
This is all the methods about how to fix the you require permission from everyone to change this file problem. Hope you can successfully change the aimed file with one of these methods.
