Adobe InDesign is the primary option for designers to create attractive images, posters, ebooks, etc. It is frustrating to lose diligent work due to mistaken deletion, software crashes, or other reasons. How can you recover InDesign files when you're in the same situation? Read this MiniTool guide to find solutions and powerful data recovery tools.
Adobe InDesign is a desktop software for creating posters, brochures, ebooks, and other products. Though this software was released in 1999 and has been updated to fix bugs and put forward new features, people still experience file loss due to human error or software glitches. How to recover InDesign files has become a crucial issue for many people.
Hi there! If anyone can help me solve this mystery, I will happily send a reward… My friend has a MacBook Pro and was exporting a file on InDesign … it froze and did the spinning circle thing… he was advised to close it out as InDesign has a “recovery” feature. When he opened it back up, the file was completely gone. – chloehenryreddit.com
How to Recover Lost/Deleted InDesign Documents
When your locally saved InDesign files are lost, InDesign file recovery is not a tricky mission. In this section, we will discuss how to recover InDesign files in Windows and Mac separately.
Way 1. Recover Deleted InDesign Documents from the Recycle Bin/Trash
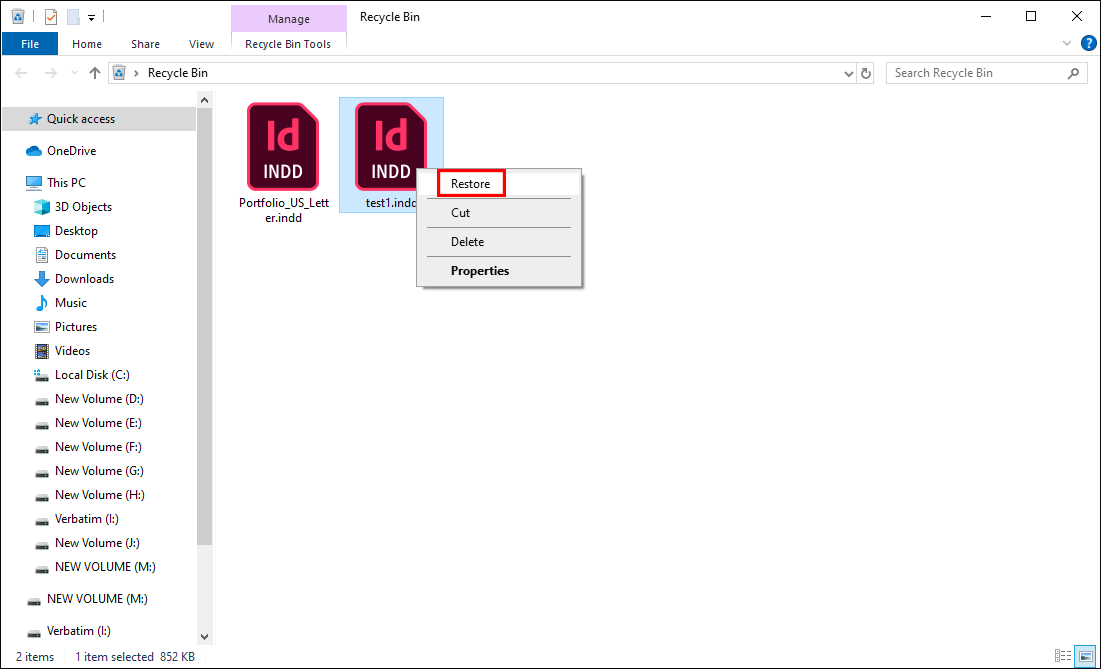
When it comes to recovering deleted files, people usually think of going to the Recycle Bin or Trash first. For Windows users, the deleted files will be sent to the Recycle Bin and kept here for days. To complete a Recycle Bin recovery, open the Recycle Bin to find the deleted InDesign files and right-click on them to choose Restore.
Similarly, Mac users should go to the Trash and right-click on the needed InDesign files to choose Put Back to restore the deleted InDesign files.
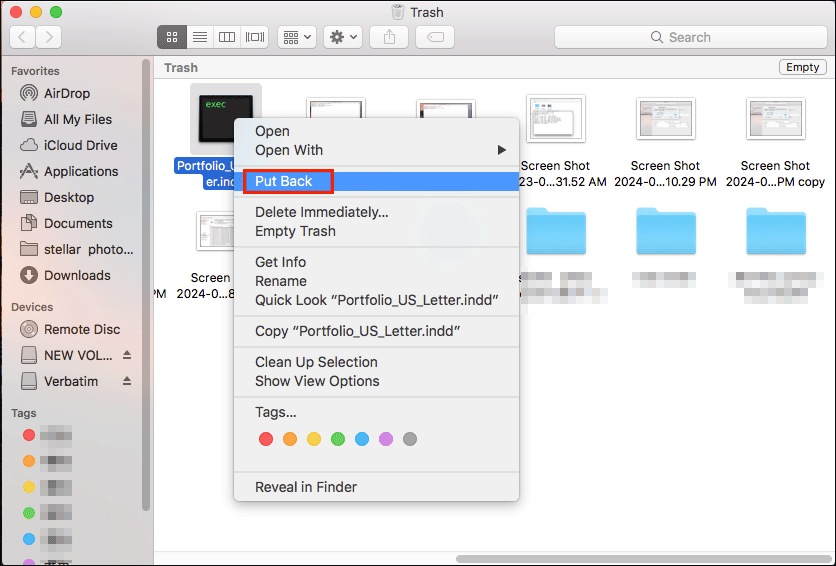
File restored from the Recycle Bin or Trash can be found in the original file folder.
Way 2. Recover Lost InDesign Documents Using MiniTool Power Data Recovery
Can not find the desired documents in the Recycle Bin? Can you restore the permanently deleted or lost InDesign documents on Windows? You can try to recover lost InDesign documents by yourself with the help of secure data recovery services like MiniTool Power Data Recovery.
This file recovery software perfectly fits all Windows operating systems. Additionally, this software is capable of carrying out file recovery tasks regardless of the file format, such as Photoshop file recovery, Zoom recording recovery, Word document recovery, etc. You can also find the saved InDesign files by running this software to scan your computer. MiniTool provides several editions with different techniques and functions. You can get MiniTool Power Data Recovery Free to check whether you can find the needed INDD files.
MiniTool Power Data Recovery FreeClick to Download100%Clean & Safe
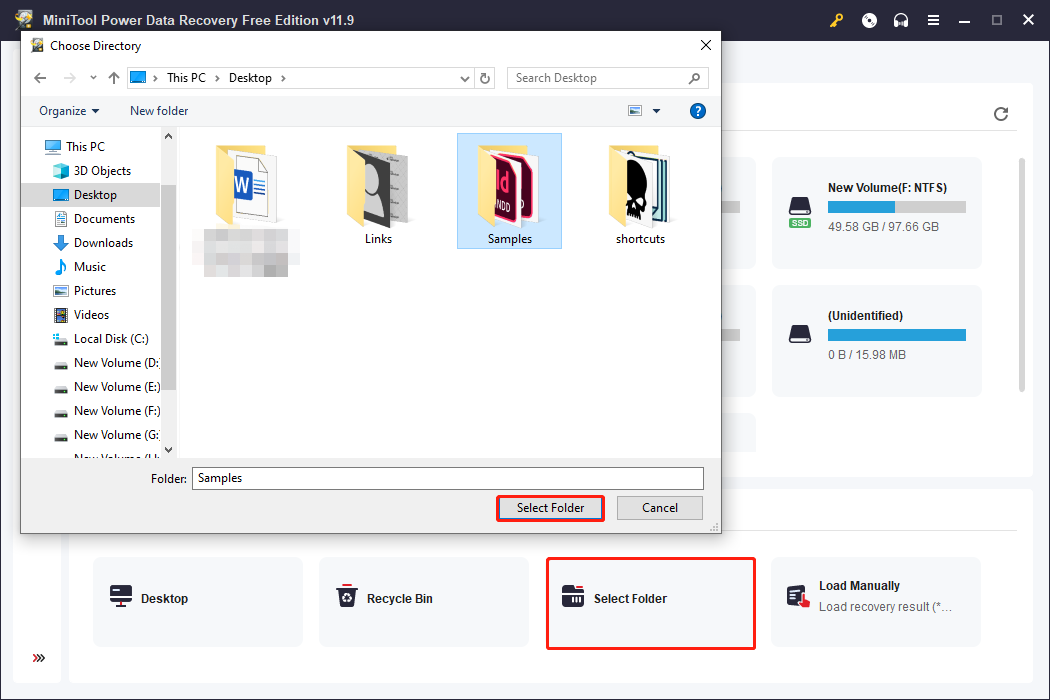
Step 1. After downloading and installing the software on your computer, you can launch it to enter the main interface. All partitions are displayed under the Logical Drives tab. Optionally, you can choose to scan the Recycle Bin, Desktop, or a specific folder to shorten the scan duration largely.
Here is an example of scanning a specific folder. Click Select Folder and navigate to the folder you want to scan. Select the folder and click Select Folder to confirm. The scan process will start automatically.
Step 2. You can browse the file list during scanning, but in order to find all the wanted files, do not interrupt the process.
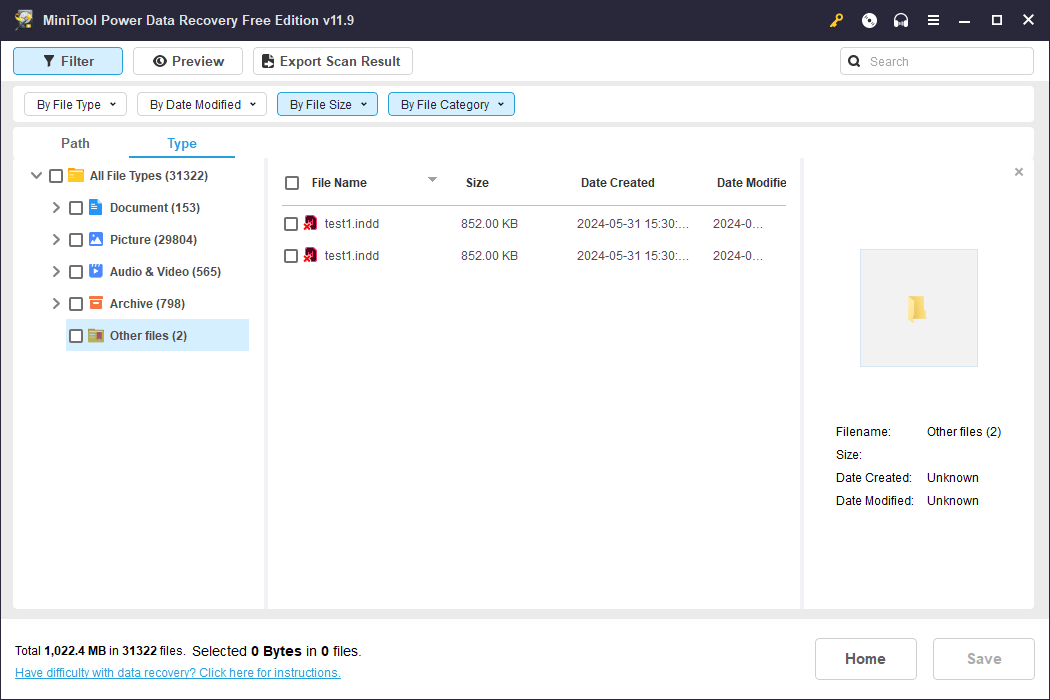
On the result page, you can expand the Deleted Files or Lost Files option to look for the required InDesign files. Optionally, switch to the Type tab and find the InDesign files under the Other files classification quickly. Click on the Filter button to set filter conditions like file type, file size, file category, and file last modified date to narrow down the file list.
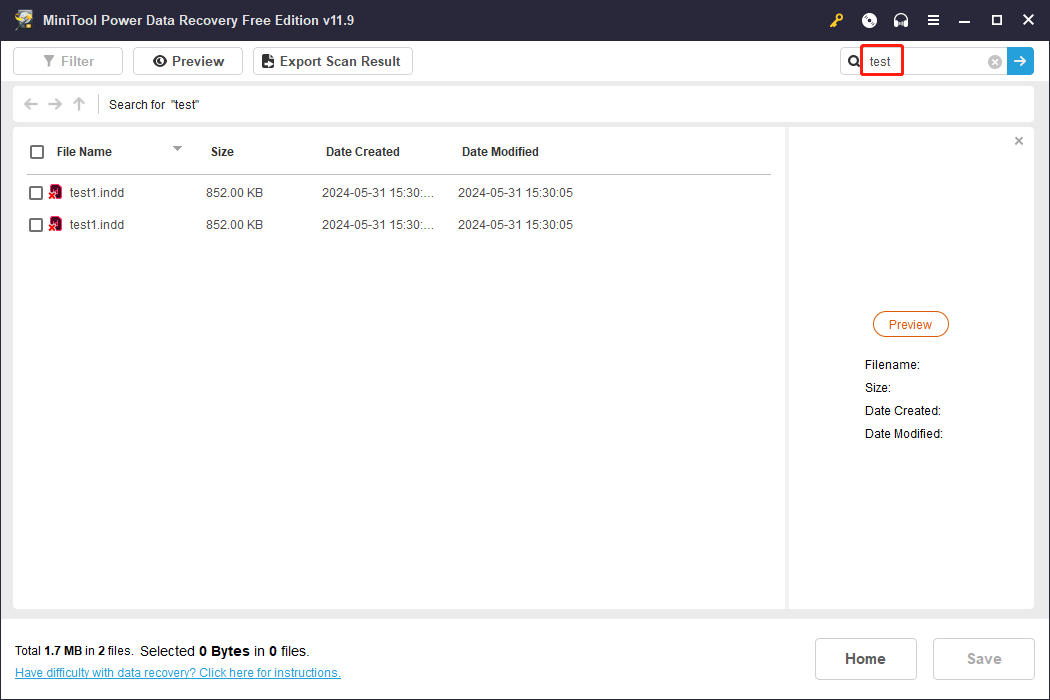
If you remember the file name, you can use the Search type to locate the file effectively. For example, if I need to find the test1.indd file, I can type its full or part of the name into the search box and hit Enter to filter the file out.
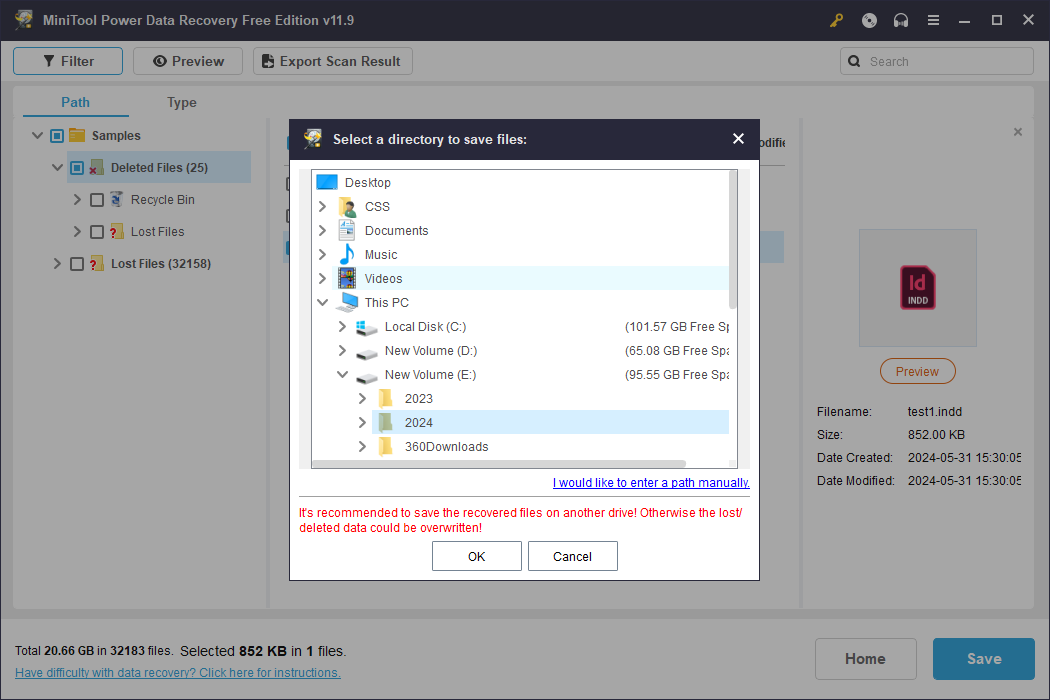
Step 3. Tick the required INDD files and click on the Save button to choose a save path that is different from the original one. Click OK to confirm.
If you choose more than 1GB of files with the free edition, you will be asked to upgrade the software edition to completely recover the chosen InDesign files. You can visit the License Comparison page to select one that fulfills your requirements.
In addition to the final saved INDD files, MiniTool Power Data Recovery is able to recover deleted INX files and IDML files as well. Why not get the free edition to try it out?
MiniTool Power Data Recovery FreeClick to Download100%Clean & Safe
Way 3. Recover Lost InDesign Documents Using Stellar Data Recovery for Mac
If you lose InDesign documents on your Mac, there is also a fantastic file recovery software for you, Stellar Data Recovery for Mac. Apart from supporting multiple types of file recovery, this software also allows you to restore files from various data storage devices, like external hard drives, USB drives, memory cards, etc.
You can download and install this software by clicking the download button below, then try to recover InDesign files that are lost or permanently deleted with the following guide.
Data Recovery for MacClick to Download100%Clean & Safe
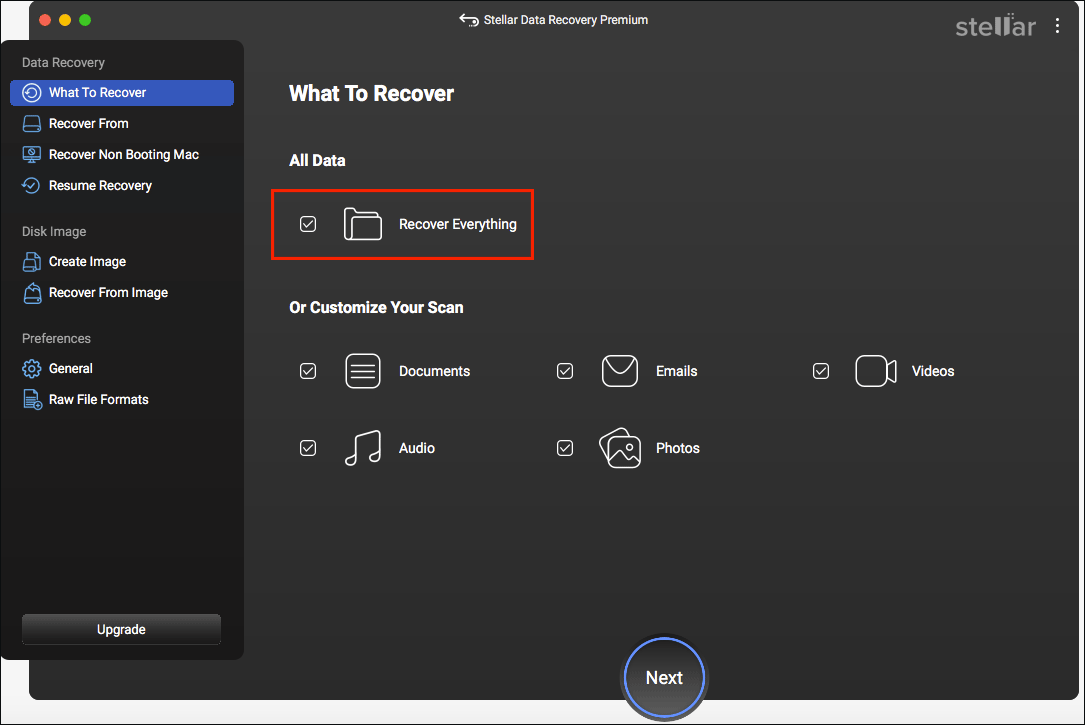
Step 1. Double-click on the software icon to launch it. After entering the main interface, you should choose the file type that needs to be restored. You are suggested to tick the Recover Everything option to find all files, then click Next.
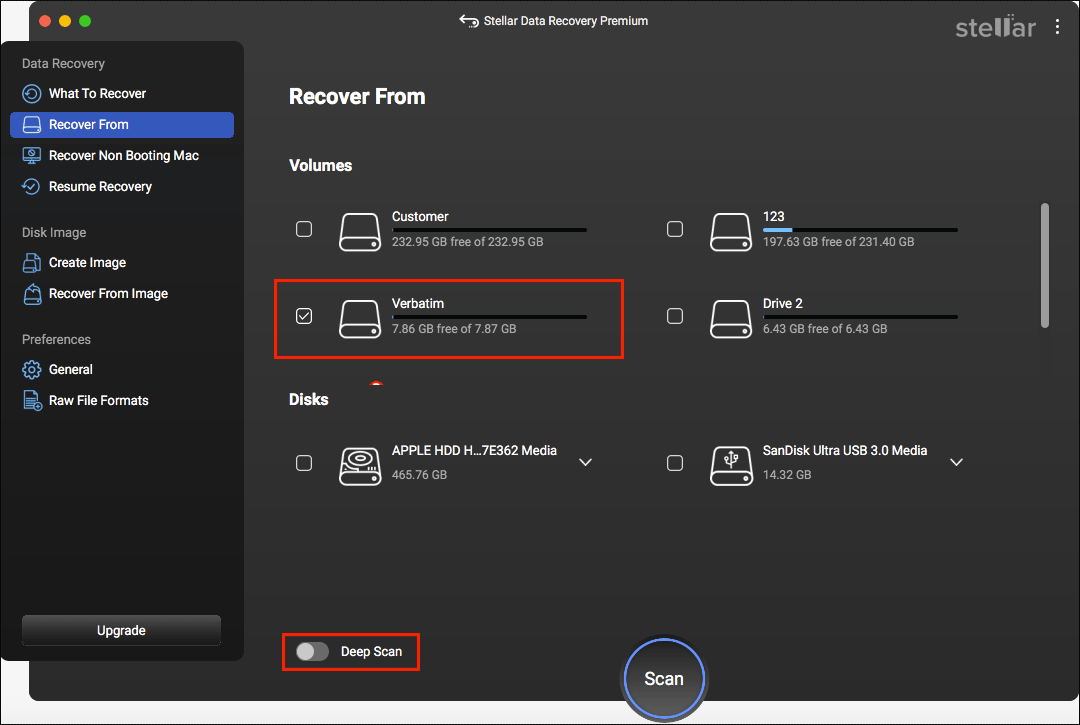
Step 2. Choose the volume where the InDesign files are stored and click the Scan button. You can toggle the Deep Scan switch to On to allow the computer to scan the target volume comprehensively.
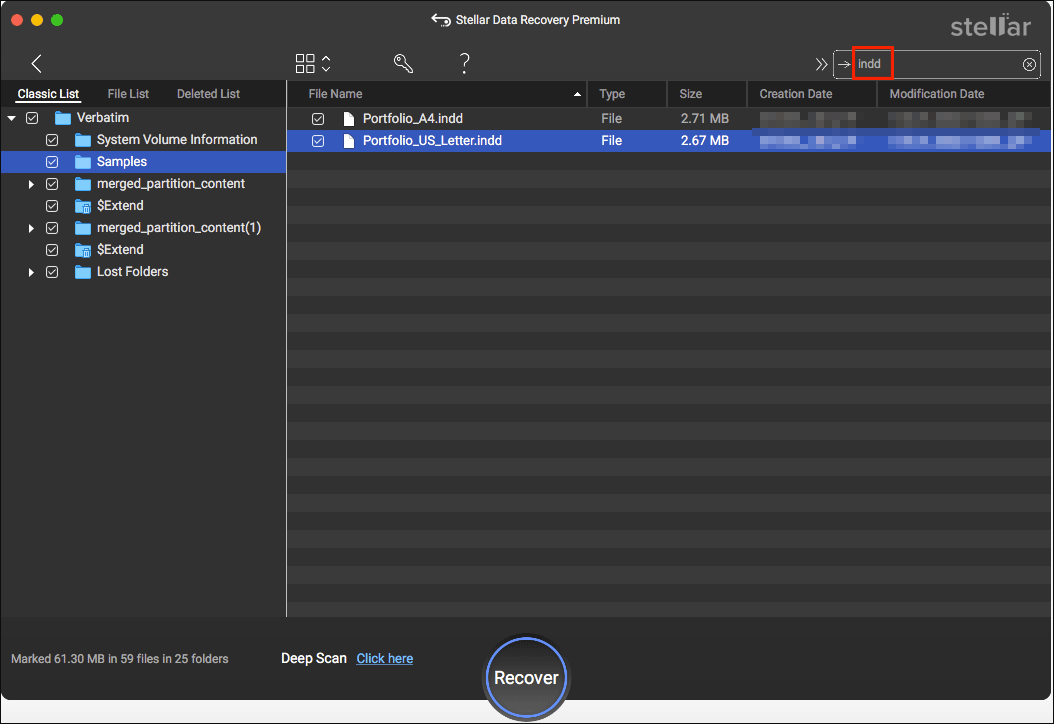
Step 3. After scanning, all found files will be listed under the Classic List tab. You can type .indd into the search box and hit Enter to quickly filter out all the InDesign files from the file list. Choose the file you need and add the checkmark in the checkbox. Click Recover to restore the selected file to a new destination. Do not save files to the original path, which might lead to data overwriting.
You can perform a deep scan to find lost files on your computer with the free edition of Stellar Data Recovery for Mac, however, you need to activate the software to complete the InDesign file recovery process. Follow the on-screen instructions to activate the software if you need.
How to Recover Unsaved InDesign Files
You may unexpectedly lose an InDesign file while working on it due to software glitches, system problems, power outages, or other reasons. The unsaved content may be lost on these occasions. Can you recover unsaved InDesign files? There is a chance since Adobe InDesign is equipped with the auto recovery feature.
About InDesign Recovery Folder
When you work on an InDesign document, InDesign will automatically save changes in temporary files in the InDesign Recovery Folder on your device. The temporary file will be deleted once you manually save your changes. When InDesign shuts down unexpectedly, these temporary files can be used to recover unsaved documents.
For Windows users, the InDesign Recovery folder is located in: C:\Users\username\AppData\Local\Adobe\InDesign\Version x.0\en_US\Caches\InDesign Recovery.
For Mac users, the InDesign Recovery folder can be found via: Users/username/Library/Cache/Adobe InDesign/Version x.0/InDesign Recovery.
Recover Unsaved InDesign Files with the InDesign Auto Recovery Feature
When losing an InDesign file due to accidentally shutdown, you need to recover the unsaved INDD file by restarting InDesign immediately. You will get a prompt that asks “Do you want to start automatic recovery?”. Click Yes.
InDesign will check the InDesign Recovery folder to find the document that was opened when the software crashed and try to open it. If the file is successfully opened, you can head to File > Save/Save As to save the recovered file. If the target file can’t be opened, InDesign will quit or report an error message.
Repair Damaged InDesign Files with InDesign Built-in Repair Tool
File corruption is also a worrying problem for InDesign users. Plenty of factors can lead to InDesign file corruption and make files unreadable. Luckily, InDesign has an embedded repair mechanism that can help you repair corrupted documents.
InDesign can detect and recover corrupted documents automatically, and then inform you with a prompt. You can click Save As to save the recovered version before continuing the further operations or click Cancel to stop the recovery process.
Optionally, you can try other file repair tools to repair the corrupted InDesign documents. Read this post to choose one professional tool based on your demands: Top 10 Free File Repair Tools to Repair Corrupted Files.
How to Protect InDesign Documents from Being Lost/Deleted/Corrupted
Data recovery can be effective in most cases but is not a 100% solution. Even with professional and robust data recovery services, you may find that some files can’t be found. Therefore, you should take measures to prevent crucial InDesign documents from being lost. The best security precaution an individual can take is to back up their data.
You can manually copy and paste important InDesign files to other locations if there are only a few files. When there are piles of files, manual backup is not only time-consuming but also troublesome, such as duplicate or incomplete backups. Hence, you can try MiniTool ShadowMaker, an easy-to-use backup software, to back up your InDesign documents.
This backup service supports making redundant files and folders and allows you to back up partitions and disks. Moreover, it contains three backup types to satisfy different backup needs. For example, if you are backing up files for the first time, you can choose to perform a full backup. The next time, you can choose an incremental or other backup, depending on the situation.
You can get MiniTool ShadowMaker trial by clicking the download button below to experience the backup features for free within 30 days.
MiniTool ShadowMaker TrialClick to Download100%Clean & Safe
Guide to Back up InDesign Documents
Step 1. Double-click on the software icon to open it and head to the Backup tab.
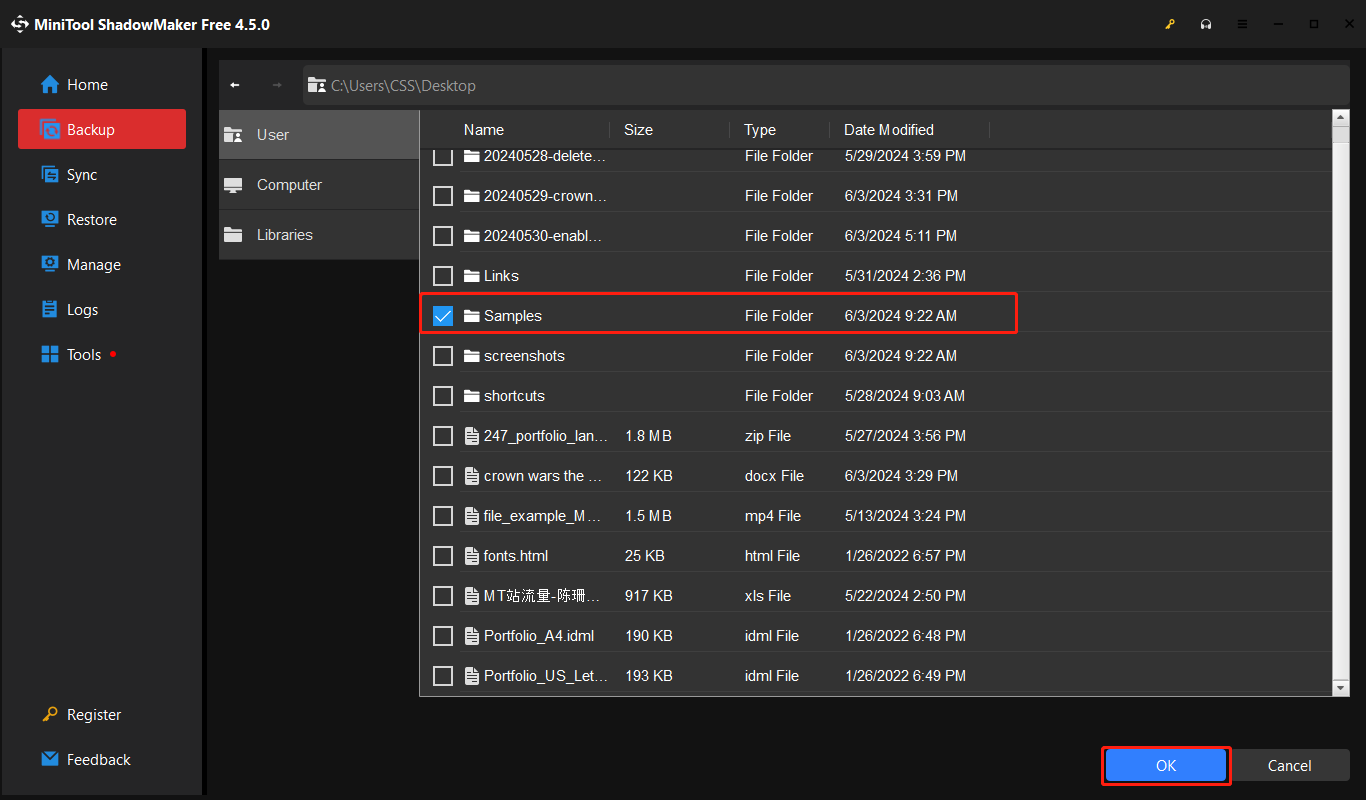
Step 2. Click SOURCE and navigate to the target folder to find the files you want to back up. Click OK to return to the Backup interface.
Step 3. Click DESTINATION to choose the save location of the backup and click OK to confirm.
Step 4. Click Back Up Now to start the backup process.
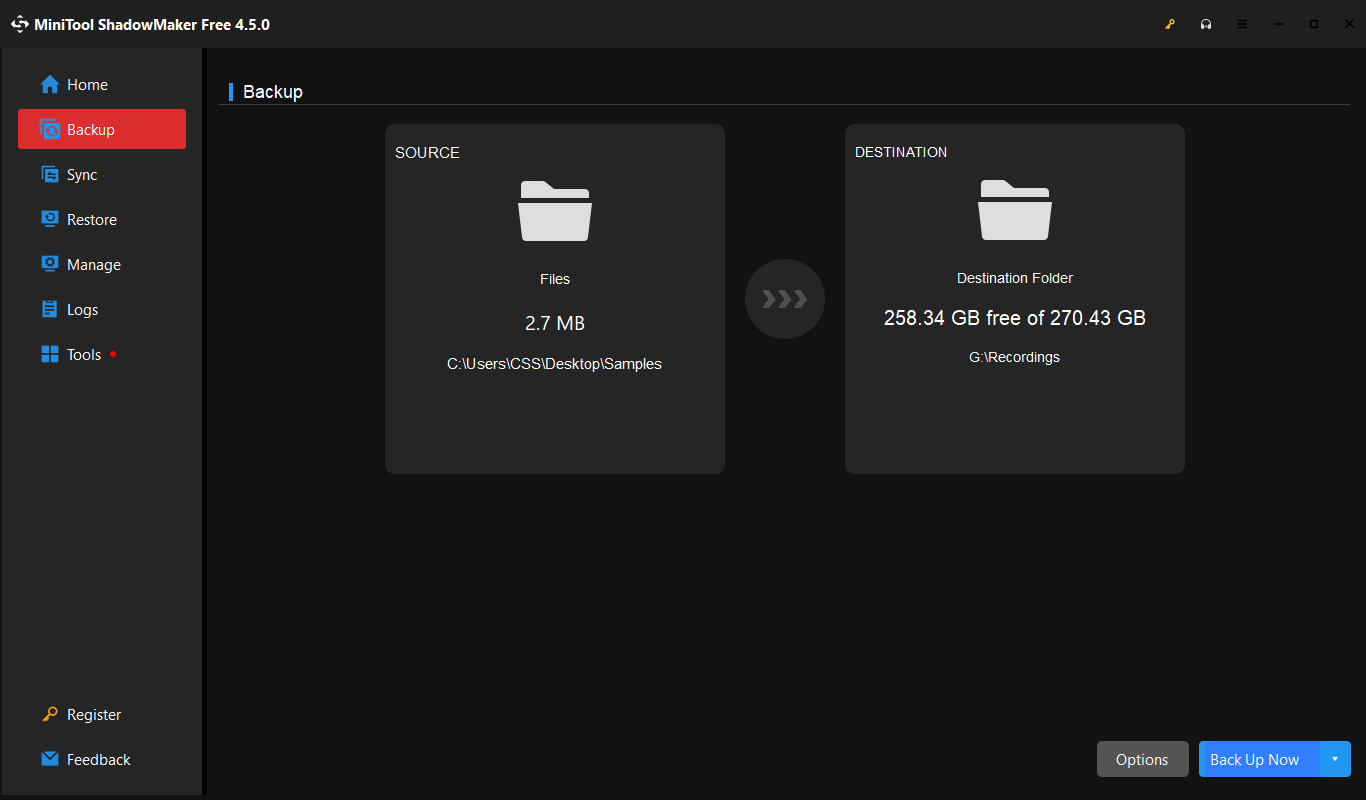
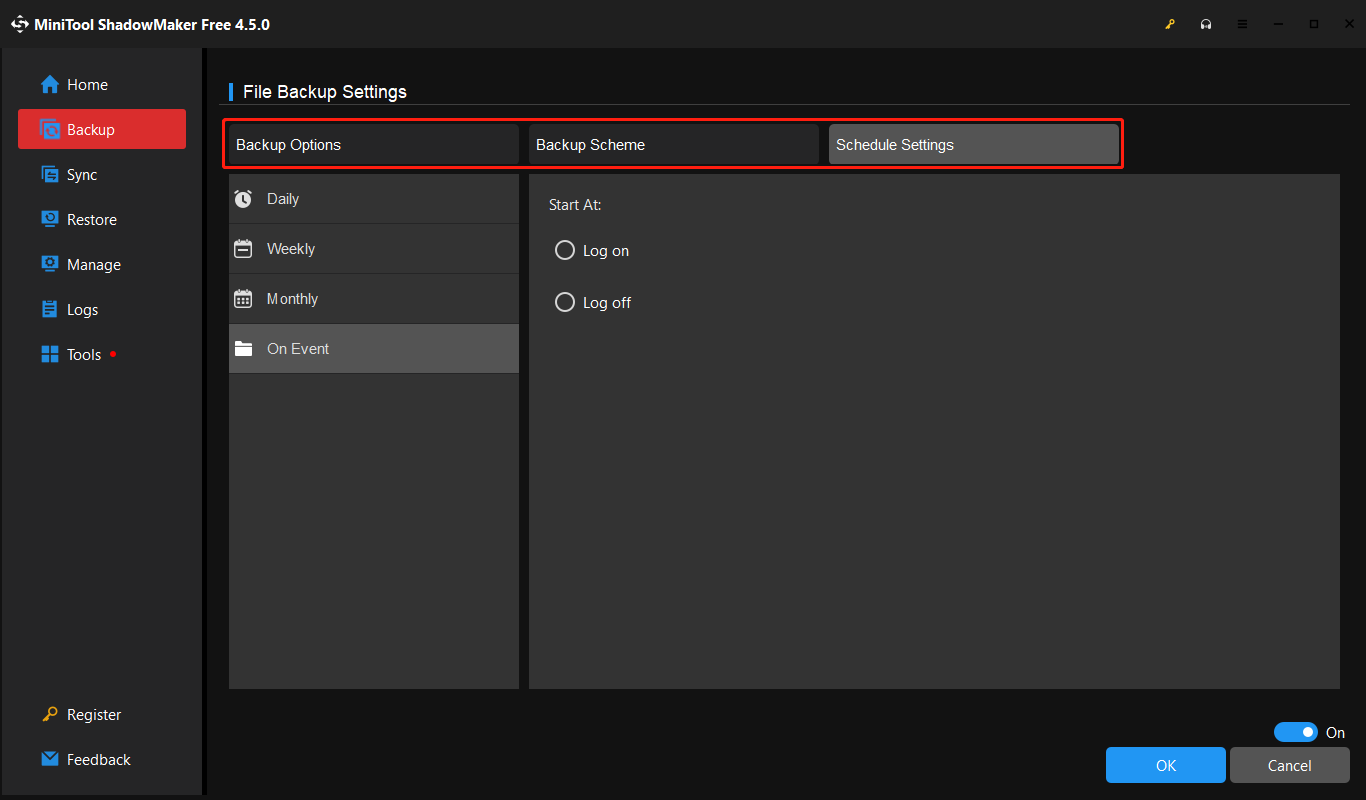
Optionally, you can click the Options button to manage the backup settings, including backup schemes, backup periods, and backup types. You can set the backup cycles to make the software back up files automatically, which ensures your files are well protected in time.
Bottom Line
To sum up, you may lose InDesign documents due to deletion, software or system issues, or other causes. It only takes a few steps to recover InDesign files if you know the solutions and get powerful data recovery tools. This post shows you methods to recover deleted/unsaved InDesign files on Mac and Windows.
Should you have any problem using MiniTool software, please feel free to let us know via [email protected].

