Power Plan or Power Mode is a feature in Windows that enables you to manage and optimize the power usage of your computers. Some of you might encounter the issue of not being able to change power plan settings on your device. This post from MiniTool Website will sort out some troubleshooting steps for you.
Cannot Change Power Plan
Windows Power Plan helps you to conserve energy and extend the battery life of your laptops or tablets. Usually, it is pretty easy to change the power modes, but in some cases, you cannot change power plan due to the factors below:
- Incorrect power settings.
- Using a custom power plan.
- Corrupted battery driver.
If you still cannot change power plan after a simple restart of your computer, scroll down to apply the following solutions now!
MiniTool ShadowMaker TrialClick to Download100%Clean & Safe
How to Fix Cannot Change Power Plan on Windows 10/11?
Fix 1: Run the Power Troubleshooter
Windows comes with many inbuilt troubleshooters for you to scan the system for potential issues. If you doubt the power settings are configured improperly, follow these guidelines to run the Power Troubleshooter:
Step 1. Press Win + I to open Windows Settings.
Step 2. Go to Update & Security > Troubleshoot > Additional troubleshooters.
Step 3. Scroll down to find Power, hit it and the hit Run the troubleshooter to start diagnosing the problems with your power settings.
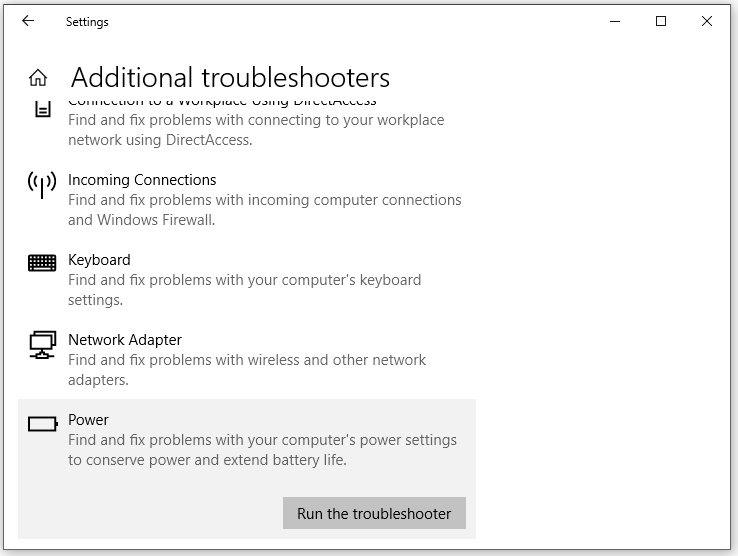
Step 4. After scanning, apply all the recommendations and see if you can change your power plan.
Fix 2: Change Power Plan via Group Policy
Local Group Policy Editor also allows you to configure some important settings on your computer. If you can’t change power plan settings via Control Panel, you can try to edit the power plan via Group Policy. To do so:
Step 1. Type gpedit.msc in the Run box and hit Enter to launch Local Group Policy Editor.
Step 2. Navigate to this location:
Computer Configuration > Administrative Templates > System > Power Management
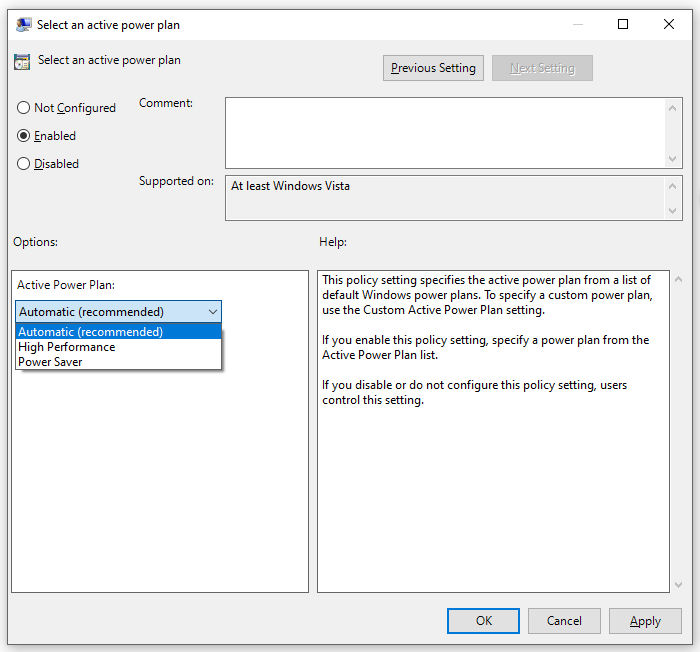
Step 3. In the right pane, double-click on Select an active power plan.
Step 4. Tick Enabled > select a power plan under Active Power Plan > hit OK to save the changes.
Fix 3: Update the Battery Driver
Faulty or corrupted battery driver can also lead to issues like unable to change power mode. In this case, the best way is to update or reinstall the driver. Here’s how to update the driver to the latest version.
Step 1. Right-click on the Start icon and select Device Manager.
Step 2. Expand Batteries and right-click on Microsoft ACPI-Compliant Control Method Battery to select Update driver.
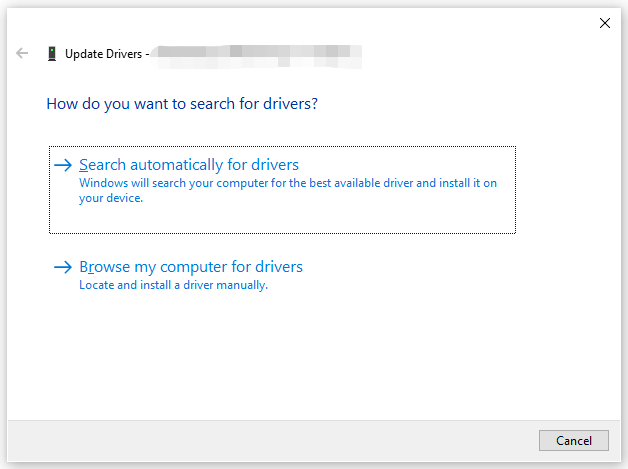
Step 3. Click on Search automatically for drivers and then Windows will download and install the available driver update for you.
Fix 4: Run SFC & DISM Scan
Any corruption in the system files can also make you unable to change power plan. To repair these corrupted system files, you need to run SFC and DISM in sequence. To do so:
Step 1. Launch an elevated Command Prompt.
Step 2. In the command window, type sfc /scannow and hit Enter.
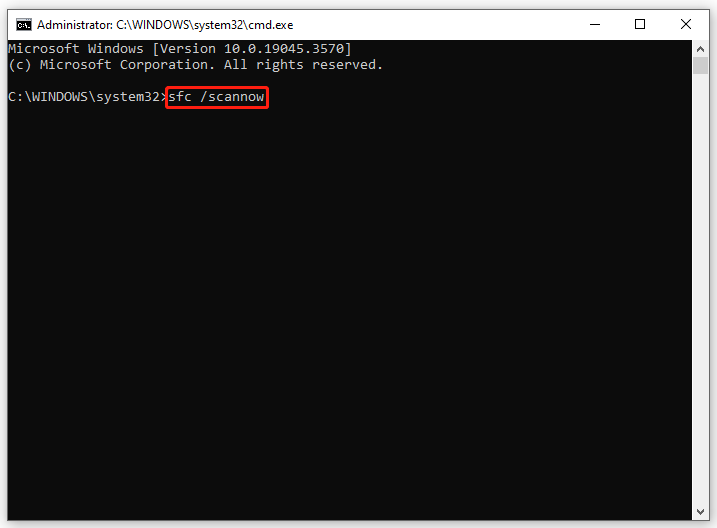
Step 3. After completion, relaunch Command Prompt as an administrator > run the following commands one by one > hit Enter after each command.
Dism /Online /Cleanup-Image /CheckHealth
Dism /Online /Cleanup-Image /ScanHealth
Dism /Online /Cleanup-Image /RestoreHealth
Fix 5: Reset Power Settings
Another solution is to reset your power settings to the default state. To do so:
Step 1. Press Win + R to open the Run box.
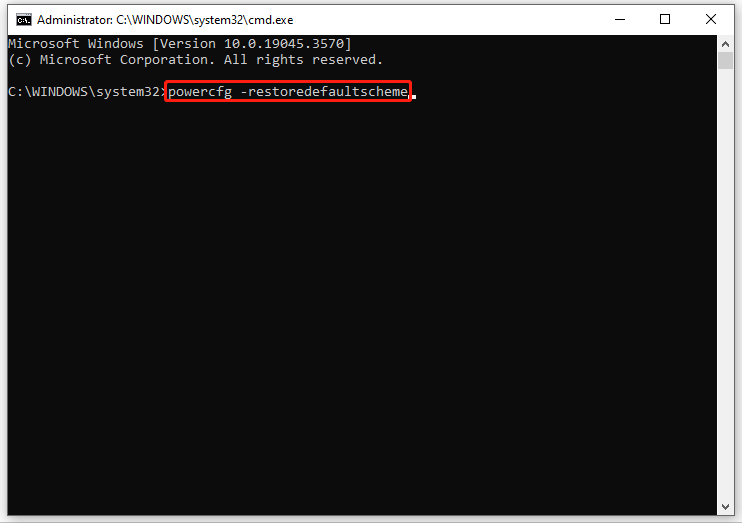
Step 2. Type cmd and press Ctrl + Shift + Enter to launch Command Prompt with administrative rights.
Step 3. Type the following command and hit Enter.
powercfg –restoredefaultscheme
Final Words
Now, you can customize the power plan as per your needs. If this issue is still there, you can visit the official Microsoft support team and report your problem in detail to them. Have a nice day!
