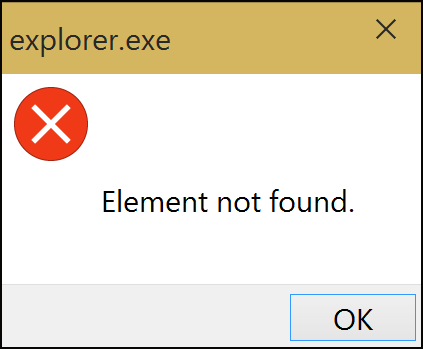
Explorer.exe element not found error may appear when you try to access File Explorer on your computer. This error occurs due to malfunction of Windows Explorer, system updates, corrupted system files, and other reasons. How to fix element not found in Windows? The following four solutions tell you.
Fix 1. Restart Explorer.exe in Task Manager
When you launch File Explorer but receive the element not found error, try to restart the Explorer.exe process to handle the issue.
Step 1. Press Ctrl + Shift + Esc to launch Task Manager directly.
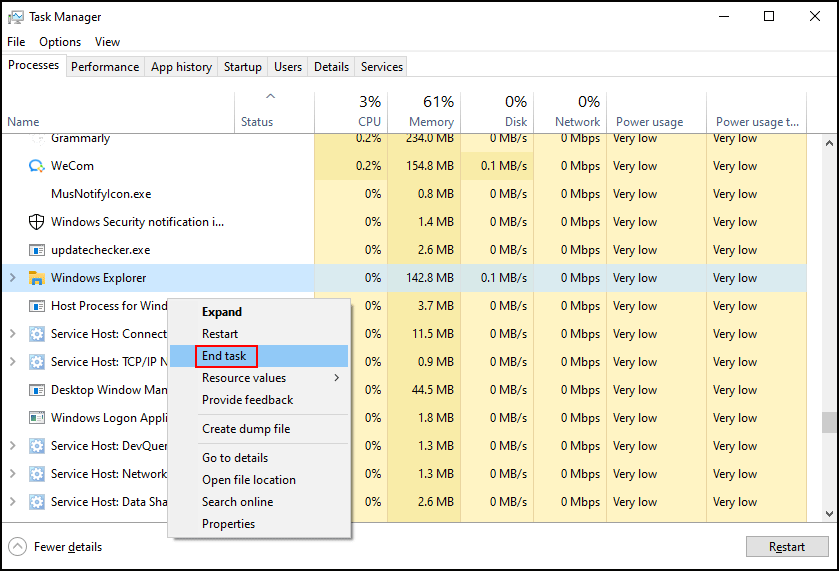
Step 2. Find Windows Explorer under the Processes tab. Right-click on it and choose End task.
Step 3. Open Task Manager by pressing the Shift + Ctrl + Esc key combination. Choose File > Run new task.
Step 4. Type explorer into the box and hit Enter to relaunch File Explorer on your computer.
Afterward, try to access File Explorer to see if the element not found error is fixed.
Fix 2. Uninstall the Latest Windows Update
Element not found in Explorer is a common issue on Windows 10/11, sometimes, due to an incompatible Windows update. If you encounter this error after an upgrade, uninstalling the recent update may help fix it.
Step 1. Press Win + I to open Windows Settings.
Step 2. Choose Update & Security > Windows Update > View update history.
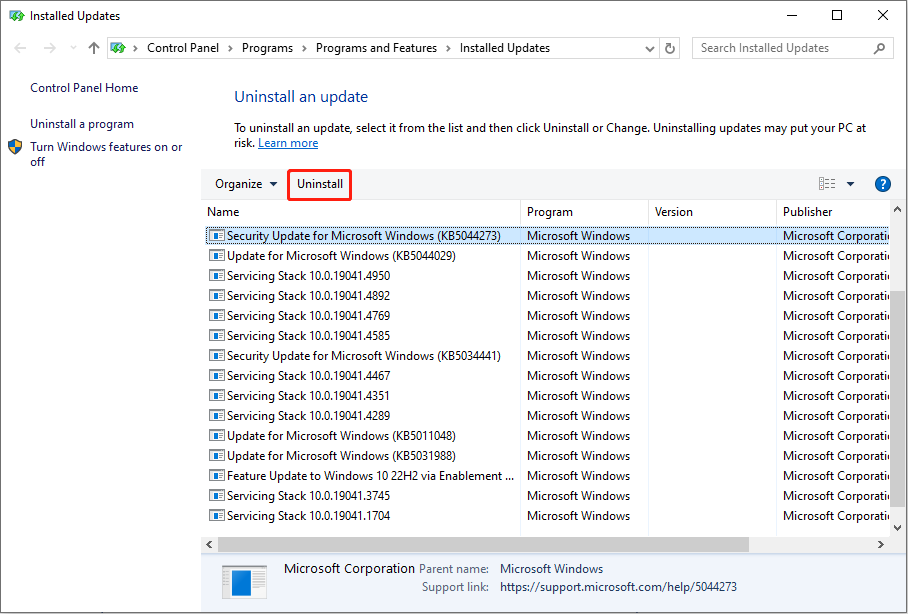
Step 3. Click Uninstall updates. In the following window, you need to choose the recent update and click Uninstall.
Fix 3. Run SFC and DISM Commands
In addition to the above two reasons, the problematic system files may result in this Explorer.exe element not found error. Fortunately, Windows contains system file repair tools, System File Checker and DISM.
Step 1. Press Win + R to launch the Run window.
Step 2. Type cmd into the dialog and press Shift + Ctrl + Enter to run Command Prompt as administrator.
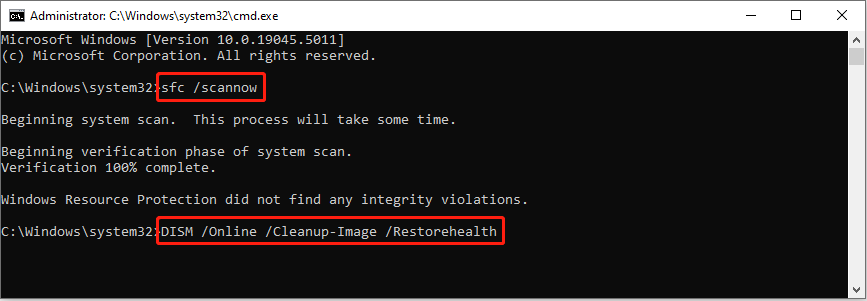
Step 3. Type sfc /scannow and hit Enter.
Step 4. Type DISM /Online /Cleanup-Image /Restorehealth and hit Enter.
Fix 4. Reset the Computer
When the former three solutions don’t troubleshoot your dilemma, resetting your computer can be the last straw. This operation will delete all installed applications and preserve crucial files. It can resolve problems that are caused by post-installed software or improper operations.
Step 1. Press Win + I to open Windows Settings.
Step 2. Head to Update & Security > Recovery. Click Get started at the right pane.
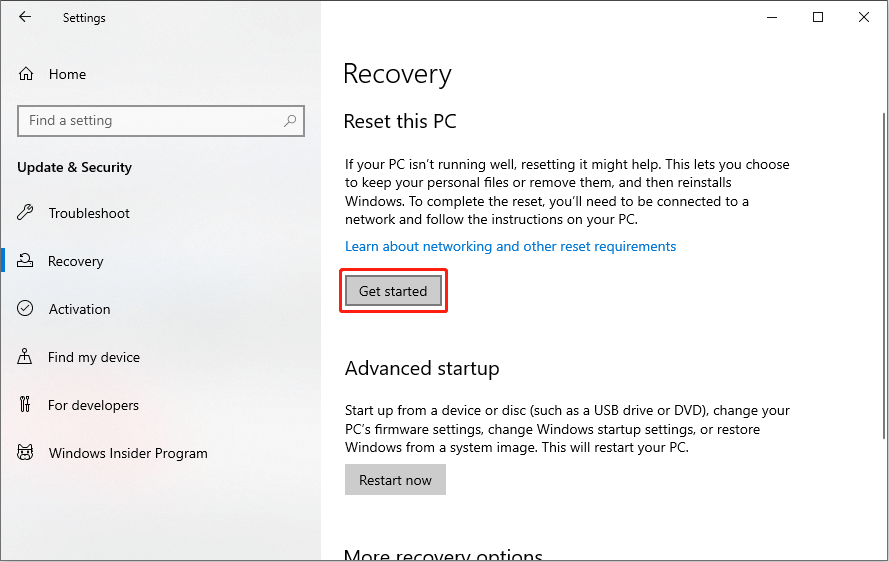
In the Reset this PC window, you can choose Keep my files or Remove everything based on your needs. The latter option will remove all of your personal files and installed applications. Therefore, think twice before taking action.
Bonus Tip: Recover Lost Files with MiniTool Power Data Recovery
After resolving the Explorer.exe element not found error on your computer, you are highly advised to check if any of your files are lost. Once files are lost, restore them as soon as possible to avoid data overwriting.
MiniTool Power Data Recovery is specifically designed to recover files that are lost in various situations, ranging from mistaken deletion and virus infection to partition loss and device failure. You can get this tool and try to recover files when needed. Running the free edition of this software supports you scanning the target location and restoring no more than 1GB of files for free.
MiniTool Power Data Recovery FreeClick to Download100%Clean & Safe
Bottom Line
This post introduces four solutions on how to fix element not found on Windows 10/11. You can try those solutions one by one to find one that works on your case. Hope this post gives you some useful information in time.
