Windows 11/10 allows you to share folders with friends or collogues over the network. Sometimes, you may want to stop sharing a folder but don’t know how to do that. This post from MiniTool provides 6 ways for you.
Windows 11/10 File Explorer lets you share a folder or file with other users on the local network using SMB protocol. However, for some reason, you want to stop sharing a folder on Windows. The following lists 6 ways.
Way 1: Via Folder Properties
The first way for you to stop sharing a folder is via the folder’s properties. Here is how to do that:
Step 1: Right-click the folder that you don’t want to share and click Properties.
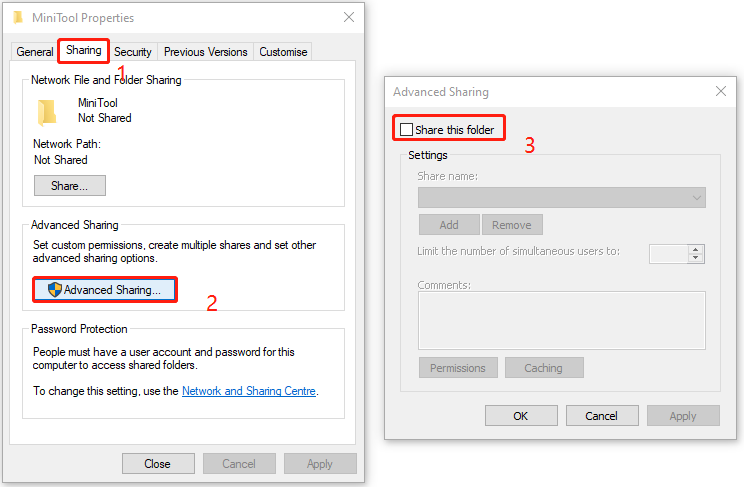
Step 2: Go to the Sharing tab and click Advanced Sharing….
Step 3: Uncheck the Share this folder box. Click Apply and OK.
Way 2: Via Remove Access
Then, you can remove the folder’s access to stop sharing it. Here are the steps.
Step 1: Right-click the folder that you don’t want to share.
Step 2: Click Give access to > Remove access.
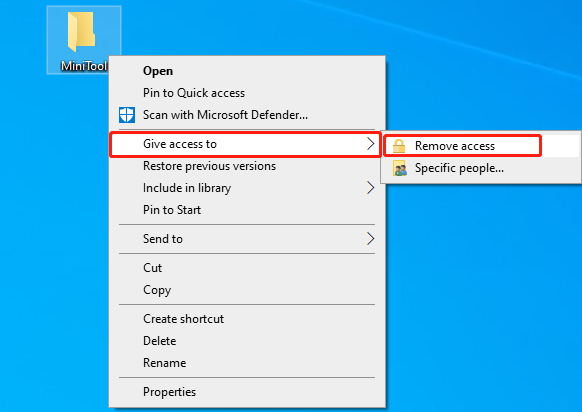
Step 3: Then, click Stop Sharing in the next window.
Way 3: Via Computer Management
How to stop sharing a folder on Windows 11/10? The third way for you is via Computer Management.
Step 1: Type Computer Management in the Search box and click Open.
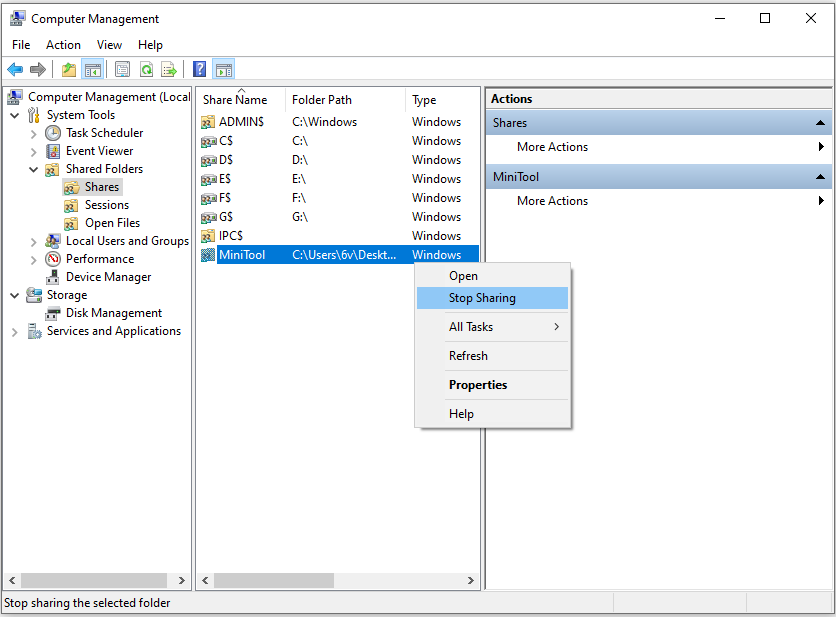
Step 2: Go to Computer Management (Local) > System Tools > Shared Folders > Shares.
Step 3: Find the folder you don’t want to share in the right panel. Right-click it to choose Stop Sharing.
Way 4: Via Control Panel
The fourth way is via Control Panel.
Step 1: Type Control Panel in the Search box and click Open.
Step 2: Go to Network and Sharing Center and click Change Advanced Sharing Settings.
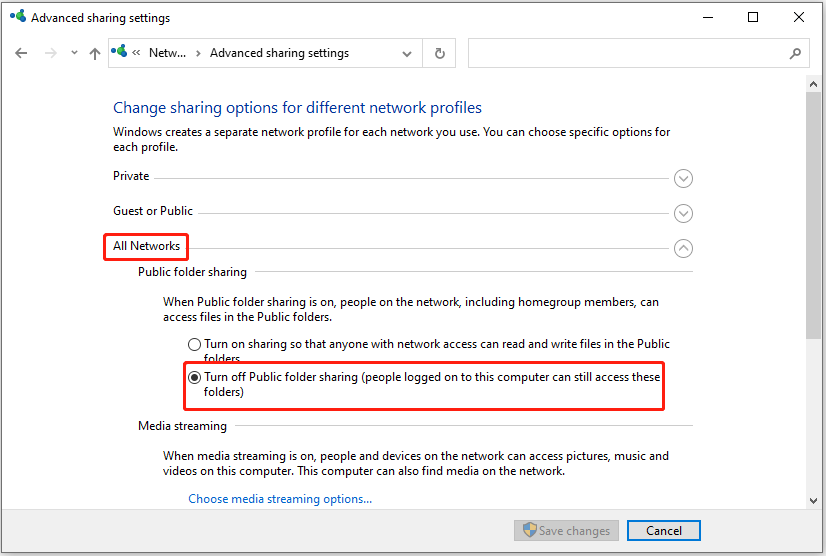
Step 3: Under the All Networks part, select the Turn off public folder sharing (people logged on to this computer can still access these folders) option under Public Folder Sharing.
Step 4: Click Save Changes.
Way 5: Via Command Prompt
You can also stop sharing a folder via Command Prompt.
Step 1: Type cmd in the Search box and choose Run as administrator.
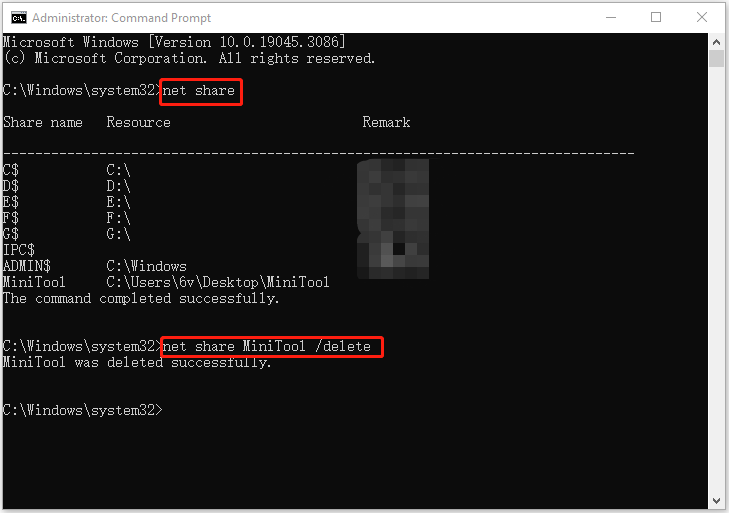
Step 2: Type the following command and press Enter.
net share
Step 3: Then, type the following command and replace the FolderName with the name of the folder that you want to stop sharing. Then, press Enter.
net share FolderName /delete
Way 6: Via PowerShell
The last way for you to stop sharing a folder on Windows 11/10 is via PowerShell.
Step 1: Type PowerShell in the Search box and choose Run as administrator.
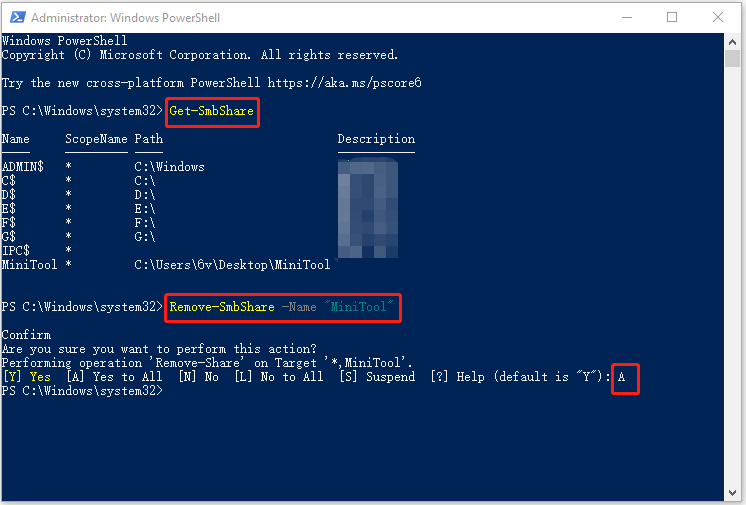
Step 2: Type the following command and press Enter.
Get-SmbShare
Step 3: Type the following command and replace FolderName with the name of the folder that you wish to stop sharing. Then, press Enter.
Remove-SmbShare -Name “FolderName”
Step 4: Type A to sure you want to perform the action.
Tip: There is a piece of quick and safe sync software to share files with others – MiniTool ShadowMaker. You can use the Sync feature of it to share files between computers and you can sync your files and folders regularly, so you don't have to re-sync each time you edit your files.
About The Author

Position: Columnist
Having been an editor at MiniTool since graduating college as an English major, Daisy specializes in writing about data backups, disk cloning, and file syncing as well as general computer knowledge and issues. In her free time, Daisy enjoys running and going with friends to the amusement park.