There is nothing more frustrating than the issue of OOBE bypassnro not working on the Windows 11 initial setup after installing the OS. No worries. Go to troubleshoot this issue step by step by following the comprehensive guide given by MiniTool.
OOBE Bypassnro Not Working Windows 11
A clean install of Windows 11/10 is a better way to completely clean all of the accumulated Windows cruft from an old system. After completing the installation, you need to finish the setup with Windows Out of Box Experience (OOBE). OOBE includes a series of screens to guide you through some basic settings of the operating system.
MiniTool ShadowMaker TrialClick to Download100%Clean & Safe
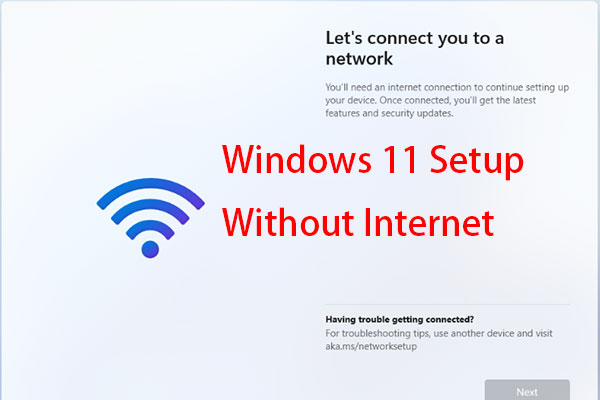
You are prompted to connect to a network to set up Windows 11 with a Microsoft account but sometimes you want to perform Windows 11 offline setup for some reason. However, you will get stuck with a grey button. To continue and bypass the Internet requirement, you use the OOBE bypassnro command. Unfortunately, in some cases, OOBE bypassnro not working crops up.
How can you troubleshoot the issue? Perhaps some methods below help a lot.
1. Check the Command Syntax
Make sure you use the correct command instead of the wrong one to bypass the Windows 11 network requirement. So check the command syntax:
Step 1: On the OOBE screen, press Shift + F10 on your keyboard to open Command Prompt.
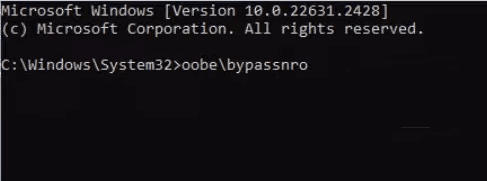
Step 2: Type the correct command – oobe\bypassnro and then press Enter. Note that there are no typos and no blank spaces in the command, or else, you face OOBE bypassnro not working.

Step 3: If this cannot work, use the command OOBE\BYPASSNRO in the CMD window. Alternatively, the command variation – %systemroot%\System32\oobe\BypassNRO.cmd may also help.
2. Edit Windows Registry
In case you receive a message telling you a file is not found after running the OOBE bypassnro command correctly, try to edit your Windows registry to solve Windows 11 oobe/bypassnro not working.
Step 1: Also, press Shift + F10 to launch Command Prompt on the OOBE interface.
Step 2: Type regedit and hit Enter to access Registry Editor.
Step 3: Copy and paste the path – Computer\HKEY_LOCAL_MACHINE\SOFTWARE\Microsoft\Windows\CurrentVersion\OOBE to the address bar and hit Enter.
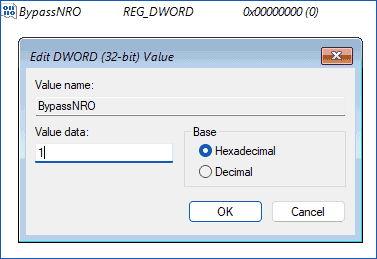
Step 4: Create a new DWORD value called BypassNRO by right-clicking on the empty area and choosing New > DWORD (32-bit) Value.
Step 5: Double-click on it to set Value data to 1.

Whereafter, close Registry Editor and restart the PC. Later, you can succeed in performing Windows 11 offline setup.
3. Use unattend.xml to Bypass Windows 11 OOBE
Besides, you are allowed to use an Answer or unattend.xml file during the Windows installation. An unattended Windows 11 installation helps automate the Windows setup process without typing any information, allows you to customize the installation as per your preferences, and also bypasses an Internet connection. For details, you can resort to this post – How to Create an Unattended Windows 11 Installation.
4. Create a Local User Account
While Windows 11 OOBE bypassnro not working appears, try this proven way which helps to bypass the Let’s connect you to a network screen.
Step 1: Type net.exe user yourusername /add and press Enter.
Step 2: Type net.exe localgroup administrators yourusername /add and press Enter.
Step 3: Type cd oobe and hit Enter.
Step 4: Execute the command – msoobe.exe && shutdown.exe -r.
The PC will restart and follow the on-screen instructions to finish the setup with a local account, without an Internet connection.
Final Words
Setting up Windows 11 without Internet is very easy and OOBE bypassnro favors it. In case of oobe/bypassnro not working, try the given fixes in turn and you should find the one that works for you.
By the way, before installing Windows 11 using a bootable USB drive, remember to use MiniTool ShadowMaker to backup files to prevent data loss. After a complete installation and setup, we also recommend running this backup software to automatically back up the computer for security.

