You may have no idea and feel puzzled about the Recycle Bin emptying not working in Synology issue when you attempt to empty the Recycle Bin to free up the storage space of your Synology NAS device. It’s even worse when you successfully empty the Recycle Bin and discover that some important files have also been deleted at the same time.
Are there any methods to fix the issue with Recycle Bin emptying not working in Synology? Can I recover deleted files from the Synology NAS device? You may think about these questions. Fret not; we explore several effective methods and provide robust data recovery software to rescue your data with specific instructions.
How to Fix Recycle Bin Emptying Not Working in Synology
To fix the issue with Recycle Bin emptying not working in Synology, try the methods mentioned below one by one until the issue is gone.
Method 1. Wait for the Retention Period to Expire
If you’re utilizing Synology’s Snapshots, you should wait for the retention period to expire before you notice an increase in your available space. To explain this further, since Synology’s snapshots and BTRFS allow for the restoration of files or folders, the corresponding file must still be present on the hard drive in order to be restored. This is the reason you might remove files from the Recycle Bin but not see an immediate change in your storage capacity.
Remember that you can delete snapshots to regain space instantly, but doing so will mean you no longer have any snapshots left. We recommend retaining your current snapshots if you have enough available space until they are automatically removed according to your retention schedule.
Method 2. Empty the Shared Folder
When files are removed from the Synology NAS device, they are usually transferred to a hidden directory known as the #Recycle folder located within the shared folder from which the deletion occurred. Consequently, you can directly delete the Shared Folder to spare more storage space.
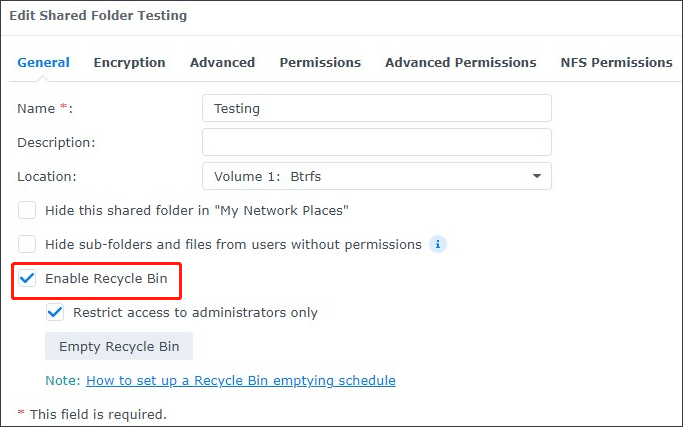
Step 1: Access the Control Panel and choose Shared Folder. Click on Edit for the Shared Folder you wish to clear the recycle bin of.
Step 2: Click on Empty Recycle Bin to remove all files and folders from the recycle bin of that specific shared folder only. This process will need to be repeated for each shared folder.
Method 3. Create a Recycle Bin Emptying Schedule
Manually emptying the Recycle Bin can be overwhelming. If you face the issue of not being able to empty the Recycle Bin in Synology, automating this process can be more efficient, ensuring that files are deleted automatically after a specified time. To configure a schedule for emptying the Recycle Bin, follow these instructions:
Step 1: Access the Control Panel and choose the Task Scheduler.
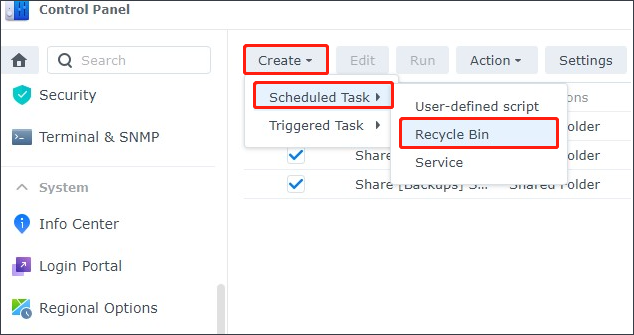
Step 2: Click on Create, then select Scheduled Task, and choose Recycle Bin.
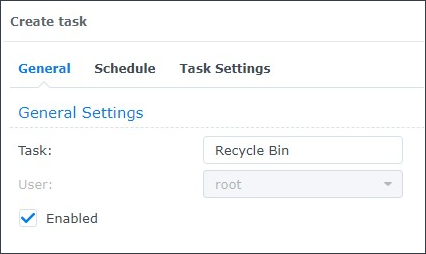
Step 3: In the General section, provide a name for the task and check the box of Enable.
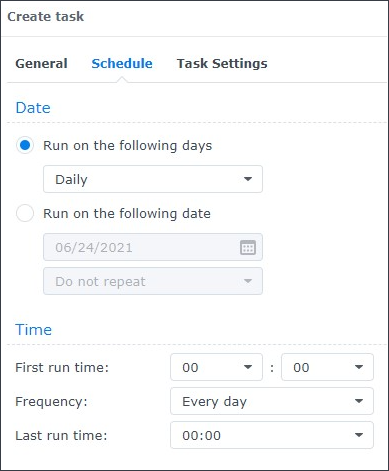
Step 4: In the Schedule area, specify when you want the task to run.
Step 5: In Task Settings, tick Empty all Recycle Bins and Delete all files. You can also according to your actual situation determine whether to empty all Recycle Bin or only specific files.
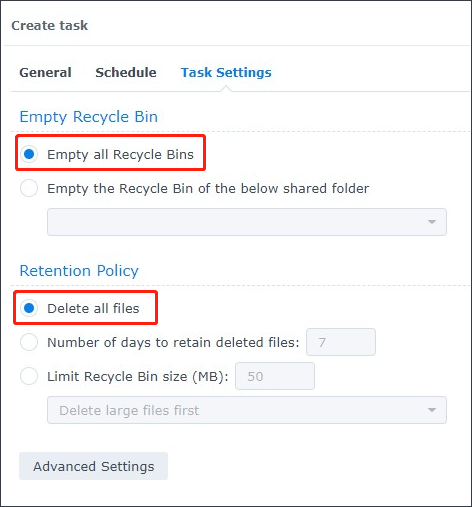
Step 6: The Retention Policy step is vital. It determines the timeframe for when files will be deleted. You can select your preference. Additional settings are available for more detailed customization.
Recover Deleted Files from Synology NAS Device (If Possible)
After figuring out the methods to fix the Synology emptying Recycle Bin not working issue, you may find your important files may also be deleted. How to recover deleted files from the Synology NAS? Which app can help you to recover these files safely and effectively? Using a trustworthy data recovery tool can make things do more with less. MiniTool Power Data Recovery for your conference.
Here, we will introduce the specific instructions to recover deleted files from your Synology NAS using MiniTool Power Data Recovery.
Step 1. Download and install MiniTool Power Data Recovery. This tool allows you to recover 1 GB of files for free and can recover various file types, including documents, photos, videos, audio, databases, etc.
MiniTool Power Data Recovery FreeClick to Download100%Clean & Safe
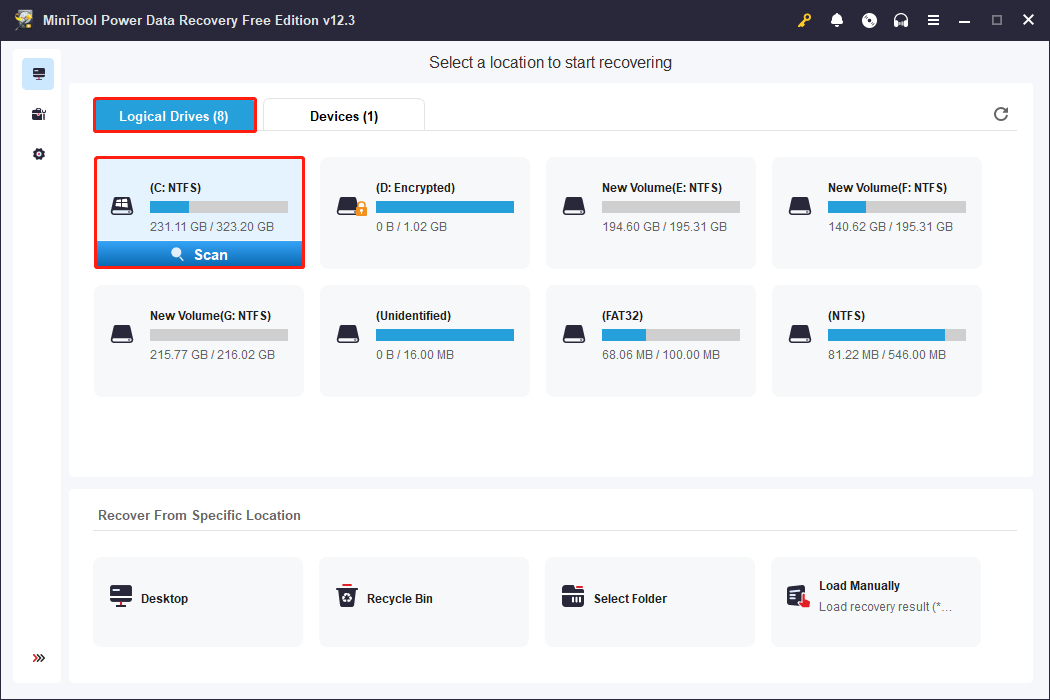
Step 2. Connect your device to your PC and access to MiniTool Power Data Recovery. Once entering its main interface, you will locate the Logical Drives tab by default. Choose the target partition and click the Scan button.
Step 3. The results page shows a list of files for you to examine. However, to ensure the best scanning result, do not pause the scanning process while it’s ongoing. After the scan is complete, you will see the Path section, which contains three folders: Deleted Files, Lost Files, and Existing Files. To quickly find and verify the files you want, you can utilize the Filter, Type, Search, and Preview options.
Step 4. Choose the files you want to recover and click Save to select an appropriate location. In the pop-up window, pick a save location and click OK. It is advisable to avoid saving files back to the original file path to prevent potential data loss.
Final Words
In a word, MiniTool explorers feasible methods to fix the issue with Recycle Bin emptying not working in Synology and a professional data recovery tool to recover your deleted files. Hope the information is useful for you.

