About Formatting C Drive
Formatting refers to the process of preparing a new partition or remove existing data on a hard drive or USB storage devices. In this process, file system will be created to get partition ready to store new data. You need pay attention to that you will lose all the data in the partition you formatted.
C drive is usually the system partition on a computer, and you will lose the operating system and cannot boot your computer if you format C drive. Why do users still want to format C drive? There are some common reasons for formatting C drive:
- Remove virus and malware: it could be dangerous if your operating system is attacked by virus or malware, because your files might be damaged, lost or even leaked to third parties. You can format C drive to remove virus and protect your computer.
- Reinstall operating system: when your system crashes and you cannot boot your computer, or you want to install a new OS, you can format C drive and reinstall system. In this case, you can format C drive with the system setup installer during reinstalling process.
- Erase data: as there might be personal data in your hard drive, you need to erase these data before recycling or donating it. You can format the drive to achieve it, but formatted hard drive can be recovered by some third-party software. In this case, I recommend you wipe the hard drive to protect your privacy.
You Cannot Format This Volume
Usually, if you want to format a partition, you can:
- Double-click This PC from desktop to open File Explorer.
- Right-click the partition you want to format and select Format.
- Follow the onscreen instructions to finish the process.
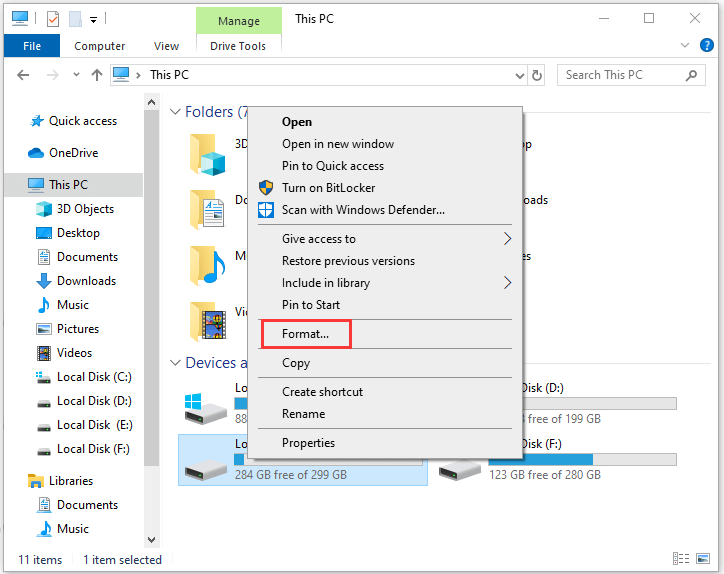
Alternatively, you can use Disk Management to format it.
However, when you try to format C drive with either File Explorer or Disk Management, you will always receive the error message “You cannot format this volume. It contains the version of Windows that you are using. Formatting this volume could cause your computer to stop working”.
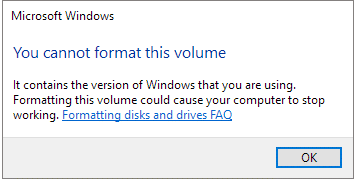
Actually, you cannot format C drive like other drives in Windows. This limitation is set considering this situation that users cannot delete their operating system by mistake.
So, how to format C drive in windows 10? You can get the answer in the following contents.
Back Up Your C Drive Before You Format It
If you have some important files in your C drive, you’d better back up them to an external drive before you start formatting, as all the data in the partition will be deleted.
It may cost a lot of time to find those files one by one to back up them. A good way to save time is using MiniTool Partition Wizard to back up the whole partition, including the operating system and your personal files.
Connect an external hard drive to your computer and follow the steps below to back up your C drive.
Step 1: Click the following button to get the software free.
MiniTool Partition Wizard FreeClick to Download100%Clean & Safe
Step 2: Launch MiniTool Partition Wizard. Select your C drive and click Copy Partition feature from the action panel.
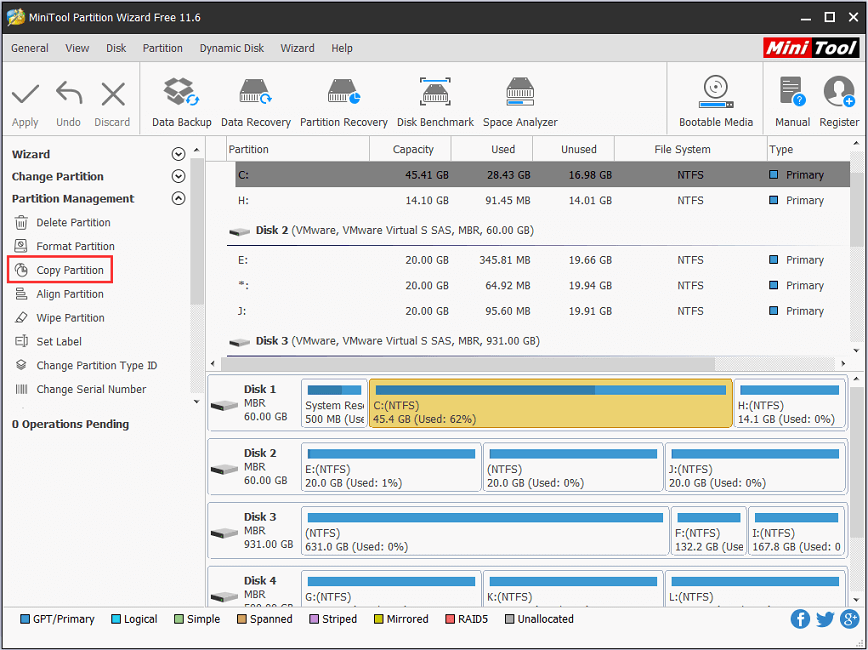
Step 3: Choose the external drive and mark the position where you want to create the copy for your C drive.
Step 4: Click Next and follow the instructions to finish the process. Remember to click Apply when you turn to the main interface to execute the pending operation.
Once you back up your C drive, you can go to format it without any worries.
How to Format C Drive with Windows Installation Media
To format C drive, all you need is the Windows installation media, which may be a bootable USB flash drive or a DVD that contains the burned ISO file. You can use Windows 10 Media Creation Tool to create the media. Once you got the installation media, you can follow the methods below to format C drive.
Method 1: Format C Drive While Installing Windows
If you want to reinstall Windows, you don’t need to format C drive in advance to leave room for the new OS installation, because the formatting process will be completed automatically during the installation. Here is how to do it.
Step 1: Boot your PC from Windows Installation Media.
Step 2: In Windows Setup window, configure the language, time and currency format, and keyboard or input method. Then click Next to continue.
Step 3: Click Install now. Then enter the product key and accept the license terms.
Step 4: Now you will be asked which type of installation you want. Just select Custom: Install Windows only (advanced) to remove everything and install Windows 10.
Step 5: In the pop-up window, you can see all the partitions you have. Just select the system partition and then click Format to format it.
Step 6: Follow the onscreen instructions to finish the process and then you can continue to install Windows 10.
Method 2: Format C Drive Using Command Prompt
You can also format C drive using Command Prompt after you boot from the Windows Installation Media.
Normally, I recommend you to format the system partition to NTFS file system, instead of FAT32 or exFAT (click here to know the differences among them), for better stability and higher security. The detailed steps are as follows.
Step 1: Follow Step 1 and Step 2 in Method 1 to boot from Windows Installation Media and configure some settings.
Step 2: Click Repair your computer.
Step 3: Now go to Troubleshoot > Command Prompt.
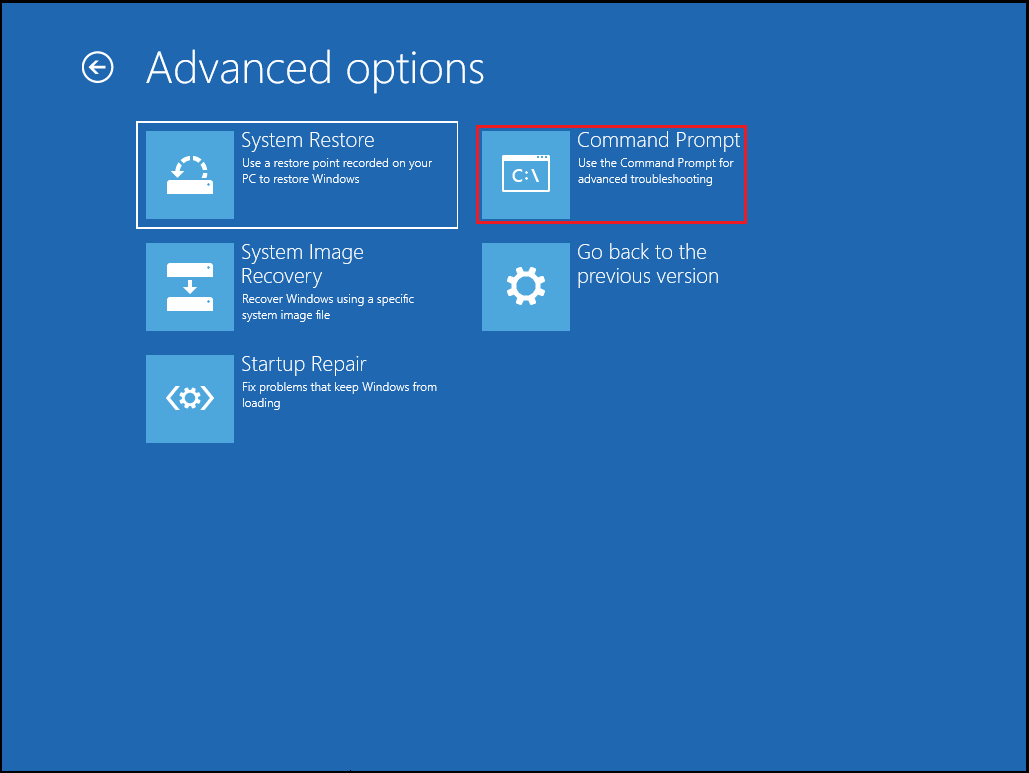
Step 4: Input the format c: /fs:NTFS and press Enter to execute the command.
How to Format C Drive with MiniTool Partition Wizard
Another way to format C drive quickly and easily is using MiniTool Partition Wizard, which helps create/resize/format partition flexibly. Just click the following button to download and install it. Then follow the steps below to format C:\.
Move 1: Create A bootable USB or CD/DVD and Boot from It.
As it is mentioned before, you cannot format C drive while running Windows system. So, you need to create a bootable edition of MiniTool Partition Wizard. You can use a USB flash drive to do this.
Step 1: Connect a USB drive to your computer and then launch MiniTool Partition Wizard.
Step 2: Click Bootable Media from the tool bar.
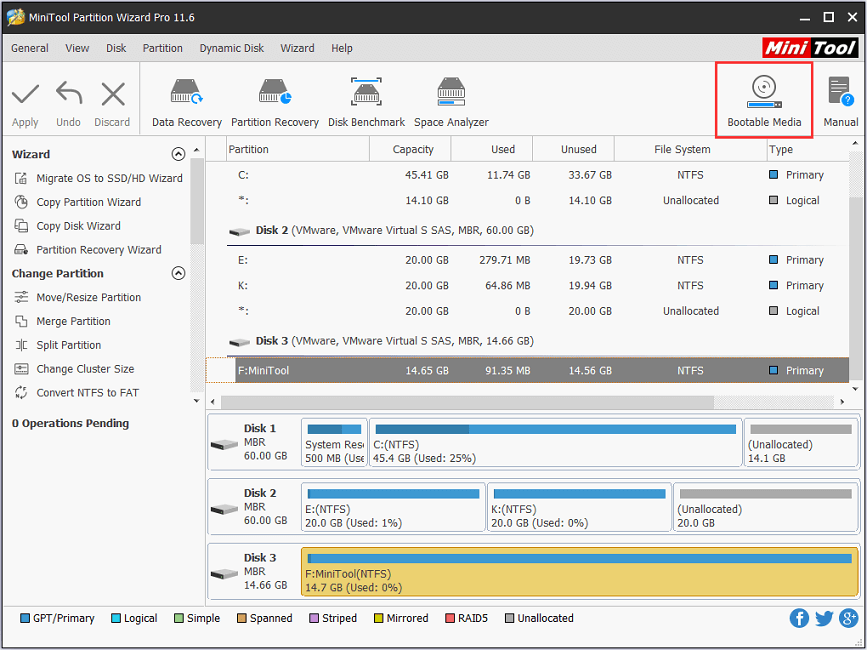
Step 3: Select WinPE-based media with MiniTool Plug-in as the media type. Then, in the pop-up window, choose USB Flash Disk as the media destination.
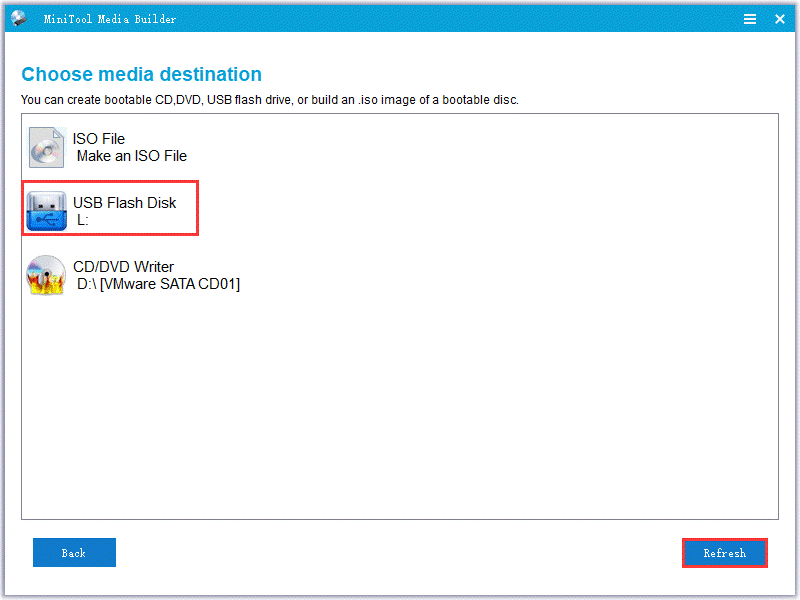
Step 4: Wait for a while. Click Finish when the WinPE files have been built.
Step 5: Restart the computer and then boot from the burned USB.
Now you can start formatting C drive.
Move 2: Format C:\
Step 1: After you boot from the burned USB, MiniTool Partition Wizard Bootable Edition will be launched automatically.
Step 2: Right-click the system partition and select Format from menu. Then you will be warned that formatting system partition may cause your computer to be unbootable. If you are sure the operation, just click Yes to continue.
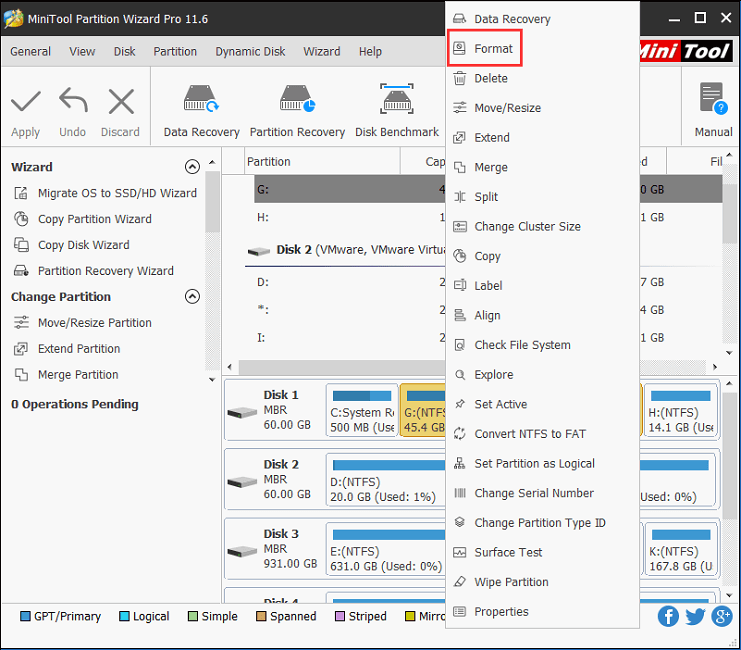
Step 3: Configure Partition Lable, File System and Cluster Size and Click OK.
Step 4: Click Apply to execute the formatting process.
Bottom Line
You might need to format C:\ for various reasons, such as to remove virus and malware, to reinstall operating system, erase data etc. Anyway, you can try these methods displayed in this post to format C drive in Windows 10.
If you have any problems about this post, please don’t hesitate to type them in the following comment zone. In addition, feel free to send an email to [email protected] if you have difficulties while using MiniTool Partition Wizard.
Format C Drive FAQ
Usually, you can format a partition in File Explorer.
- Double-click This PC.
- Right-click the target partition and select Format.
- Configure the options and then click Start in the pop-up window.
