DLL file plays an important role in ensuring the normal operation of more than one program. So when the related error happens, you need to resolve it as soon as possible. This post on MiniTool Website revolves around the “setupapi.dll not found” issue to show some fixing measures.
Setupapi.dll Not Found
Before you get to understand the “setupapi.dll not found” issue, here is a question – What is a setupapi.dll file? This file, as an essential system file of the Windows operating system, is closely related to the Setup Application Programming Interface (SetupAPI). It is a system component responsible for general setup functions and device installation functions, ensuring that Windows programs operate properly.
You may encounter the “setupapi.dll not found” issue when you attempt to open some Windows software or even when the operating system goes malfunctions. There are some common setupapi.dll errors you may refer to:
- setupapi.dll is missing
- setupapi.dll crash
- setupapi.dll was not found
- Cannot register setupapi.dll
- Cannot find setupapi.dll
- setupapi.dll Access Violation
- setupapi.dll error loading
These error codes can be triggered by many factors, such as,
- Mistaken deletion of setupapi.dll files
- DLL system file corruption
- Improperly registered DLL file
- Malicious software conflicts
- Faulty Windows update
For the next part, we will present some available fixes to help you get rid of the setupapi.dll not found or missing error. But before you start the methods, it is highly recommended that you should back up your important data in advance because some of the next moves may erase your data.
Suggestion: Back up Your Data in Advance
Besides, backup is a good habit to prevent data loss and it can help quickly recover your lost contents or system in case of some severe results. You can use this free backup software – MiniTool ShadowMaker – to prepare your backup plan.
MiniTool ShadowMaker boasts many accompanied functions and features to improve the user experience, such as backup schemes and schedules. Download and install the program to get a 30-day free trial version.
MiniTool ShadowMaker TrialClick to Download100%Clean & Safe
Step 1: Launch the program and click Keep Trial to enter the interface.
Step 2: In the Backup tab, choose your backup source, including systems, disks & partitions, and folders & files. Then you can choose your backup destination. You can choose NAS devices or external hard drives as your target.
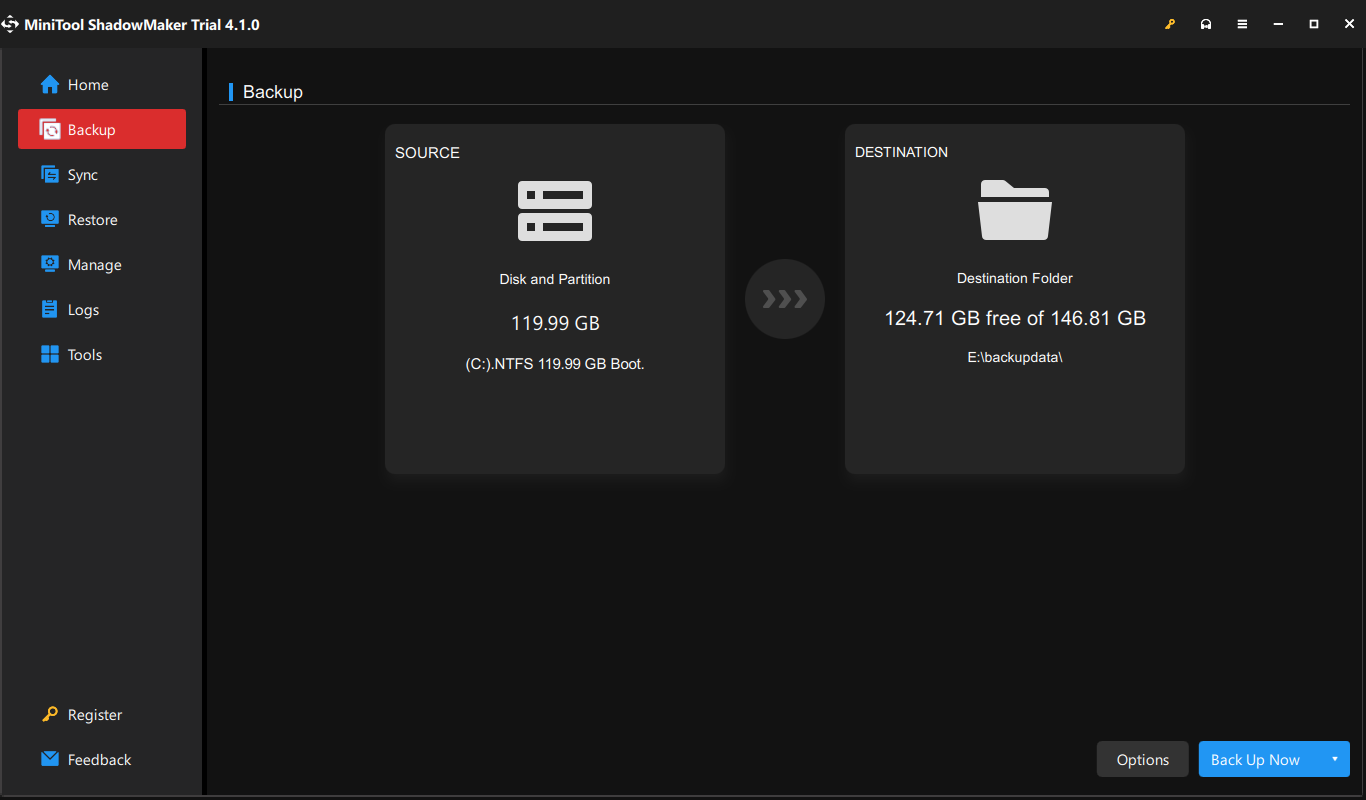
Step 3: When you finish that, click Back Up Now to start the task.
Now, you can try the following solutions.
Fix Setupapi.dll Not Found
Fix 1: Use Windows Store Apps Troubleshooter
Some people may run into the setupapi.dll missing error when they access Windows Store. Considering this common situation, you can try the dedicated troubleshooter to fix the bugs.
Step 1: Go to Start > Settings > Update & Security > Troubleshoot > Additional troubleshooter.
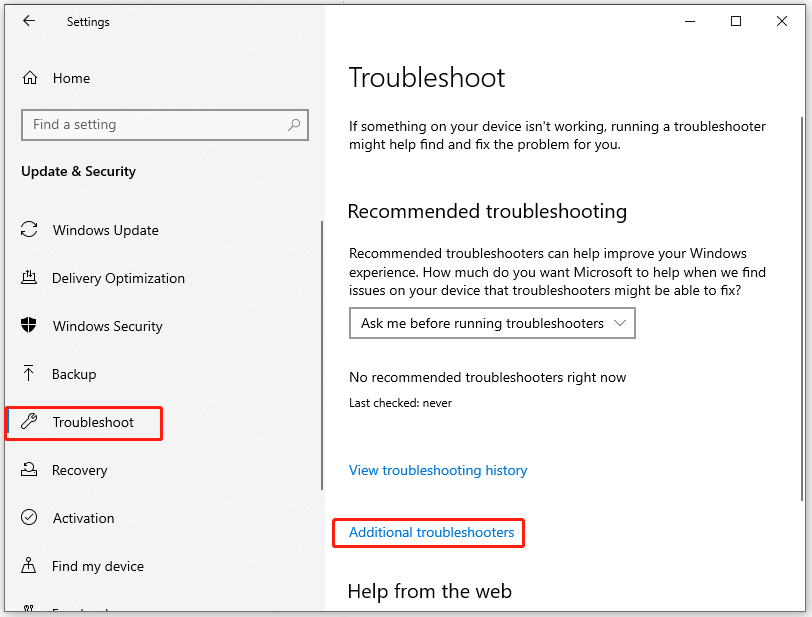
Step 2: Scroll down to locate and click on Windows Store Apps and then Run the troubleshooter.
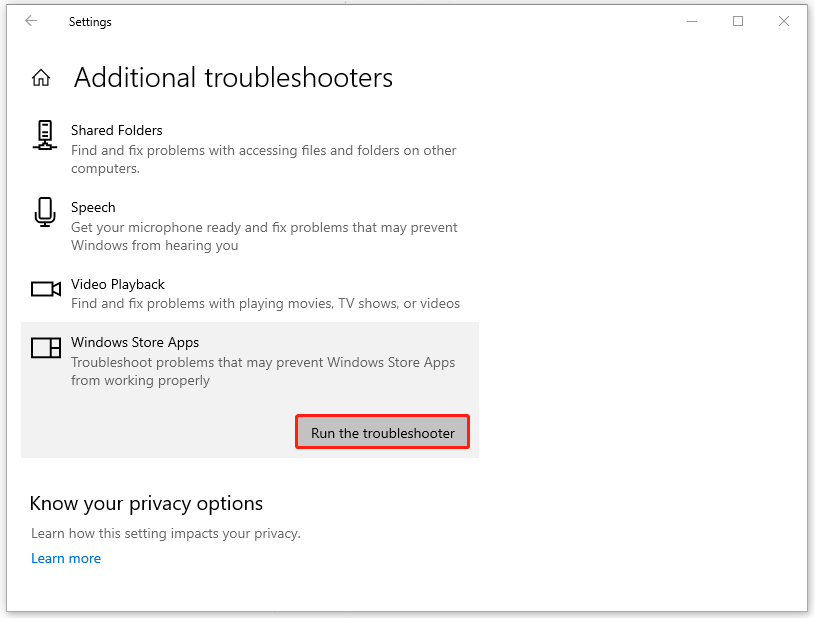
After that, you can restart your computer and try Windows Store again.
Fix 2: Run SFC and DISM Scans
Another method is to run Windows built-in tools to repair system file corruptions and then the setupapi.dll not found error can be fixed. Here are specific steps.
Step 1: Input Command Prompt in Search and choose Run as administrator.
Step 2: Then copy and paste this command to press Enter.
sfc /scannow
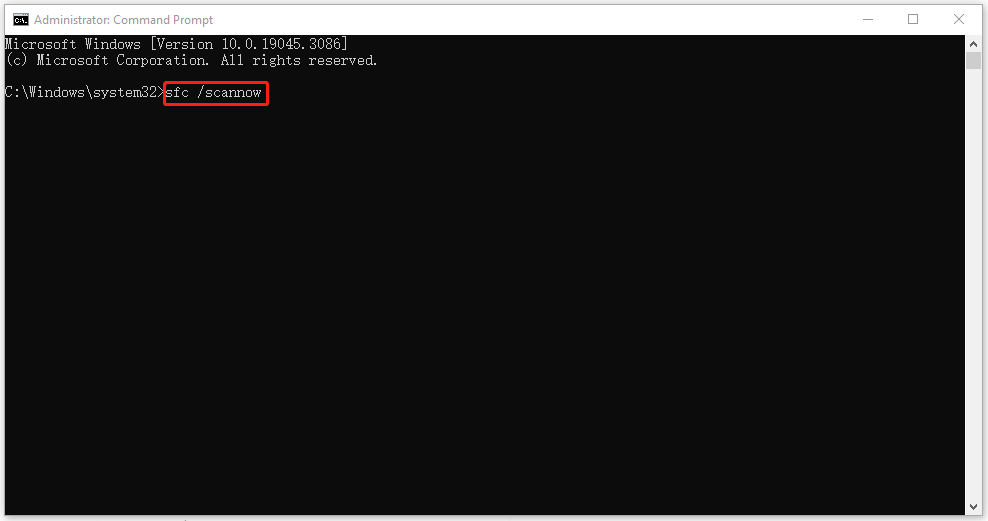
When done, copy and paste this command and press Enter.
DISM /Online /Cleanup-Image /RestoreHealth
After all of them end, you can close the window and restart your computer to check if the setupapi.dll not found error persists.
Fix 3: Scan Your PC for Malware
Since malware can attack your DLL files and maliciously delete them to cause system crashes and the “setupapi.dll not found” issue, you can scan your computer for viruses.
Step 1: Go to Start > Settings > Update & Security > Windows Security > Virus & threat protection.
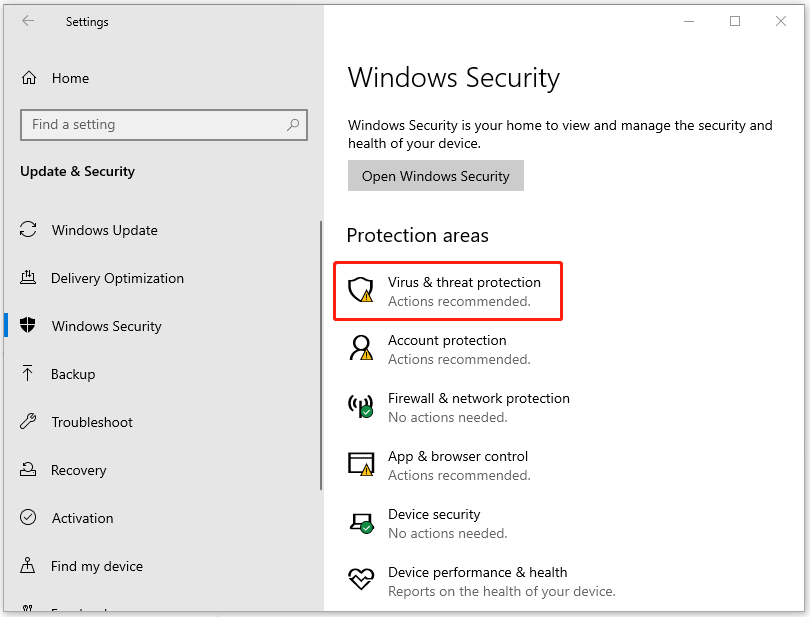
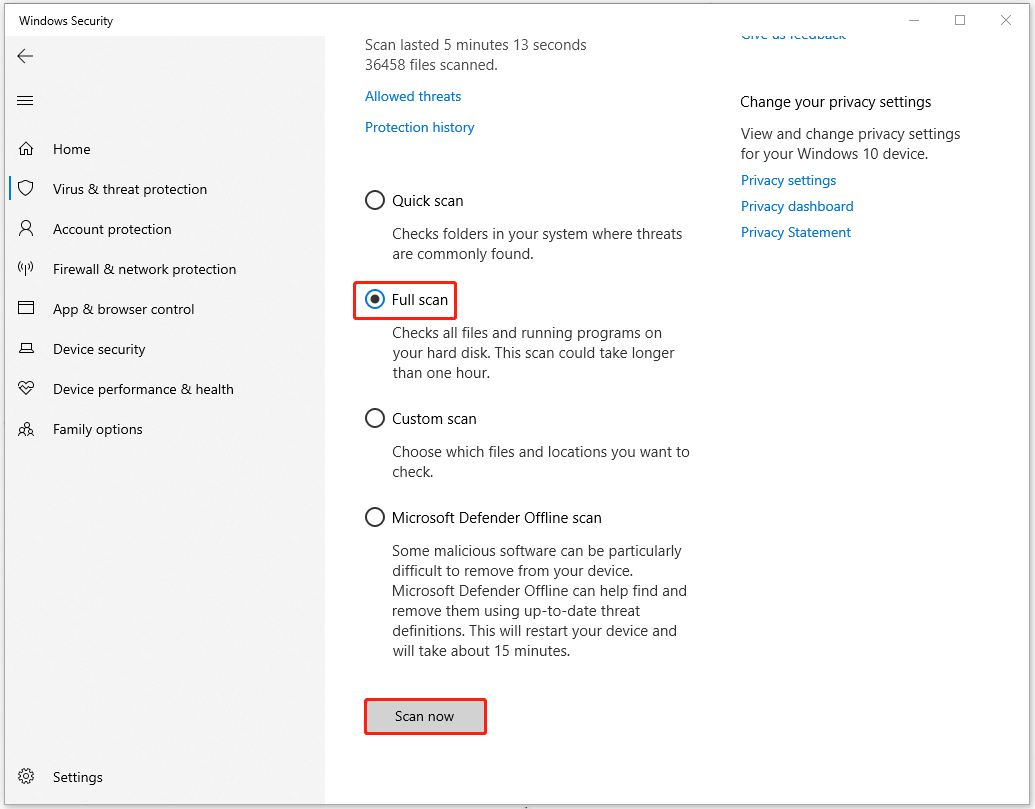
Step 2: Click Scan options > Full scan > Scan now.
Fix 4: Check Disk
You can run the Check Disk utility to analyze hard-drive errors that include the SETUPAPI.dll error and run repairs automatically.
Run Command Prompt as an administrator and in the new window, type chkdsk c: /f and press Enter to execute the command.
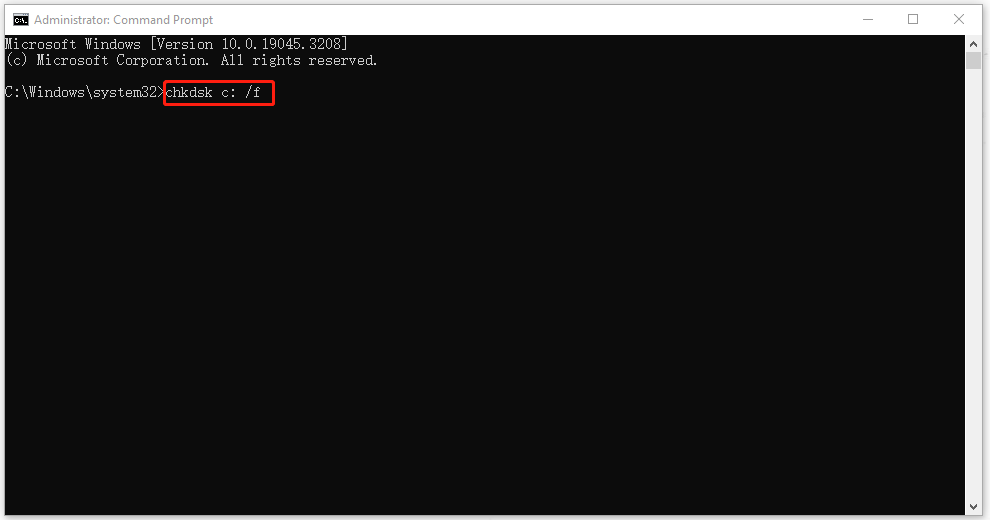
If you see an error asking you if you want to check the volume the next time the system restarts, you can type Y and close the window to restart your computer.
Fix 5: Reinstall Your Windows
If all the above methods can’t resolve the “setupapi.dll not found” error, the last method is to reinstall your Windows. But notice that you should have had a backup plan with MiniTool ShadowMaker for your important data and this method possibly clear your data.
Step 1: You can download the Windows media creation tool from Microsoft and get the ISO file.
Step 2: Open the tool and choose Create installation media for another PC.
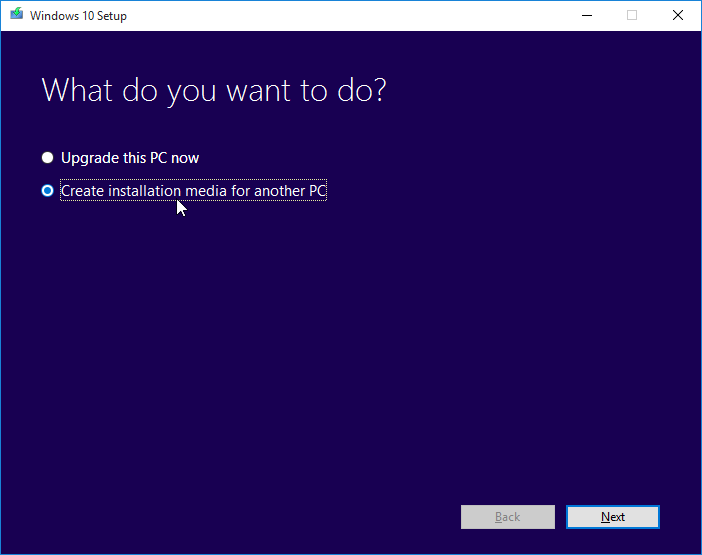
Then you can select language, architecture (32 or 64-bit), and edition to move on; check the ISO file option and click Next to pick a location to download all needed files.
After that, you can repair-install Windows:
1. Locate your ISO file and right-click to select Properties.
2. In the General tab, click Change and choose Windows Explorer to open the file. Then click OK.
3. Right-click the ISO file to choose Mount and then double-click on the ISO files to choose setup.exe to start Windows 10 setup.
4. Then choose Download and install updates.
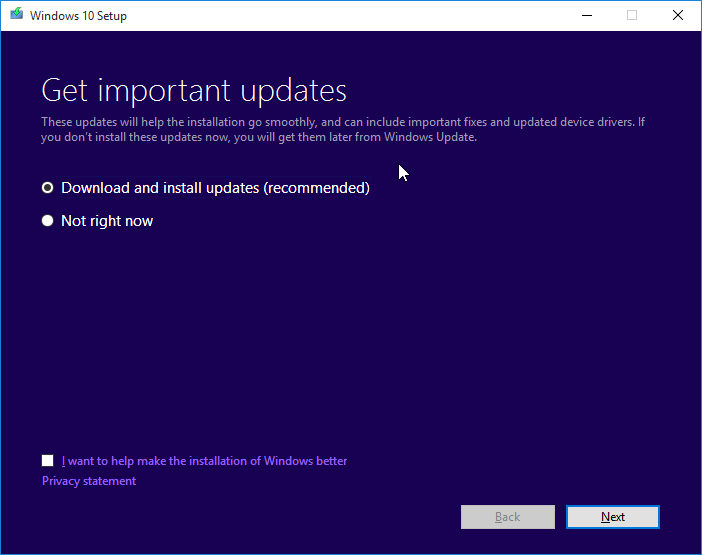
You can click Accept in the License terms screen.
5. When everything has been settled, you can click Change what to keep in the Ready to install screen. And you will see three options for you; just choose what you want to click Next.
6. After that, you will be directed to the Ready to install screen where you can click Install to begin the task.
Wrapping It up
Different DLL files can play varied roles in maintaining the system or application performance. When you encounter the setupapi.dll not found error, don’t panic, just follow the above methods, and your issue can be successfully fixed.
If you have encountered any issues when using MiniTool software, you may contact us via [email protected].
![CHKDSK vs ScanDisk vs SFC vs DISM Windows 10 [Differences]](https://mt-test.minitool.com/images/uploads/2020/03/chkdsk-vs-scandisk-vs-sfc-vs-dism-thumbnail.jpg)
![[SOLVED] Windows Defender Not Turning on in Windows 11/10/8/7](https://mt-test.minitool.com/images/uploads/2018/12/windows-defender-not-turning-on-thumbnail.jpg)
