When you create a new sentence in Microsoft Word, does Word automatically capitalize the first letter? If not, you can follow the steps below to enable this feature. If you prefer to set which letters are capitalized independently instead of being determined by Microsoft Word, you can also set up this feature according to the guidance below.
How to Enable/Disable Auto-Capitalization in MS Word
1. Enable/Disable Auto-Capitalization in Microsoft Word
Here are the detailed steps with pictures to enable auto-capitalization in Microsoft Word:
Step 1: Open a Microsoft Word document.
Step 2: Click File in the upper left corner of the taskbar and then select Options.
Step 3: Go to the Proofing tab and click AutoCorrect Options.
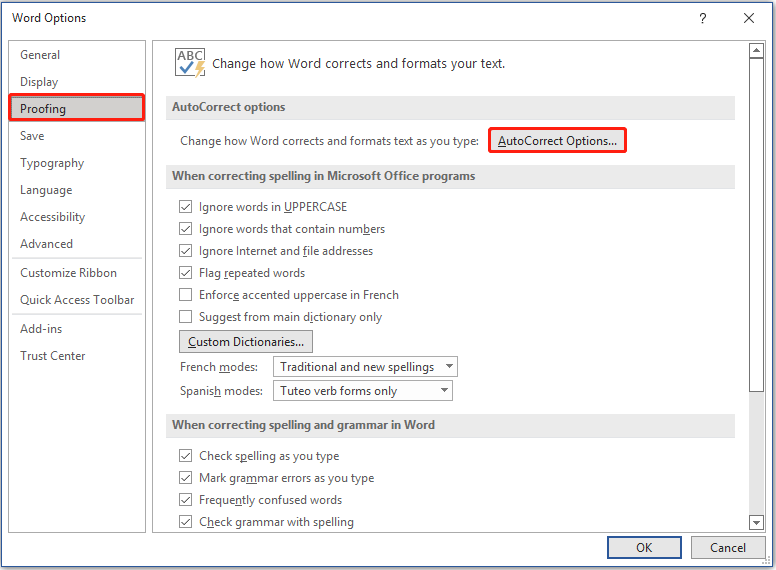
Step 4: Tick all or some of the following six options. (To disable auto-capitalization in Microsoft Word, you just need to uncheck the options not required).
- Show AutoCorrect Options button
- Correct TWo INitial CApitals
- Capitalize first letter of sentences
- Capitalize first letter of table cells
- Capitalize names of days
- Correct accidental usage of cAPS LOCK key
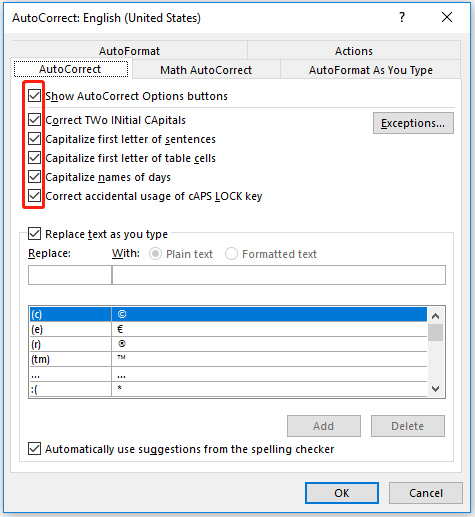
Step 5: Click OK to save the changes.
2. Set up Exceptions to Automatic Capitalization Rules
In addition to ticking the default auto-correct options of Word, you can also set exceptions to automatic capitalization by yourself.
For example, Word capitalizes the first letter of the word after the period generally, but in some abbreviations like “e.g.” or some special circumstances, the period is also used. The words after these periods should not be capitalized. How to set these exceptions? Here is the step-by-step tutorial.
Step 1: Open a Microsoft Word document.
Step 2: Go to File > Options > Proofing > AutoCorrect Options.
Step 3: Under the AutoCorrect tab, click Exceptions.
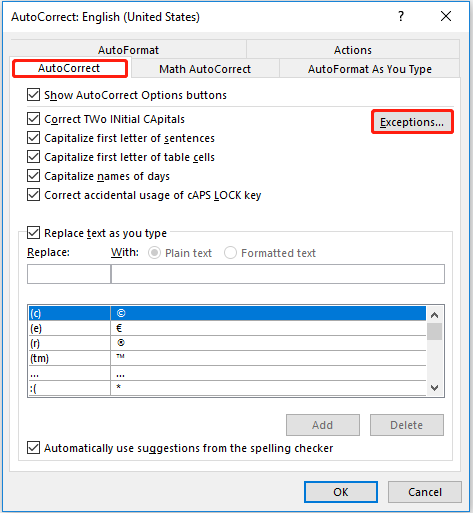
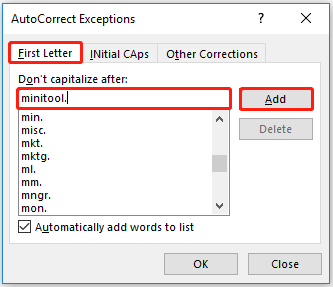
Step 4: Under the First Letter tab, type an exception where the word after it is not capitalized and click Add or press Enter.
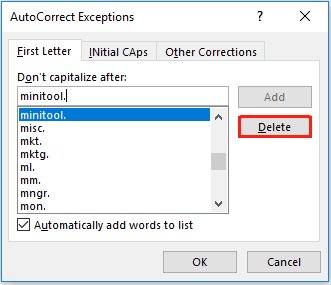
Step 5: If you do not want an exception to work, you can select it and click Delete.
Step 6: Click OK to apply all the changes.
You can also set up the INitial CAps and Other Corrections parts using the same way.
How to Use Change Case Feature in Microsoft Word
In the Microsoft Word ribbon, there is a Change Case feature that can be used to edit the upper and lower case of the existing text. Here are how to use this feature.
Step 1: Open a Word document and select the text you want to change its capitalization.
Step 2: Under the Home tab, click Change Case (If you cannot find it, you can search for it by pressing Alt + Q).
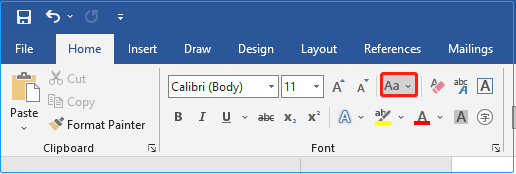
Step 3: Select the desired capitalization.
- Sentence case: To capitalize the first letter of a sentence and leave other letters lowercase.
- Capitalize Each Word: To capitalize the first letter of each word.
- UPPERCASE: Make all selected text uppercase.
- To make all text lowercase, you should choose lowercase.
- To alternate uppercase and lowercase on the selected text, you should select tOGGLE cASE.
At the same time, you can also use the shortcut key Shift + F3 to switch between UPPERCASE, lowercase, and Capitalize Each Word.
Bottom Line
Hope this article can help you disable and enable auto-capitalization in Microsoft Word proficiently. If you have any questions, please leave a message in the comment area to let us know. For more information about computer tech, please go to MiniTool News Center.
