Attempted Write to Readonly Memory Windows 10/8/7/11
Have you been bothered by a blue screen of death (BSoD) error when running your computer? Perhaps the answer is yes. Generally speaking, BSoD errors always happen no matter you are using Windows 7, Windows 8, Windows 10 or Windows 11.
In the MiniTool website, we have shown you many blue screen errors, for example, Attempted Switch from DPC, System Service Exception Stop Code, Atikmdag.sys BSoD, Bad Pool Caller, Memory Management BSoD, etc.
Now, we will show you another stop code – attempted write to readonly memory. In Windows 11/10/8, you may get the computer screen saying your PC ran into a problem and needs to restart along with stop code: attempted_write_to_readonly_memory, as shown below:
In Windows 7, you may get the computer screen saying “An attempt was made to write to read-only memory” along with stop 0x000000BE.
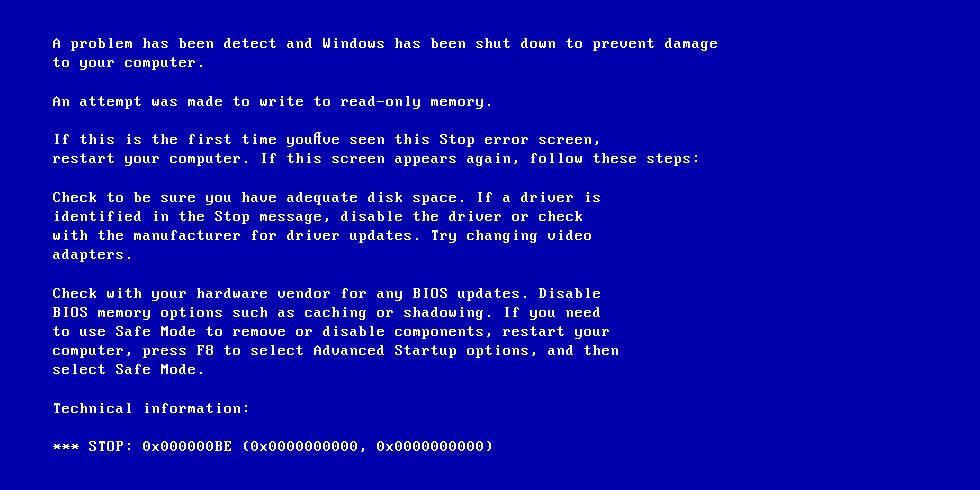
This BSoD error occurs when a driver tries to write to a memory segment that is read-only on a computer. It is usually caused by these files – iusb3hub.sys, ntoskrnl.exe, ntfs.sys, ntkrnlpa.exe, vhdmp.sys, dxgkrnl.sys, win32k.sys, tcpip.sys, or atikmdag.sys. If you can identify the driver file that causes this stop code, rolling back or updating the driver can help.
In the following part, we will show you how to fix the issue of attempted to write to readonly memory.
Fixes for Attempted Write to Readony Memory Windows 11/10/8/7
Before Troubleshooting
When getting the stop code, your PC fails to boot to the desktop. In this case, how can you perform the troubleshooting? Safe mode is required.
In Windows 7, you can restart the PC, press F8 to enter the Advanced Boot Options window and use the arrow keys to highlight your choice like Safe Mode.
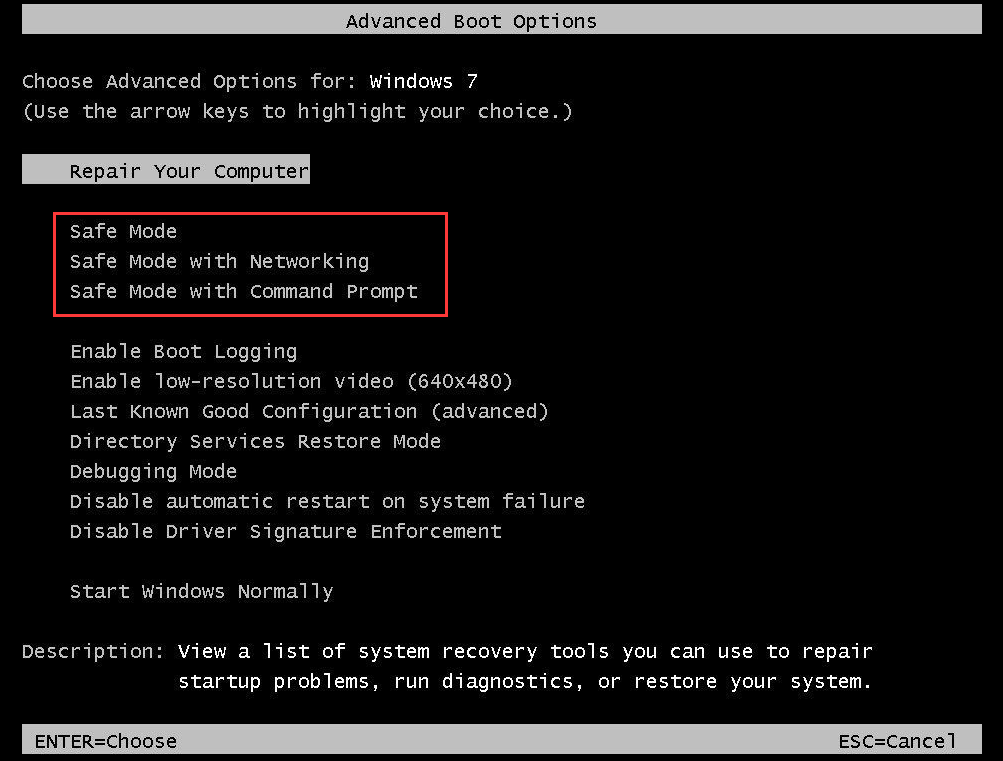
In Windows 11/10/8, you need to press a repair installation disc and boot the PC from this disc to enter WinRE (Windows Recovery Environment). Then, go to Troubleshooting > Advanced options > Startup Settings > Restart and then press F4 to enable Safe Mode.
Now, let’s see the methods to fix the attempted_write_to_readonly_memory stop code.
Method 1: Update, Rollback or Uninstall Drivers in Windows 11/10/8/7
If the device drivers are not compatible with the Windows operating system, the issues like attempted write to readonly memory may be triggered. Additionally, outdated or corrupted drivers can also give rise to this issue.
To fix this issue, you can update, rollback or uninstall drivers on your computer.
Update Drivers
Step 1: Right-click the start button and choose Device Manager.
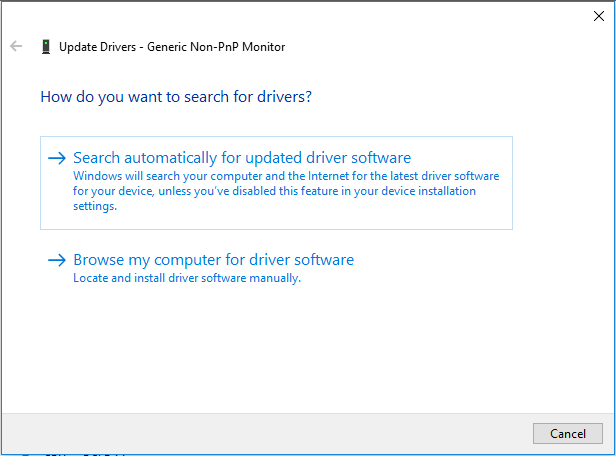
Step 2: Right-click each driver and choose Update Driver.
Step 3: Click Search automatically for updated driver software. If Windows cannot find a driver, go to the manufacturer’s website, download and install a driver for your PC.
Rollback or Uninstall Drivers
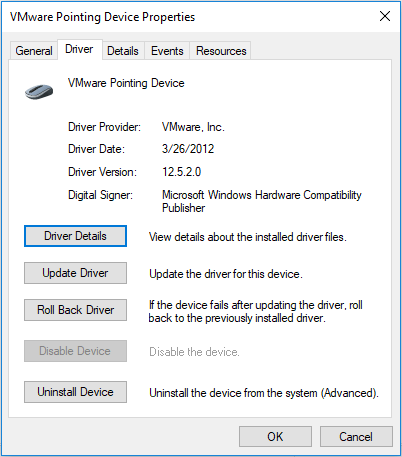
Step 1: In Device Manager, double-click each driver and you can see some options.
Step 2: You can click Roll Back Driver or Uninstall Device and then follow the on-screen instructions to finish your operations.
Method 2: Uninstall Recent Software
If you have recently installed a software, you should try uninstalling it to check if this program is the cause behind attempted write to readonly memory stop code.
Follow these steps:
Step 1: In Windows 11/10/8/7, open Control Panel.
Step 2: View all the items via Category and click Uninstall a program from the Programs section.
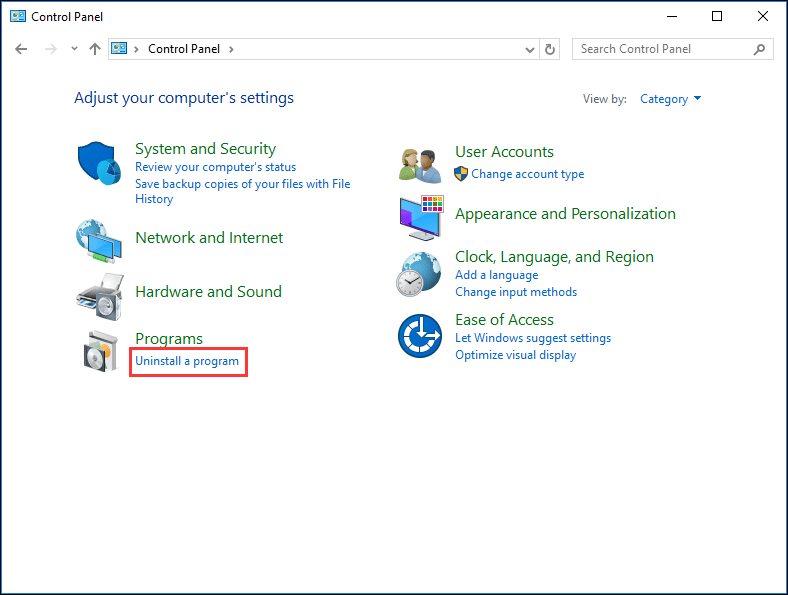
Step 3: Locate the recent software from the app list and right-click it to choose Uninstall.
Method 3: Run Memory Diagnostics
When 0x000000BE error or attempted write to readonly memory happens on your Windows 11/10/8/7 PC, you can run a memory check. The following is what you should do:
Step 1: Press Win + R keys on your keyboard to open the Run utility.
Step 2: Type mdsched.exe and press Enter to open the Windows Memory Diagnostic Tool.
Step 3: Two options are given to you and here we click Restart now and check for problems (recommended).
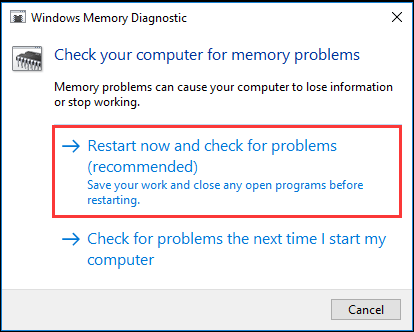
Step 4: Windows is checking for memory problems. If no issues are detected, it’s likely that memory is not the cause of the blue screen error discussed in this post.
Method 4: Run Blue Screen Troubleshooter
If you are bothered by Windows 11/Windows 10 attempted write to readonly memory, the Blue Screen Troubleshooter can be helpful.
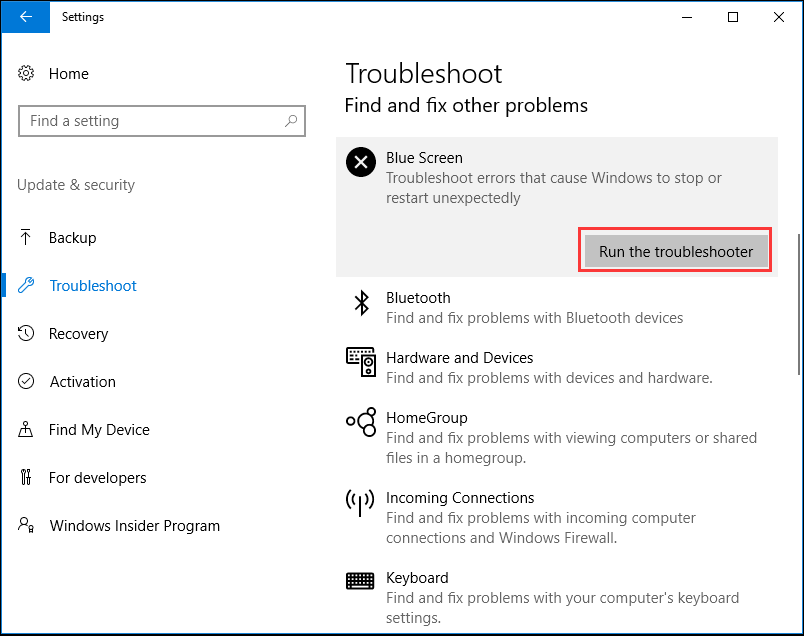
Step 1: In Safe Mode, click the Start button and choose Settings.
Step 2: Go to Update & Security > Troubleshoot.
Step 3: Locate Blue Screen and click Run the troubleshooter.
Step 4: Perform the fix by following the on-screen wizards.
Method 5: Update Windows
According to users, updating Windows is a good solution to fix the stop code attempted write to readonly memory. But you should know some things about the update.
If Windows Update needs to update a particular component or service but cannot find it, it won’t update it. As a result, some errors regarding registry errors or intermittent file errors appear during startup.
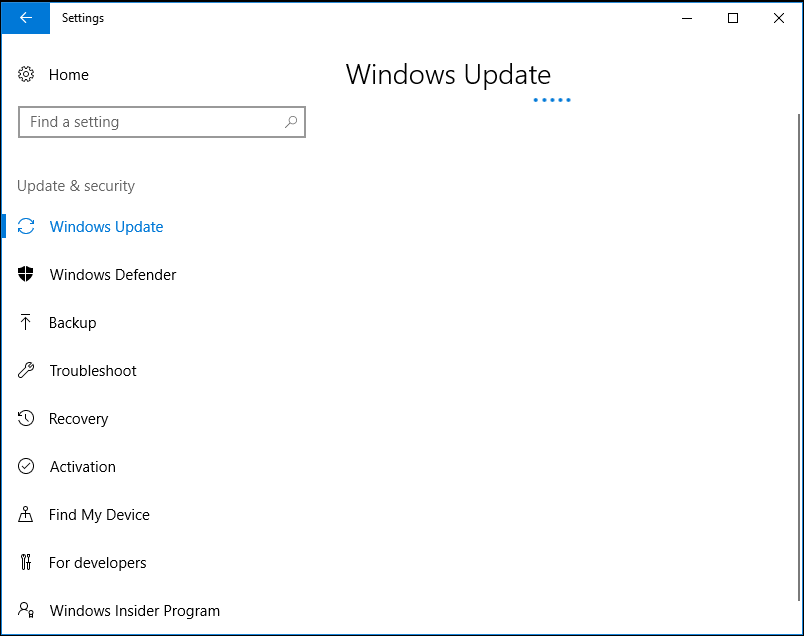
If you still need to update Windows in Safe Mode to fix your issue, you can follow these steps:
Step 1: Open your browser and go to the link.
Step 2: Input kb to the search box and then find your needed update, download and install it.
Later, restart your PC to check if Windows 10/8/7 attempted to write to readonly memory is resolved.
Method 6: Update BIOS
Incompatible or misconfigured BIOS firmware may lead to the occurrence of attempter_write_to_readonly_mmeory. Thus, in order to fix this issue, you need to update BIOS and see if it can help.
BIOS update is not an easy thing but you can do that job by following the instructions mentioned in this post – How to Update BIOS Windows 10 | How to Check BIOS Version.
Method 7: Disable BIOS Memory Options
Some users recommend that disabling BIOS memory options is a method to fix your BSoD error. To do this, you need to boot your PC to BIOS, open the Advanced page and you can see options. Just use the arrow keys to highlight your choice. This post from wikiHow – How to Disable BIOS Memory Options may be helpful for you.
Some users have offered some other solutions:
- Boot to Last Known Good Configuration to undo changes in the registry and drivers that may have caused the BSOD error if you get the error “An attempt was made to write to readonly memory” in Windows 7.
- Check the system for overclocking. You can disable all overclocking or use a lower setting based on the clock frequency specified by the vendor of the GPU, CPU, and other installed devices.
- Perform a system restore if you have a restore point created before the blue screen occurs.
What to Do After Troubleshooting?
After fixing your issue, now your PC can start normally. Then, what should you do? Here, we recommend that you back up your computer.
As mentioned, blue screen errors appear from now and then, which brings many troubles for you, for example, you need to spend much time looking for solutions to fix it, the PC downtime lasts long, etc. If you have a backup of the operating system, things become easier.
In the event of 0x000000BE or attempted_write_to_readonly_memory, you can quickly and effectively restore the non-working PC to a previous state. In addition, some blue errors can cause file loss. To avoid loss, we also suggest backing up your crucial files.
In conclusion, having a habit of backing up a computer is really good. How can you create a backup for your system or files? Here, MiniTool ShadowMaker is worth trying. As a piece of professional PC backup software, it is useful to back up the Windows operating system, partitions, disks, files, and folders. This program is compatible with Windows 11/10/8/7.
Now, click the following button to get MiniTool ShadowMaker Trial Edition and have a try. Note that this edition only allows you to use it within 30 days for free.
MiniTool ShadowMaker TrialClick to Download100%Clean & Safe
Step 1: Run MiniTool ShadowMaker
- Double-click the icon of this backup program.
- Continue using the trial edition by clicking Keep Trial.
Step 2: Choose Backup Source
- Go to the Backup tab.
- By default, this program backs up your system. That is, system partitions are selected in the SOURCE section.
- If you want to back up files, go to choose the files that you need by clicking SOURCE > Folders and Files.
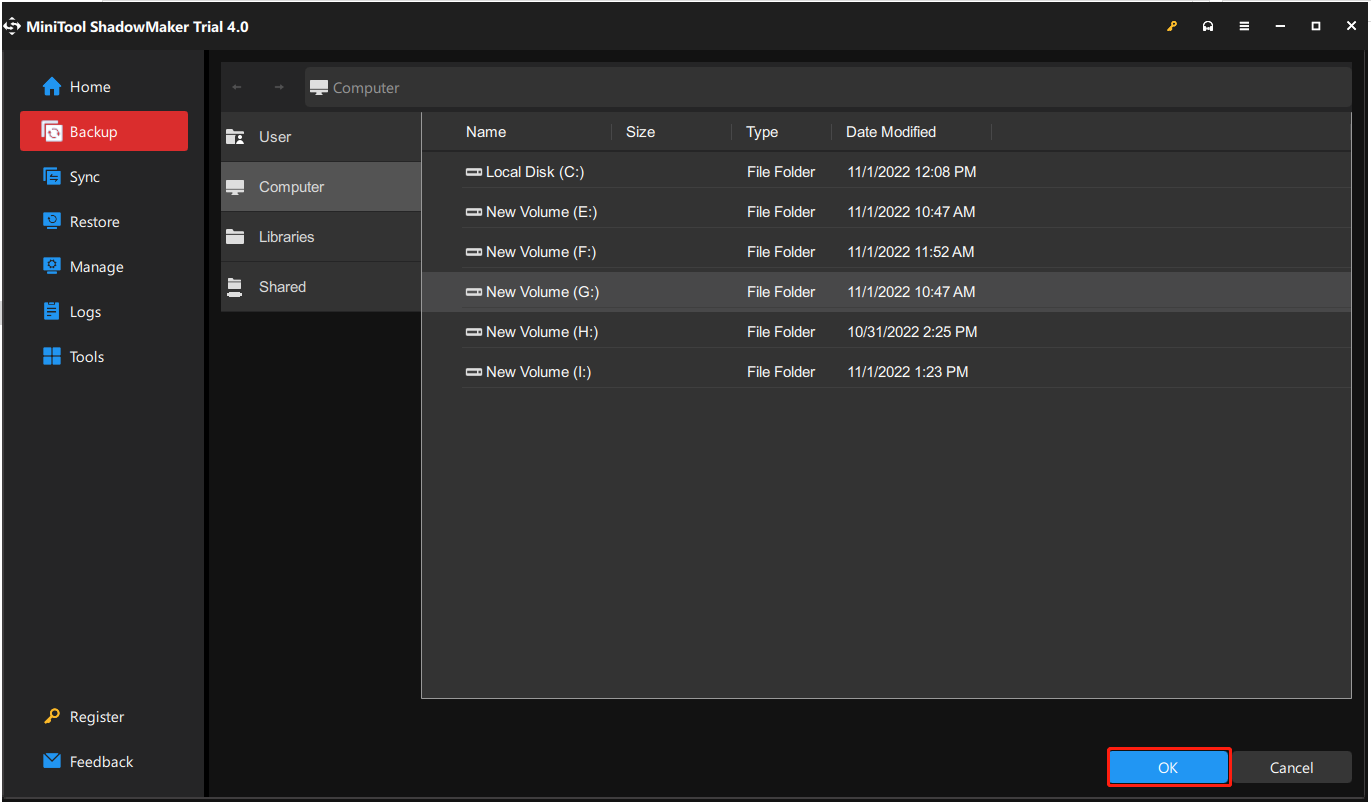
Step 3: Choose a Destination
- Go to the DESTINATION part.
- Choose a target path to save the backup image file. Here, we choose drive G.
Step 4: Start the Backup Task
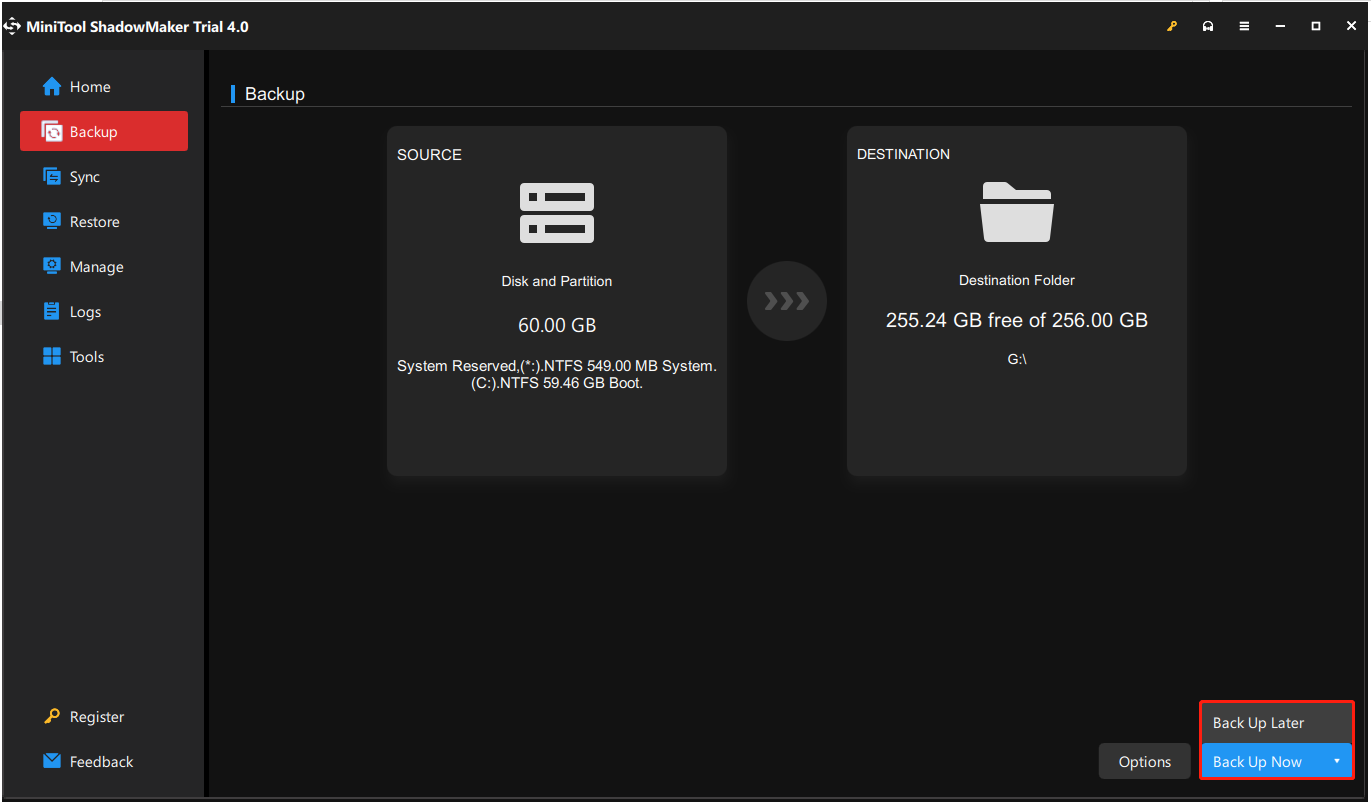
- Click Back Up Now or Back Up Later.
- MiniTool ShadowMaker will start to perform this task in Manage.
Bottom Line
Does the blue screen of death error – attempted_write_to_readonly_memory occur in Windows 11/10/8/7? Take it easy and you can get many solutions to get rid of this stop code. Besides, it is best to create a backup for your PC after fixing the BSoD error.
On the other hand, you can let us know if you have other solutions to fix this stop error. Also, any questions on MiniTool software are also appreciated. Leaving a comment below or contacting us via [email protected] is available.
Attempted Write to Readonly Memory FAQ
- Update, rollback or uninstall drivers
- Uninstall recent software
- Run Memory Diagnostics
- Run Blue Screen Troubleshooter
- Update Windows
- Update BIOS
- Disable BIOS Memory Options
- Run the memory check
- Update all available device drivers
- Run an SFC scan
- Scan for possible viruses
- Update Windows with all security patches and updates
- To learn more, refer to this post – [Solved] ATTEMPTED_EXECUTE_OF_NOEXECUTE_MEMORY in Windows 10
