What Is Chromebook Recovery Utility
Chromebook Recovery Utility is a tool that can help you recover Chrome OS. With Chromebook OS recovery image file, you can reinstall a fresh copy of Chrome OS on the Chromebook easily. This operation is the equivalent of reinstalling Windows, macOS, or Linux systems.
This utility can be used on M55+ Chromebooks, Windows, Mac to create recovery media. You are required to make some preparations in order to create the Chrome OS recovery drive.
Also read: What Is Windows Storage Spaces & How to Create/Resize/Delete It
What to Prepare to Create a Chrome OS Recovery Drive
In order to create a Chrome OS recovery drive, you need to prepare the items below.
- A Chromebook device. As an alternative, you can get a proper running Windows or Mac device with a Chrome browser installed.
- A USB flash drive with a capacity of 4GB or more.
You need to pay attention to that the USB flash drive needs to be formatted before utilizing it. Hence, you should ensure there are no important files in it or you have backed up the data to other places.
How to format the USB flash drive? You have 3 options to do that.
Option 1: Format USB Flash Drive via Disk Management
Step 1: Plug the USB flash drive into your computer.
Step 2: Open the Run window by pressing Windows and R keys.
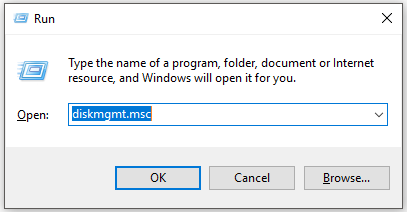
Step 3: Type diskmgmt.msc in the Run window and hit Enter to open Disk Management.
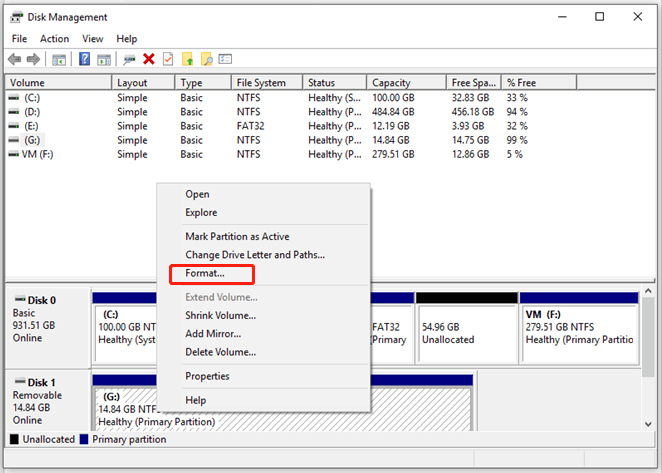
Step 4: Right-click on the USB flash drive and click the Format option in the pop-up menu.
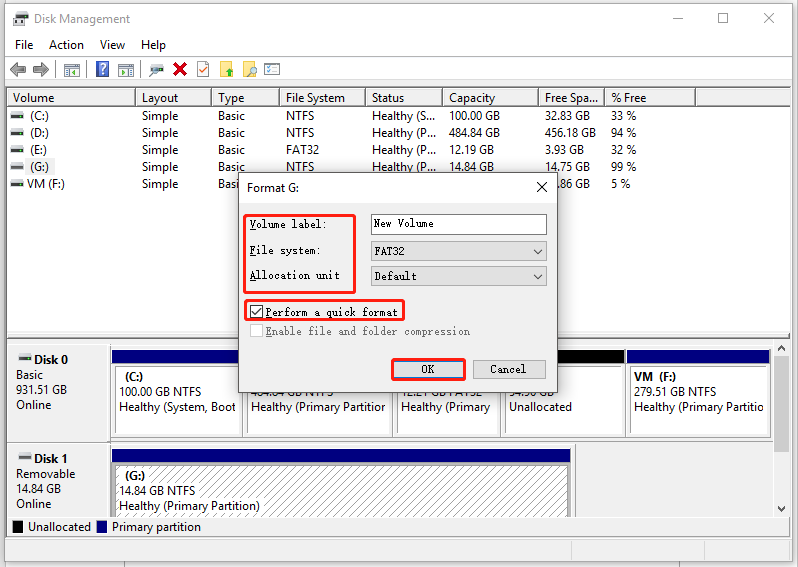
Step 5: In the elevated window, configure the volume label, file system, and allocation unit size based on your demands. If you don’t have other requirements, just follow the default configuration and click OK to start the operation.
Option 2: Format USB Flash Drive via Command Prompt
Another Windows built-in program – Command Prompt can also format a USB flash drive for you. You are required to type and execute some commands to do that. Here are detailed steps.
Step 1: Likewise, connect the flash drive to your device.
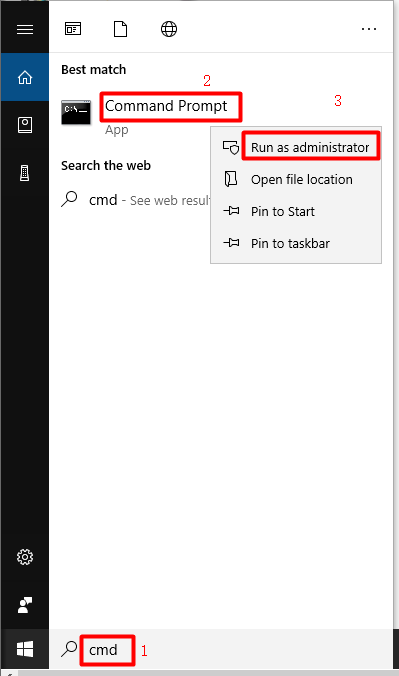
Step 2: Type cmd in the search box, and then right-click on Command Prompt under Best match and click Run as administrator.
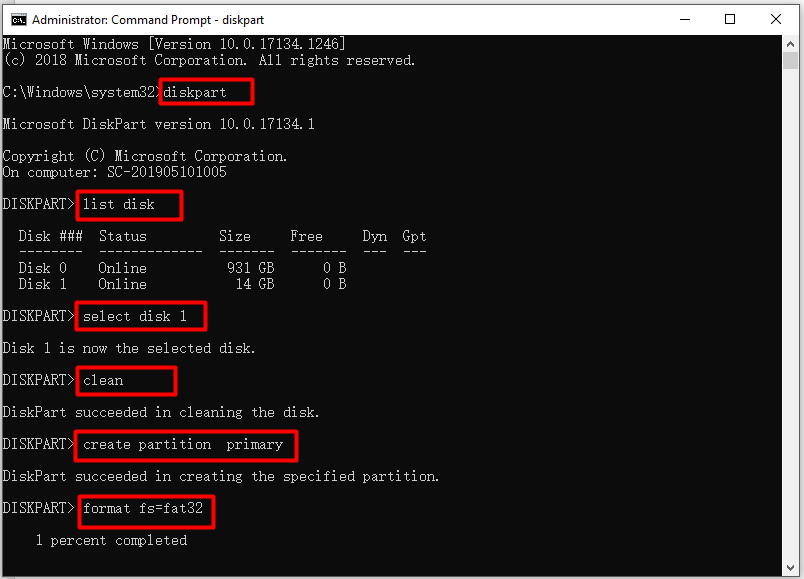
Step 3: In the pop-up Command Prompt window, type the following commands and hit Enter after each to carry out them. After executing the commands, wait for the finish of the formatting process.
- diskpart
- list disk
- select disk N (N stands for the number of the connected USB flash drive)
- clean
- create partition primary
- format fs=fat32
Further reading:
Though Disk Management and Command Prompt can format the USB flash drive, they have some limits. For instance, Disk Management only offers you 4 (NTFS, FAT, FAT32, and exFAT) file systems for formatting. Sometimes, you can’t format to FAT32 via Command Prompt because the volume size is too big, and encounter the FAT32 not an option issue.
In cases like that, you can choose a reliable third-party program to format devices. MiniTool Partition Wizard comes into use. As a professional partition manager, it enables you to format a USB flash drive quickly.
Option 3: Format USB Flash Drive via MiniTool Partition Wizard
As for format, MiniTool Partition Wizard offers you more file system options than Windows embedded programs like Disk Management. To be specific, it provides file systems including FAT32, exFAT, NTFS, EXT 2/3/4, and Linux Swap for you.
What’s more, MiniTool Partition Wizard allows you to format storage devices over 32GB to FAT32 file system that Windows Disk Management and Command Prompt can’t directly do.
Download and install MiniTool Partition Wizard by clicking the button below. Then format the USB drive with the given steps.
MiniTool Partition Wizard FreeClick to Download100%Clean & Safe
Step 1: Insert the USB drive into your computer and then launch MiniTool Partition Wizard to enter its main interface.
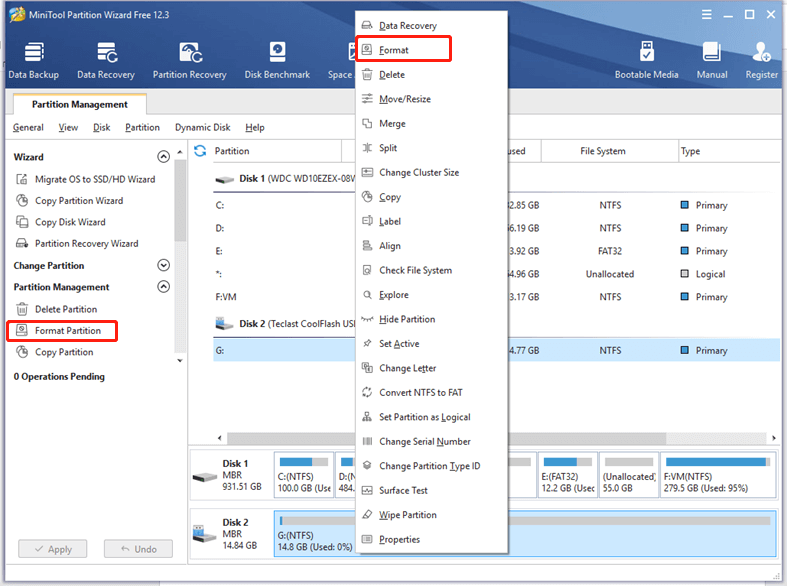
Step 2: Right-click on the USB drive and click Format. Alternatively, you can also choose the flash drive and click Format Partition in the left pane.
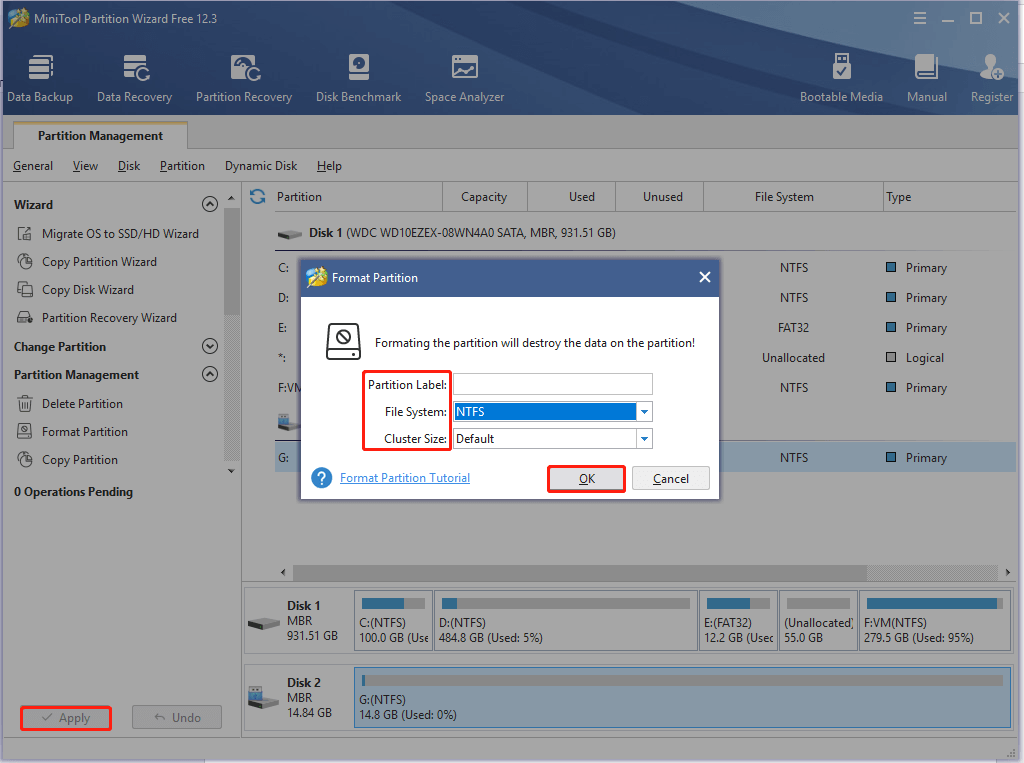
Step 3: In the prompted window, set partition label, file system, and cluster size. Then click OK and Apply to execute the operation.
How to Create a Chrome OS Recovery Drive
How to download Chromebook Recovery Utility to a USB? If you don’t know, pay attention to this section. It provides you with a detailed tutorial on how to create a Chrome OS recovery drive.
Step 1: Launch the Chrome browser from your device.
Step 2: Click here to move to the official website of Chromebook Recovery Utility, and then scroll down the content to the bottom and click Add to Chrome.

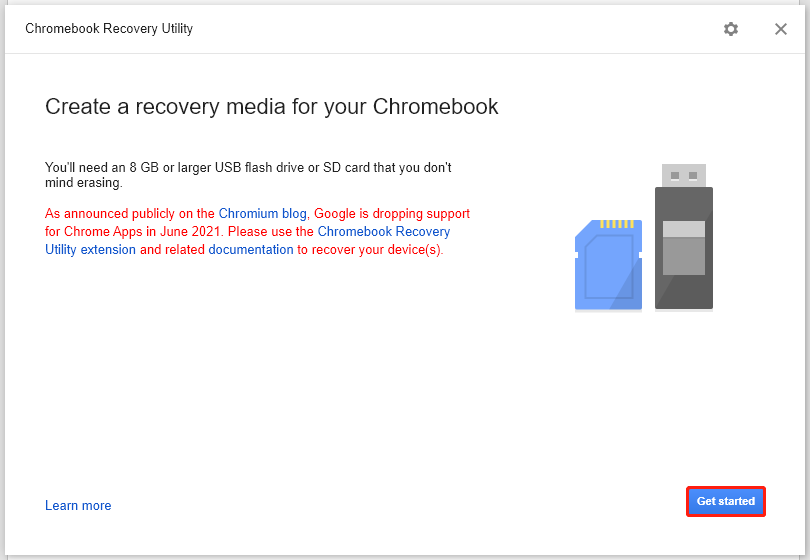
Step 3: If you are prompted with a window, click Add app. Then click the icon of Chromebook Recovery Utility icon on the screen. In the pop-up window, click Get Started.
Step 4: In the next window, enter the model number of your Chromebook. If you don’t know, choose the brand and model of your Chromebook from the list and then click Continue.
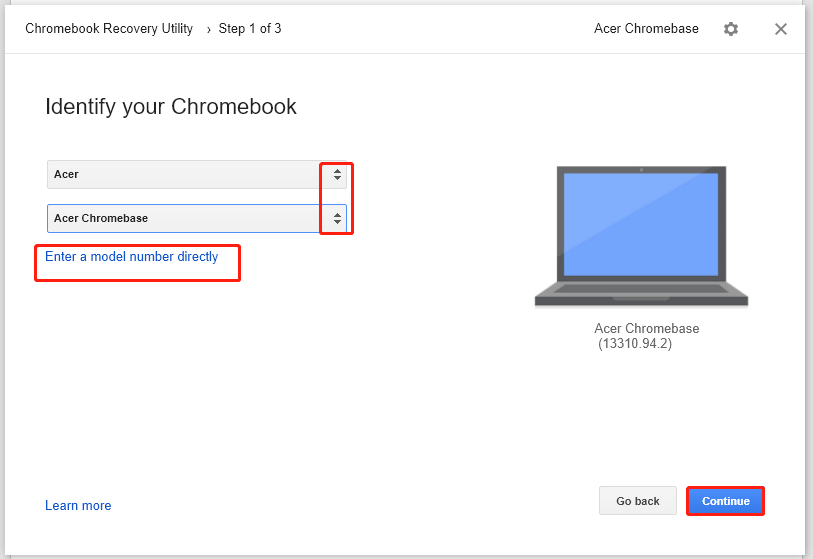
Step 5: Insert your formatted USB flash drive or SD card into your computer and then choose it. After that, click Continue.
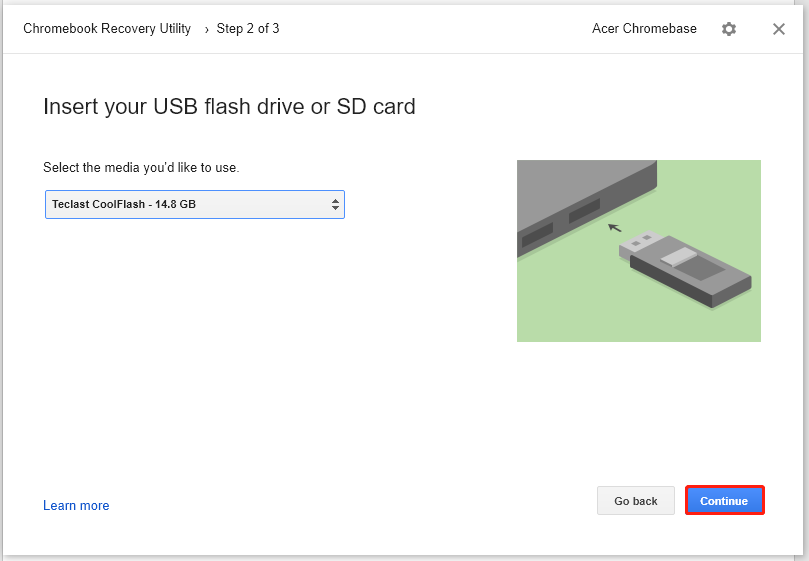
Step 6: Once you click the Create now button, the creating process will start.
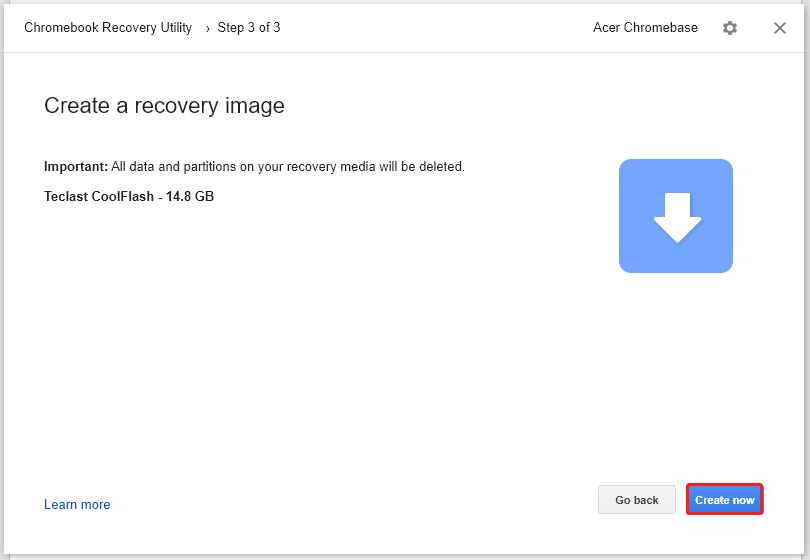
Step 7: You can view the recovery image creation process in this window. You just need to wait patiently until the finish of the process. Don’t remove your recovery media. Otherwise, the creation will fail.
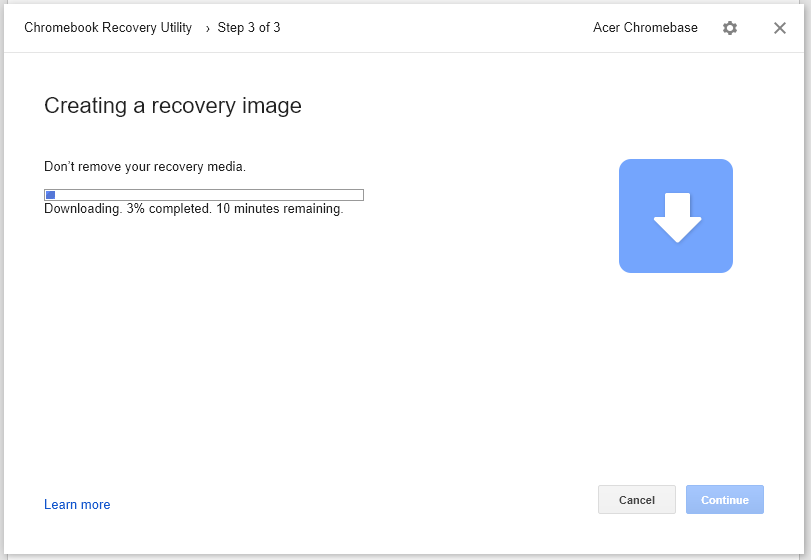
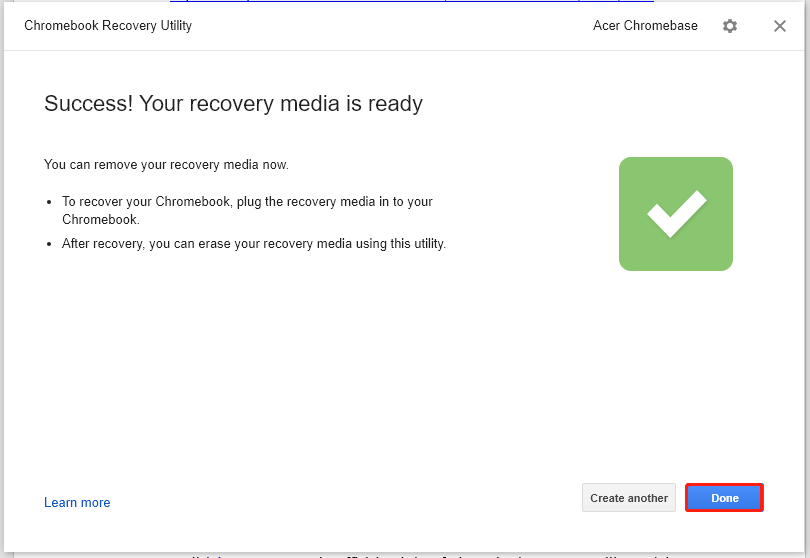
Step 8: After the process ends, click Done and remove the USB fladh drive to exit.
Also read: How to Install Windows on Chromebook (Detailed Tutorial)
How to Use the Chromebook Recovery Utility
You can use the Chromebook Recovery Utility when you receive the Chrome OS is missing or damaged error or the Chromebook fails to boot. How to recover or fix a damaged Chromebook with the drive? Follow the steps below.
Step 1: Removable all the USB accessories and other external devices from the damaged Chromebook.
Step 2: Turn off the Chromebook.
Step 3: Press the Esc + Refresh + Power buttons to enter the recovery mode of Chromebook. If you use a tablet, you need to press the Volume Up + Volume Down + Power buttons to enter the recovery mode.
Step 4: After you see the message stating that Chromebook OS is missing, insert the USB flash drive with Chromebook Recovery Utility in it to the Chromebook.
Step 5: Follow the on-screen instruction to finish the operation.
Step 6: Remove the USB from Chromebook and then the device will reboot automatically.
Step 7: Now, your Chromebook can run properly.
Wipe the USB Drive for Reusing
You might have noticed that your USB flash drive is partitioned into different sections. This means that you can’t store data on the drive unless you wipe the drive clean. As mentioned in the Your recovery media is ready window, you can erase your recovery media with the Chromebook Recovery Utility.
Here’s how to do that.
Step 1: Open the Chromebook Recovery Utility app and click on the Settings icon.
Step 2: Choose Erase recovery media and then pick the recovery media you want to erase from the drop-down menu.
Step 3: Click Continue > Erase now. Then all the data on the media will be removed.
However, you sometimes can’t find the menu. In this case, you can erase the recovery drive with MiniTool Partition Wizard. The Delete Partition and Wipe Disk features of this program can erase a drive easily.
MiniTool Partition Wizard FreeClick to Download100%Clean & Safe
Step 1: Connect the USB drive to your device and then run MiniTool Partition Wizard.
Step 2: Right-click on the connected USB drive and choose Delete All Partitions or Wipe Disk.
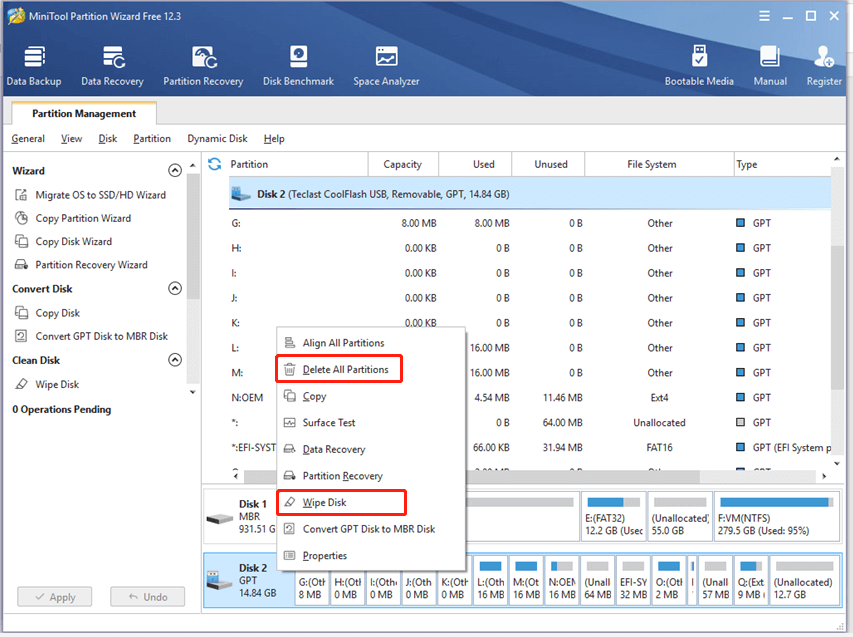
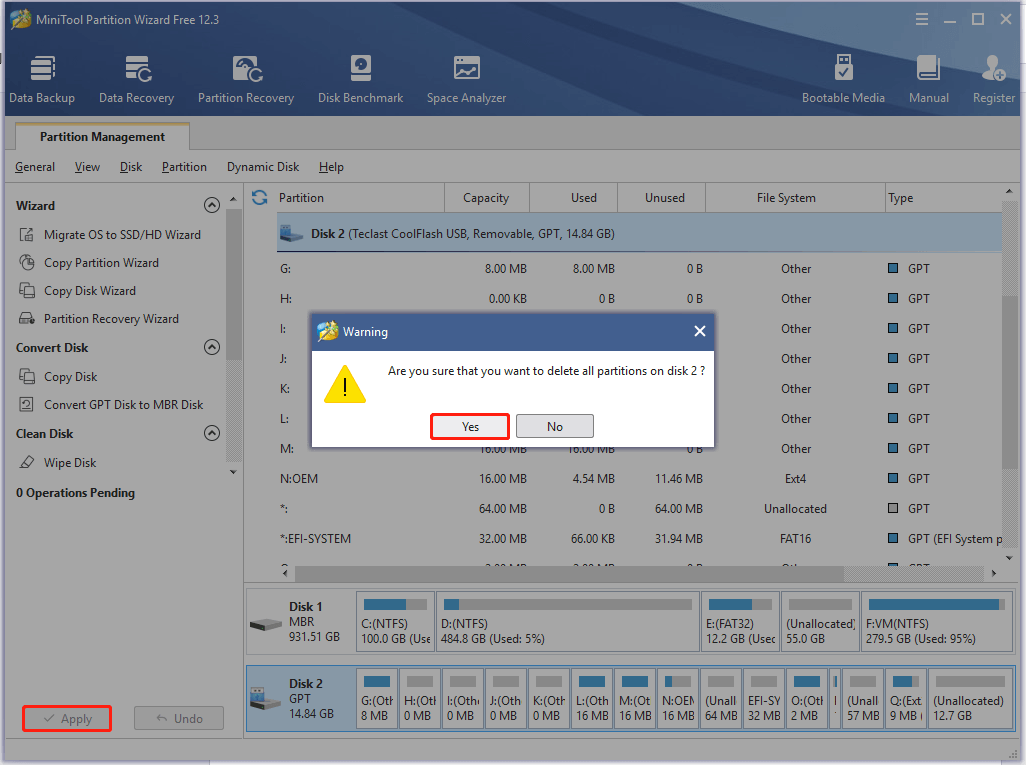
Step 3: If you choose the Delete All Partitions option, click Yes in the pop-up window to confirm the operation. Then click Apply to carry out the pending operation.
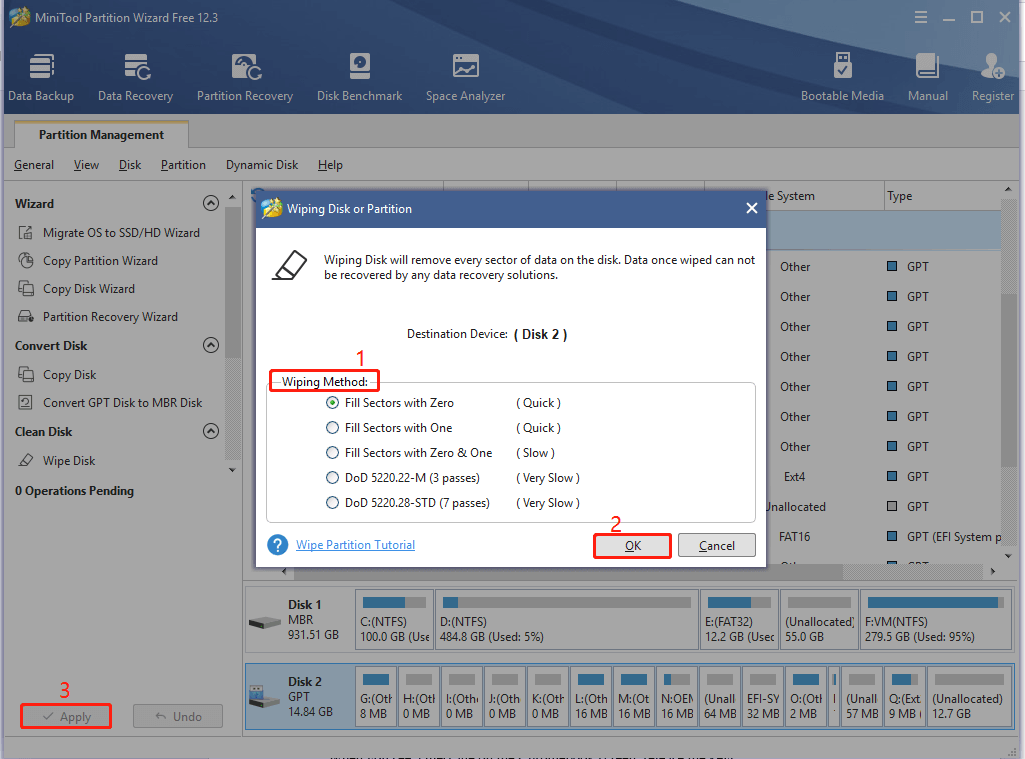
Step 4: If you pick the Wipe Disk option, you need to select a wiping method and click OK in the next window. Finally, click Apply to execute the operation.
Conclusion
This post is a comprehensive guide on Chromebook Recovery Utility, including its definition, creation, and use. In addition to that, it even shows you what do with the USB flash drive with Google Chrome Recovery Utility installed.
If you have any other thoughts about Chromebook Recovery Utility, please share with us by writing them down in the following comment area. For any issues with MiniTool Partition Wizard during the use of it, directly send us an email via [email protected].
Chromebook Recovery Utility FAQ
To exit Chromebook recovery mode, you need to follow the steps below.
- Restart the Chromebook.
- Press the Spacebar to re-enable verification when the OS verification is off message appears on the screen.
- The Chromebook will be cleaned and safe.
You can hard reset most Chromebooks with the following steps. While for some Chromebooks, you should press a special reset button, unplug the power cable, or remove and re-insert the battery to hard reset them.
- Turn off the Chromebook.
- Hold the Refresh key and click Power.
- Release the Refresh key when the Chromebook boots up.
