DISM /Online /Cleanup-Image /RestoreHealth is one of the most commonly used command lines that can repair a damaged Windows system image. However, some of you may receive DISM error 0x800f081f while running it. If you are struggling with the same error, this guide on MiniTool Website might be helpful to you.
0x800f081f Windows 10 DISM Error
Deployment Image Servicing and Management (DISM) is a useful way to repair corrupted system images. Usually, it works together with System File Checker to scan and repair your computer and return it to a healthy work state.
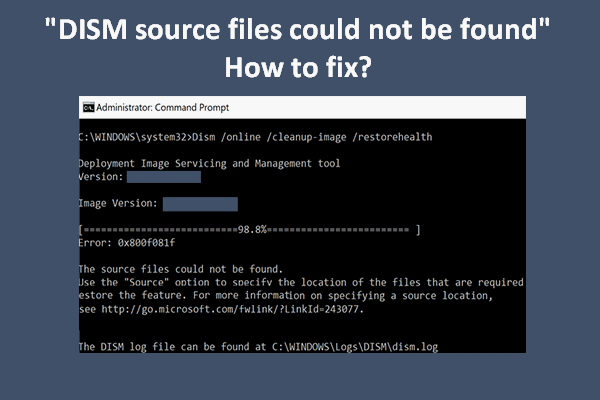
However, like other inbuilt Windows tools, it goes wrong sometimes. Quite a few users complain that they encounter DISM error 0x800f081f when running the DISM /Online /Cleanup-Image /RestoreHealth command and receiving the following error messages.
- Error: 0x800f081f. The source files could not be found.
- Windows couldn’t find the required files to complete the requested changes. Make sure you’re connected to Internet, and try again. Error: 0x800f081f.
This error indicates that DISM cannot find the files required to fix the online Windows image in the default location. DISM error 0x800f081f can lead to other errors on your computer and prevents other processes from functioning properly, so you must take some measures to get rid of it as soon as it crops up.
# Suggestion: Back up Your Computer in Advance
As you can see, it is not easy to troubleshoot manually because you don’t know the exact reason for DISM failed error 0x800f081f. What’s more, you may make some mistakes during the troubleshooting process below if you are not proficient in computers. Any small changes may make huge differences or even cause severe consequences to your computer.
As a result, we sincerely advise you to back up your computer in advance. With a backup copy in hand, you can easily restore your system to a normal state. Some of you may assume that creating a backup of your system seems difficult. Don’t worry! With a piece of professional backup software – MiniTool ShadowMaker, everything will be easier.
This free tool is compatible with almost all Windows systems and allows you to create a file, folder, partition, disk, or system backup on your Windows PC. What’s more, it is very popular among the Windows community because of its one-click system backup solution. Without further ado, let’s see how it works!
Step 1. Download, install and launch this program.
MiniTool ShadowMaker TrialClick to Download100%Clean & Safe
Step 2. After launching it, hit Keep Trial to get a 30-day free trial and then go to the Backup page.
Step 3. On this page and you can see the system-required partitions are selected by default in SOURCE and you only need to choose a storage path for your backup in DESTINATION.
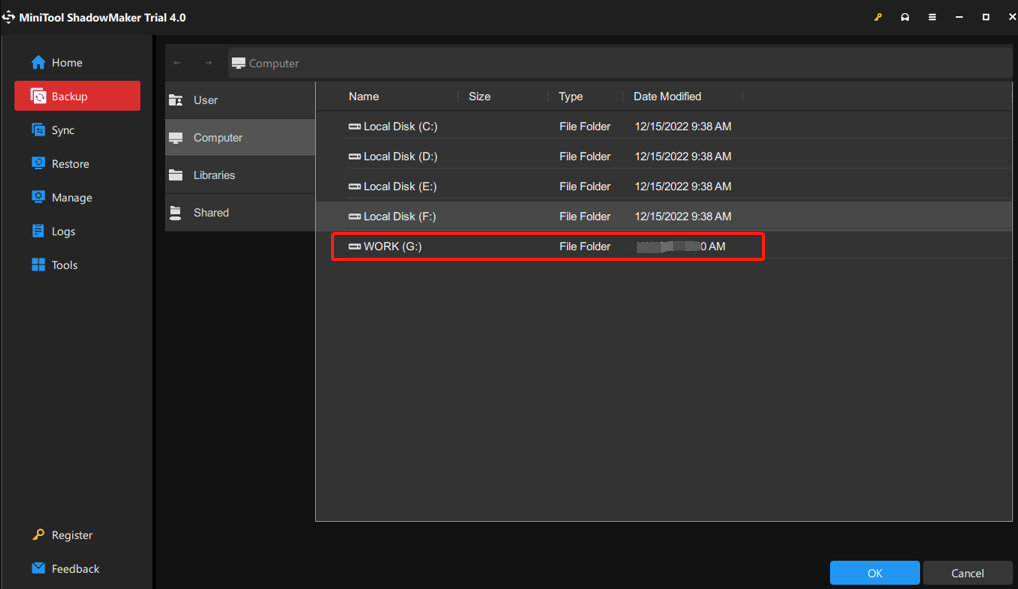
Here, we recommend you to back up your system to a USB flash drive or an external drive.
Step 4. After making your decision, you can either hit Back Up Now to start the backup process or delay the backup task by hitting Back Up Later.
Then, go to Tools > Media Builder > WinPE-based media with MiniTool plug-in > USB Flash Disk to create a bootable drive. If your computer encounters some other radical changes such as black screen, Blue Screen of Death, or system crashes in the future, you can boot your computer from this USB flash drive and perform a system recovery with the system image that you backed up.
As for backing up files, see this tutorial to get detailed instructions - How to Backup Files on Windows 10? Try These Top 4 Ways.
How to Fix DISM Error 0x800f081f on Windows 10/11?
Fix 1: Perform a Component Cleanup
You can clean up the image files and make everything run properly with the DISM component cleanup switch. Follow the steps below:
Step 1. Type cmd in the search bar to locate Command Prompt and right-click on it to choose Run as administrator.
Step 2. In the command window, run the following commands one by one and don’t forget to hit Enter after each command.
dism.exe /online /Cleanup-Image /StartComponentCleanup
sfc /scannow
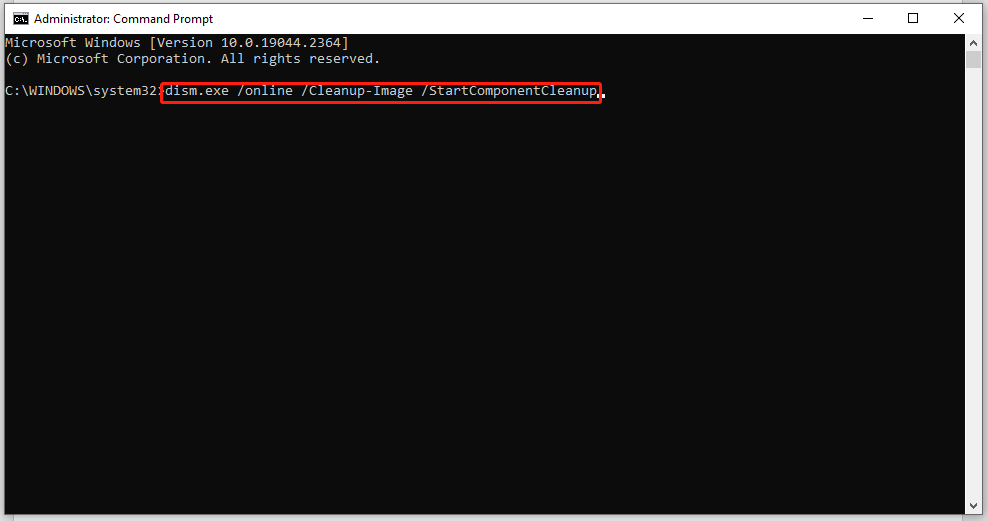
Step 3. When the two commands are complete, run Dism /Online /Cleanup-Image /RestoreHealth again to see if it works properly.
Fix 2: Run Windows Update Troubleshooter
As is known to all, Microsoft Windows Update Center triggers problems regularly and these problems can prevent you from implementing upgrades or improvements by downloading or installing new updates. In this case, Microsoft offers you a troubleshooting tool called Windows Update troubleshooter which can fix most errors including DISM Online Cleanup Image RestoreHealth error 0x800f081f.
Step 1. Press Win + I to open Windows Settings.
Step 2. In the settings menu, scroll down to find Update & Security and click on it.
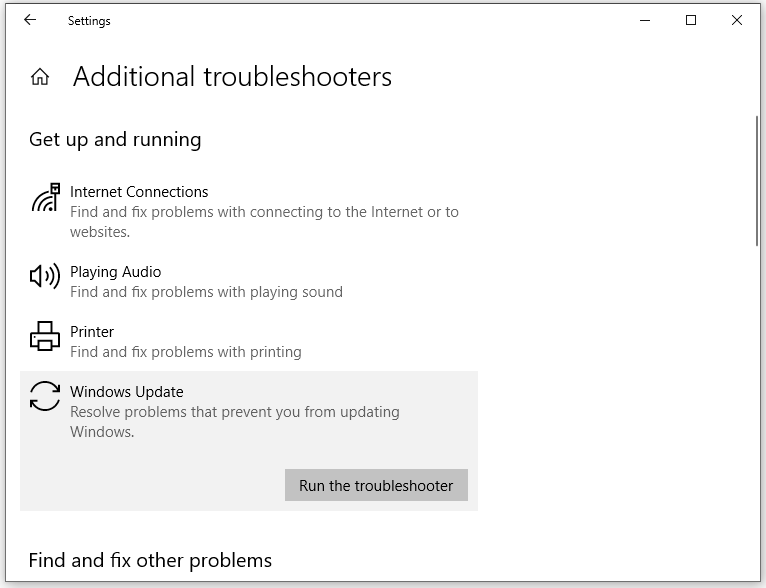
Step 3. Under the Troubleshoot tab, hit Additional troubleshooters.
Step 4. Under Get up and running, hit Windows Update and then press Run the troubleshooter. Once the troubleshooting process is done, it will show a message to inform you of the result.
Fix 3: Reinstall Microsoft .NET Framework 3.5
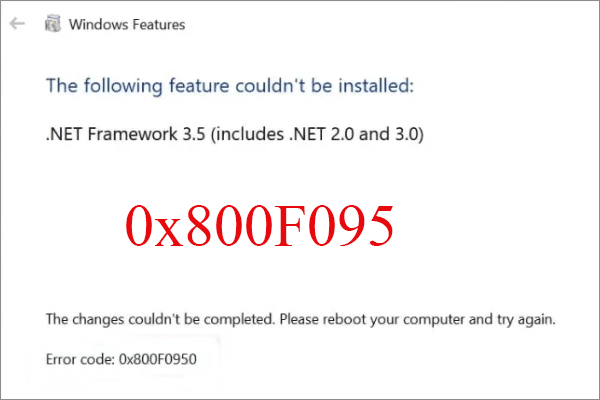
Since DISM error 0x800f081f is related to Microsoft .NET Framework 3.5, it is a good option to reinstall it.
Step 1. Click Start and go to Control Panel.
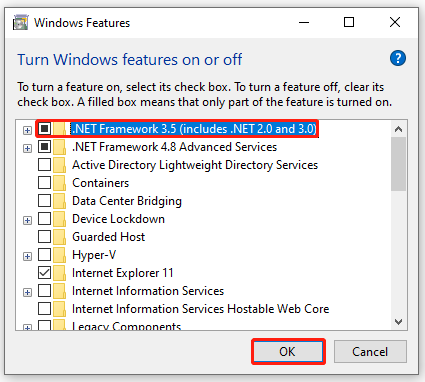
Step 2. Hit Programs and Features > Turn Windows features on or off.
Step 3. Check .NET Framework 3.5 (includes .NET 2.0 and 3.0) and hit OK.
Fix 4: Get Source from Windows Image
Usually, the DISM /Online /Cleanup-Image /RestoreHealth command is used to fix problems by searching in Windows Update or WUSU to replace the corrupted files. If DISM cannot repair a file required by the Windows image, it will result in DISM error 0x800f081f the source files could not be found.
To address this error, you need to specify a valid Windows image file (install.wim) which contains all the files required during the repairing process. The install.wim file should be included in the source folder of Windows 10 Installation media.
Move 1: Download and mount the ISO file
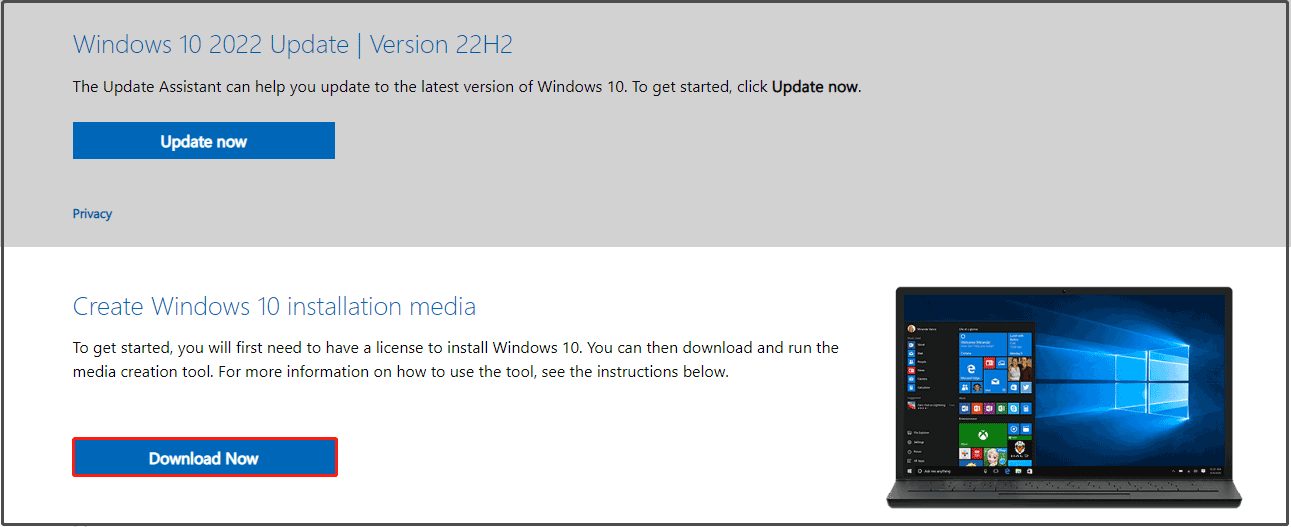
Step 1. Go to the Microsoft Software Download website and hit Download Now under Create Windows 10 installation media.
Step 2. Hit Accept to accept the license terms > tick Create installation media (USB flash drive, DVD, or ISO file) for another PC > hit Next > select Language, Architecture, and Edition > hit Next > tick ISO file > hit Next > choose a download location for Windows 10 ISO file > hit Save.
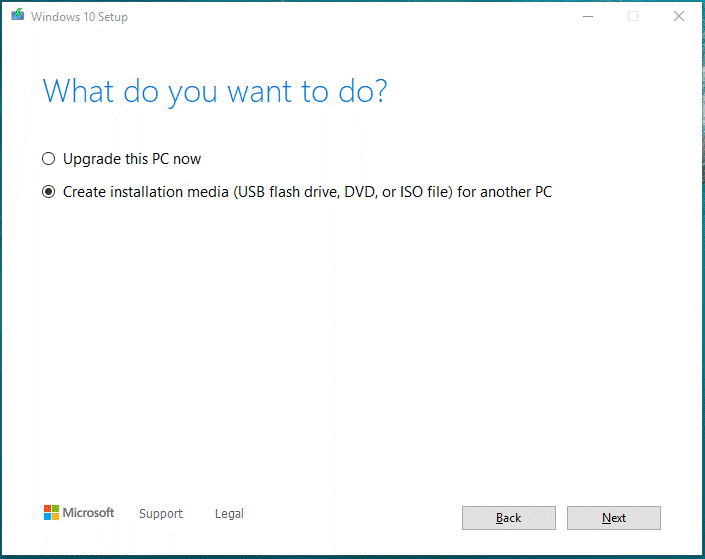
Step 3. Press Win + E to evoke File Explorer and then locate the Windows 10 ISO image file.
Step 4. Right-click on the ISO file and select Mount in the drop-down menu.
Step 5. After the mounting process is finished, go to This PC and you can see a virtual drive in the right-hand pane.
Move 2: Extract the install.wim file from the install.esd file
Step 1. From the mounted Windows ISO file, right-click on the install.esd file from the source folder to copy it to the root folder of drive C:.
Step 2. Launch Command Prompt as an administrator.
Step 3. Type cd\ to go to the root folder of drive C:.
Step 4. Type the following command and hit Enter to find which images are in the install.esd file.
dism /Get-WimInfo /WimFile:install.esd
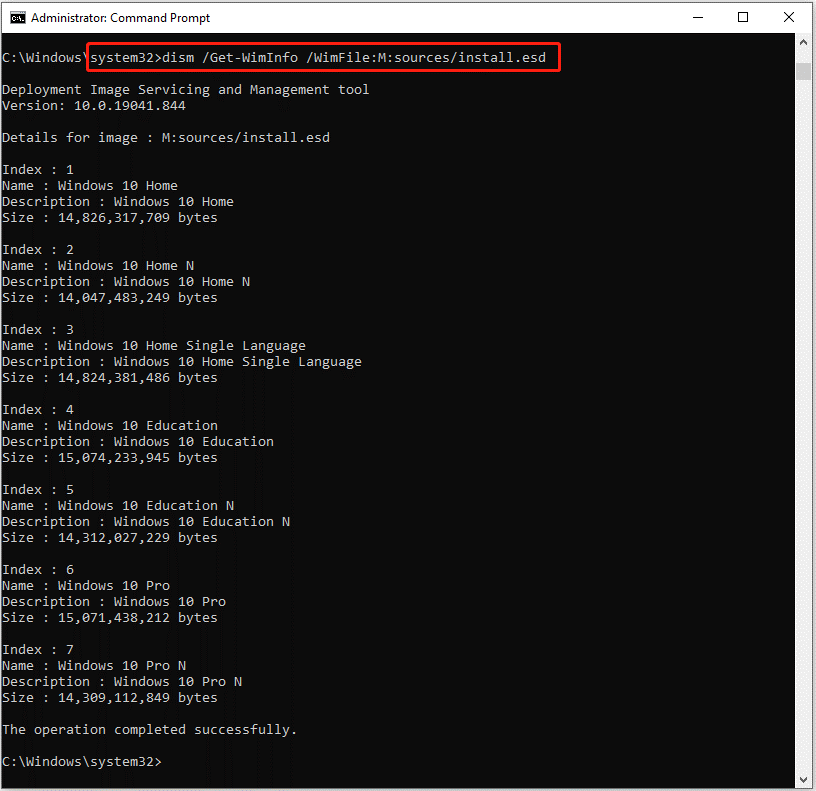
Note down the index number according to the Windows 10 installed version.
Step 5. Run the following command to extract the install.wim file according to your Windows version. Don’t forget to replace the IndexNumber with the corresponding index number you noted down just now.
dism /export-image /SourceImageFile:install.esd /SourceIndex:IndexNumber /DestinationImageFile:install.wim /Compress:max /CheckIntegrity
Step 6. Now, you can find the exported install.win file on the drive C:.
What if Windows Media Creation Tool is not working? Take it easy! Every problem has a fix. Follow this guide - Best Fixes for Windows 10/11 Media Creation Tool Not Working, and you will work it out.
Move 3: Run DISM Tools
Step 1. Launch Command Prompt as an administrator.
Step 2. Run the two commands below and hit Enter.
DISM /Online /Cleanup-Image /StartComponentCleanup
DISM /Online /Cleanup-Image /AnalyzeComponentStore.
Step 3. Run the following command to specify the C:\install.wim as the source of the known good files.
DISM /Online /Cleanup-Image /RestoreHealth /Source:WIM:c:\install.wim:1 /LimitAccess
Step 4. When this process is done, type sfc /scannow and hit Enter.
Fix 5: Perform an In-place Upgrade
The last method is performing an in-place upgrade. This process will reinstall the entire Windows core with the latest image from Microsoft. It may take a long time, please wait patiently.
Step 1. Download & Install Windows 10 Media Creation Tool on your computer and run it with administrative rights.
Step 2. Accept the license terms and tick Upgrade this PC now.
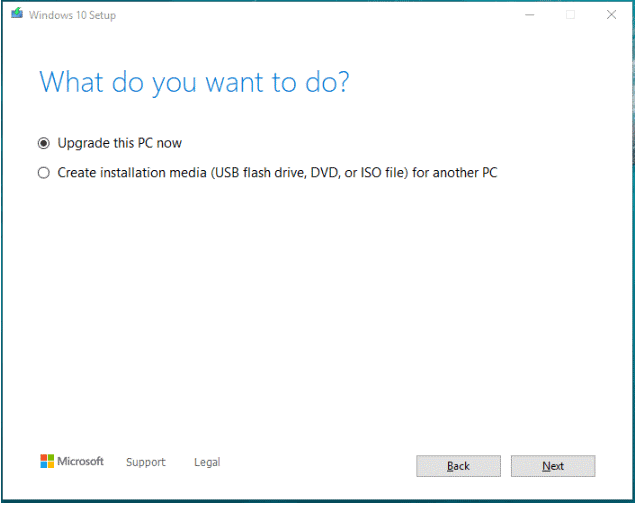
Step 3. Then, follow the prompts on the screen to complete the upgrade. After the completion, run Dism /Online /Cleanup-Image /RestoreHealth to see if DISM error 0x800f081f is gone.
If you fail to run the DISM /Online /Cleanup-Image /RestoreHealth command without error code 0x800f081f, this guide might provide you with some feasible solutions - Best Fixes: DISM /online /cleanup-image /restorehealth Is Stuck.
We Need Your Voice
That’s all about the causes and solutions to DISM error 0x800f081f. By now, we believe that you may manage to get rid of this error from your computer. Also, it is highly recommended to back up your system in advance with MiniTool ShadowMaker as a remedy in case that you encounter any severe changes on your system the next time.
Welcome to leave your joy and tell us which solution works for you in the comment zone. For more queries about our software, please feel free to contact us via [email protected].
DISM Error 0x800f081f FAQ
Fix 1: Perform a Component Cleanup
Fix 2: Run Windows Update Troubleshooter
Fix 3: Reinstall Microsoft .NET Framework 3.5
Fix 4: Get Source from Windows Image
Fix 5: Perform an In-place Upgrade
To fix DISM 0x800f081f error in Windows Server 2016, you can:
- Run a component cleanup and then perform an SFC scan.
- Offer DISM a location that contains the files it needs to perform the image repair.
- Perform an in-place upgrade.
Fix 1: Check Antivirus or Security Programs
Fix 2: Run DISM Command in Clean Boot
Fix 3: Specify the Correct Location of the install.wim File
Fix 4: Uncheck install.wim Read-Only
Fix 5: Clean up System Image Components
Fix 6: Reset Windows Update Service
Fix 7: Run Windows Update Troubleshooter
Fix 8: Disable Proxy on Your Computer
